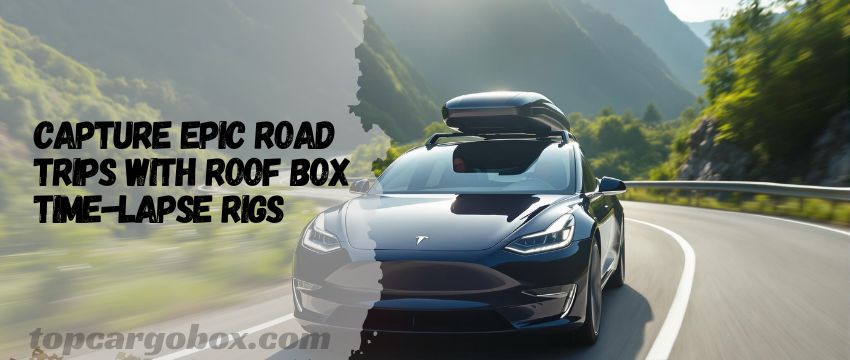
What’s up, adventure junkie? How’s it going with your road trip videos—still battling shaky clips that look like they were filmed during an earthquake? Nice try holding that phone steady at 70 mph, but let’s be real: wind, bumps, and weird angles turn your epic drive into a jittery mess. For real, who wants to waste hours editing footage that’s basically a blurry slideshow? Here’s the kicker: roof box time-lapse rigs ditch the chaos and lock your camera into a rock-solid setup. Think of it like strapping your gear to a flying tripod that laughs at potholes and gusts.
Here’s the thing: these rigs aren’t just for hauling camping gear. They’re stealthy filming platforms that sit above your car, dodging vibrations and giving you a clean, wide-angle view of the open road. Off the top of my head, imagine cruising through a desert highway with your camera capturing every sunbeam and shadow shift like it’s gliding on rails. No more leaning out windows or praying your suction cup doesn’t bail mid-shot. Legit question: why risk your gear (or sanity) when you could mount it once and forget it? Plus, their aerodynamic shapes slice through wind drag, so even at 60+ mph, your footage stays buttery.
Feeling skeptical? How do you feel about turning eight hours of driving into a hypnotic 30-second clip that’s actually watchable? These setups aren’t some overpriced gimmick—they’re your cheat code for pro-level shots without the pro-level hassle. Old-school hacks like dashboard mounts or handheld recorders can’t compete with the stability a roof box rig serves up. No big deal if you’re new to this; the learning curve’s flatter than Kansas. Just clamp your camera, tweak the settings, and let the rig do the grunt work while you focus on not missing your exit. Chill, right?
Why Roof Box Rigs Are a Game-Changer
You’ve probably mounted your camera on a dashboard or held it out the window, only to get blurry shots or worse—a dead device. No way that’s happening again, right? Roof boxes solve this by giving you a stable, elevated platform. Imagine gliding through mountain passes or deserts while your camera effortlessly records every frame. For real, this setup turns “meh” footage into something you’d binge-watch.
Stability Meets Creativity
Ever thought your roof box was just for suitcases and camping gear? Let’s face it—you’re sitting on a goldmine for filming. Those smooth, flat surfaces aren’t just for stacking duffle bags; they’re basically a VIP parking spot for your camera. 60 mph winds? No big deal. The sleek, wind-cheating shape of most roof boxes slaps away drag like it’s nothing, so your setup doesn’t wobble or bail when you’re cruising down the highway. Totally get it if you’re side-eyeing that box right now—how do you feel about turning it into a stealthy filming rig that laughs at potholes and gusts?
Here’s the kicker: those rugged, no-nonsense designs aren’t just for show. The sturdy base grips your gear tighter than a toddler with a candy bar, and the low-profile build means you won’t sound like a helicopter taking off at 70 mph. For real, why waste time rigging up DIY mounts that shake like a leaf in a storm when your roof box is already built to handle the grunt work? Throw on a GoPro, DSLR, or even a smartphone clamp, and boom—you’ve got a rock-solid platform that’s ready to roll. Old-school methods might’ve had you duct-taping cameras to hoods, but let’s hang out in 2024 where stability doesn’t have to suck.
Essential Gear for Your Setup
Alright, let’s talk gear. You’ll need more than duct tape and hope to pull this off. Off the top of my head, here’s what you can’t skip:
The Camera Mount: No Shakes, No Breaks
Let’s talk mounts—because skimping here is like using dental floss to tow your car. Nice try saving cash with that flimsy plastic clip, but when your $1,000 camera bounces off the highway at 60 mph, you’ll wish you’d splurged. Heavy-duty mounts aren’t optional; they’re the difference between “epic footage” and “epic fail.” Look for clamps that lock down like they’re terrified of hitting the pavement or suction cups that stick tighter than your ex’s passive-aggressive texts. Off the top of my head, if it can’t handle 25 lbs of gear, it’s basically decorative.

Here’s the deal: weight capacity isn’t just a suggestion—it’s your insurance policy. Think about it: your camera body, a chunky lens, maybe a stabilizer… that’s 15 lbs minimum. Add wind resistance, potholes, and sudden stops, and your mount’s gotta be built like a WWE wrestler. How do you feel about gambling with gear that’s worth half your paycheck? Totally get wanting to save a buck, but old-school clamps that wiggle like Jell-O won’t cut it. Go for models with reinforced joints and rubber grips that laugh at bumpy backroads.
Pro tip: Test your mount’s grit before hitting the road. Crank it onto your roof box, give it a shake, and if it budges? Give me a break—toss it. You want something that’ll hold firm even when your GPS reroutes you through a gravel pit. Chill, it’s not rocket science: suction cups should hiss like they’re vacuum-sealing leftovers, and clamps need to bite into the roof box like they’re hungry. For real, would you trust a noodle to hold a bowling ball? Exactly. Don’t let your rig be the weak link.
Power Solutions: Keep the Juice Flowing
Nothing kills vibes faster than a dead battery mid-shot. Use a portable power bank with 20,000 mAh or more. Solar chargers? That’s lit for sunny routes.
| Key Features of a Roof Box Time-Lapse Rig |
|---|
| Material: Durable ABS plastic or fiberglass |
| Weight Capacity: 20-50 lbs |
| Mount Compatibility: Universal, GoPro, DSLR |
| Waterproof Rating: IP67 (dust/rain proof) |
| Aerodynamic Design: Reduces wind noise |
Choosing the Right Roof Box
Not all boxes are created equal. You good with a cheap, flimsy model? Nah, didn’t think so.
Weight Capacity: Don’t Push It
Overloading your box risks damage or worse—a flying camera. Stick to 80% of the max limit for safety. My bad if that sounds obvious, but better safe than sorry!
Aerodynamics: Slice Through the Wind
A sleek, low-profile box cuts turbulence. Look for tapered edges and vents. Who knew shape could make or break your shot?
Step-by-Step Setup Guide
Ready to rig it up? Let’s bounce through the steps.
Secure the Mount Like a Pro
Clean the roof box surface with alcohol wipes first—grease is the enemy. Press the suction cup until it sucks (in a good way). Test it by gently tugging. No big deal, just avoid highway speeds until you’re confident.
Cable Management: Keep It Tidy
Use Velcro straps or zip ties to bundle cords. Loose wires = distractions and potential snags. Feeling under the weather thinking about tangled messes? Same here.
Creative Shots to Try
Why settle for basic front-facing clips when you can mix it up?
Over-the-Hood Perspective
Mount the camera low on the box’s front edge. This angle makes the road rush toward you, adding drama. That’s awesome for sunrise drives!
Sideways Sweeps
Position the cam sideways to capture landscapes blurring past. Pair with a 2-second interval for smooth motion. Can you imagine the Instagram likes?
Weatherproofing Like a Boss
Mother Nature doesn’t care about your film career. Prep for rain, dust, and heat.
Seal the Gaps
Use silicone gel around the mount’s base. For extra protection, slap on a waterproof case. IP67 rating? Totally worth it.
Editing Your Masterpiece
Filming’s half the battle. Now, make it pop.
Software Picks
Free options like DaVinci Resolve work, but Adobe Premiere Pro offers more tweaks. Speed ramps and color grading? That’s lit.
Real-World Examples
How’s it going, Spielberg? Check these ideas:
Cross-Country in 4K
One YouTuber shot a 48-hour trek using 5-second intervals. The result? A hypnotic, 2-minute clip that went viral. Get a kick out of that!
Mistakes to Avoid
Don’t grunt through these pitfalls.
Overloading the Box
Stick to the weight limit. 20 lbs isn’t a suggestion—it’s physics. Come on, you’ve got this.
Ignoring Local Laws
Some states ban roof obstructions. Check regulations to avoid tickets. Not a big deal until it is.
Conclusion
Time to hit the road! With a roof box rig, your next trip could be your most cinematic yet. Catch you later with that Oscar-worthy footage!
FAQs
1. What’s the best time-lapse interval for driving?
For highway speeds, try 2-5 seconds. Faster intervals (like 1 second) work for slow, scenic routes. Test different settings—sometimes 10 seconds creates a dreamy effect. Adjust based on how much motion blur you want. Fair enough?
2. What’s the best setup for time-lapse?
Use a DSLR or GoPro, a sturdy roof box mount, and a power bank. Add a wide-angle lens for sweeping views. Old school tripods won’t cut it here. Keep it simple but reliable.
3. How to shoot a long time-lapse?
Secure your gear against vibrations, use a 20,000 mAh power bank, and set your camera to auto-exposure. Check the rig every 2 hours. Feeling under the weather? Schedule breaks!
4. What’s the time-lapse method while driving?
Mount the camera high and forward-facing. Use interval mode and keep speeds steady. Avoid sudden lane changes—it ruins the flow. You good with that?
5. What’s the rule for time-lapse?
The 180-degree rule: Double your frame rate for natural motion blur. For example, 24 fps needs a 1/48 shutter speed. It is what it is—but it works!
Our team is creating outdoor-gear relevant articles with passion. If our articles can help you to find the correct solutions for your questions, we will be happy about that. In the content creation process, we usually collect accurate and useful information online or offline to compile our content in an organized way. Consequently, we can guarantee that you can discover some expected answers to your questions. We appreciate your time on our site.