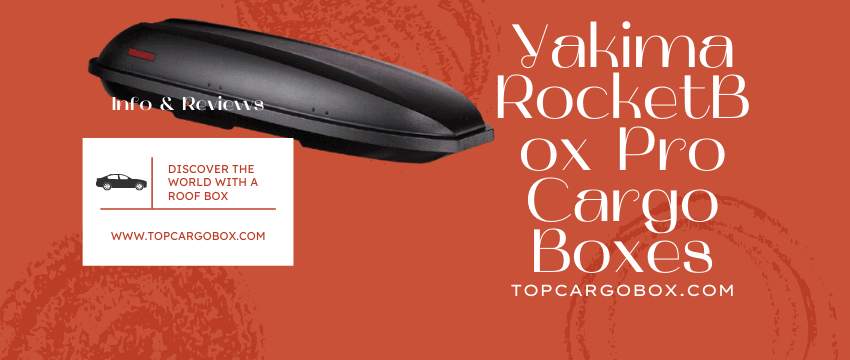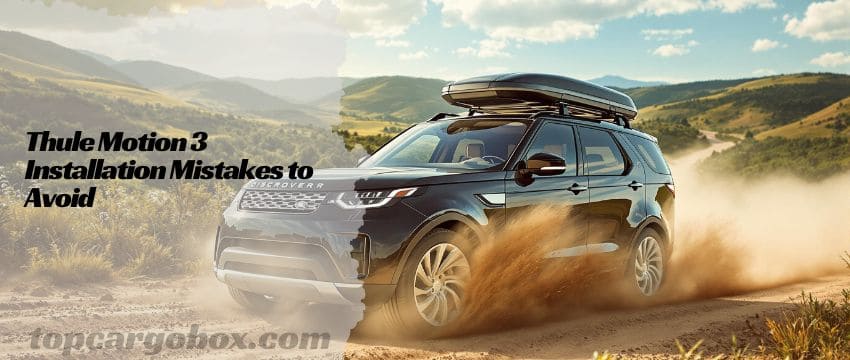
What’s up, adventure seeker? So, you finally snagged that sleek Thule Motion 3 roof box – totally awesome choice! You’re picturing effortless road trips, skis ready to go, or maybe the doggo chilling with extra luggage space. But hold up, before you hit the highway feeling like a travel ninja, let’s talk installation. Getting it wrong? Yeah, that sucks. Big time. Think wind noise driving you nuts, precious gear taking a tumble, or worse, damaging your ride. No way you want that hassle after spending your hard-earned cash, right? Let’s make sure your setup is legit secure and chill for miles ahead.
Getting Your Ride Ready: Crossbar Check is Key
Okay, first things first: your crossbars. These are the absolute foundation, dude. Skipping this step is like building a house on sand – it’s just asking for trouble. Are you sure your bars can handle the Motion 3? For real? This box isn’t crazy heavy (around 43 to 57 pounds empty, depending on size), but loaded up, it pushes 165 pounds max. Your vehicle’s roof manual and the crossbar specs are your best friends here – dig them out! Using old, rusty bars you found in the garage? Come on, that’s a major risk. Weak bars can bend or fail, turning your cargo box into a dangerous projectile. Talk about a road trip nightmare! Installing bars yourself? Double-check the spacing – Thule usually recommends 24 to 32 inches apart center-to-center, but your car’s specific mounting points rule. Get this wrong, and the box might not fit securely or could stress your roof. Feeling unsure about compatibility? Check out which cars fit the Motion 3 perfectly for extra peace of mind.
Mounting Mayhem: Don’t Ignore the Click!
Alright, the box is on the bars. Time to clamp it down! The Motion 3 uses Thule’s PowerClick system, which is pretty slick if you use it right. The biggest mistake? Not listening for that magic “click”! Each mounting foot has an integrated torque indicator. You tighten the T-handle until you hear and feel a distinct CLICK. That’s the system telling you, “Hey, perfect tension achieved!” Stopping before the click? Bad news – the box isn’t secure enough and could shift or fly off. Cranking it way past the click? Also terrible! You could seriously damage the mounting foot, the clamp mechanism, or even your crossbar. It’s not a grunt contest, seriously. Tighten evenly on all four feet, listening for that satisfying click on each one. Forgetting this simple step is how epic adventures turn into roadside disasters. How many times have you rushed through setup only to regret it later? Don’t be that person!
Positioning Perils: Finding the Sweet Spot

Where you plonk that box on your roof matters way more than you might think. Slapping it dead center because it “looks right”? Not always the best move, my friend. The goal is stability, minimal wind drag, and keeping your trunk/hatch usable. Thule specifically designs the Motion 3 to sit more forward on the roof. Why? Primarily so you can actually open your trunk or liftgate without smacking the box! Imagine loading up after a long hike and wham – lid meets box. Total bummer. Positioning it too far back might block hatch access completely. Secondly, that forward-leaning aerodynamic nose needs clean airflow. Placing it too far back can create weird turbulence, increasing noise and hurting your gas mileage – and nobody wants to burn extra fuel, right? Aim for the box to be positioned so the front edge is roughly level with the top of your windshield, or slightly forward, but always check your trunk clearance first! Test that hatch opening before you lock everything down tight.
Locking Lapses: SlideLock Smarts
You’ve got it mounted and positioned. Awesome! Now, securing your gear. The SlideLock system on the Motion 3 is super intuitive, but it’s easy to get sloppy. The key thing to remember? Closing the lid and locking it are two separate actions. Just slamming the lid shut doesn’t mean it’s locked. You must slide the red SlideLock mechanism across until it clicks into place on both sides. See that little red indicator window? When the SlideLock is fully engaged, it shows red – that’s your visual “all secure” signal. Forgetting to slide it over leaves your gear totally vulnerable. Are you kidding me? After all that effort? Also, always double-check both sides. Assuming one side locked means the other is too? Nope, that’s not how it works. Make sliding those locks part of your muscle memory every single time you close the box. It takes half a second and saves you a world of potential heartache.
Overloading Oopsies: Weight and Balance Blunders
Okay, let’s talk about filling this bad boy up. 165 pounds sounds like a lot, right? Totally. But it’s not just about the total weight – it’s where you put it. This is crucial! Loading all your heaviest stuff (coolers, toolboxes, spare tires?) way at the back or shoved to one side is asking for trouble. It throws off your car’s balance and handling, making it feel unstable or even dangerous, especially on curves or in wind. Spread the weight evenly, front-to-back and side-to-side. Put the heaviest items low and centered over the crossbars – that’s the strongest point. Think of it like packing a backpack; balance is everything. Also, resist the urge to jam-pack it until the lid bulges. You need to be able to close it properly and lock those SlideLocks without straining. Overstuffing can warp the box or damage the seal over time, leading to potential water leaks. Is maxing out the volume worth risking your gear getting soaked? Probably not.
Accessory Awareness: Getting the Most Out of It
The Motion 3 has some pretty sweet optional extras that can seriously level up your experience, but only if you use them right! Consider the interior LED light. How awesome would that be rummaging for gear at dusk? But installing it means knowing where the wiring connects cleanly inside the box – don’t just slap it anywhere. The protective liner is legit genius for keeping the box interior looking fresh, especially if you’re tossing in dirty boots, bikes, or sandy beach gear. But it needs to be laid flat and secured properly to avoid bunching up or interfering with the lid seal. And that storage cover? Perfect for keeping your box clean and UV-protected when it’s off the car. But folding it wrong or storing it damp can ruin it fast. Taking five minutes to understand how these accessories integrate properly saves frustration later. Why buy cool extras only to misuse them?
Sizing Slip-Ups: Getting the Right Fit
Choosing the Motion 3 size isn’t just about how much crap you own! Picking the biggest XL (21 cu ft) because “bigger is better” can backfire spectacularly. Yeah, it holds a ton, but is your car’s roof actually big enough to support it safely? Does it block your rear view completely? Will it turn your fuel-efficient sedan into a gas guzzler? Conversely, getting the smallest size might leave you constantly struggling for space. Check those external dimensions carefully against your roof length and width. The new low-profile options are brilliant for lower garages or a sleeker look, but ensure they still offer the volume you need. Also, think about what you’re carrying. Need 215 cm skis? Then the XL is your only Motion 3 option. Mostly duffels and camping gear? A smaller size might be perfect. Still debating sizes? Our detailed comparison breaks down the L vs XL choice. Don’t guess – measure your roof and your needs!
Weatherproofing Woes: Trust, But Verify
Thule builds tough boxes, and the Motion 3 has great seals. But assuming it’s 100% waterproof forever, no matter what? That’s a long shot, my friend. Mistakes happen. Did you accidentally trap part of the rubber seal under the lid when you closed it? Happens way too easily, especially if the box is overstuffed. That creates a direct path for water. Did you clean the seal channel after a muddy trip? Grit and debris build-up prevent the seal from closing tightly. Over time, UV exposure and temperature swings can make the seal material less flexible. It’s smart to do a quick visual check of the seal all the way around before a trip. Even better? We put the Motion 3 through a serious waterproof test so you know what to expect. Packing super valuable or water-sensitive gear? Using waterproof bags or bins inside the box is always a brilliant backup plan. Better safe than soggy!
Final Checks & Hitting the Road
Feeling good? Almost there! Before you declare victory and blast the tunes, do a final once-over. Give each mounting foot T-handle a firm wiggle – no movement should happen if you heard the click properly. Visually confirm those SlideLock indicators are showing red on both sides. Walk around the car. Does the box look level? Is it sitting squarely on the crossbars? No part of the box should be hanging off the bars unsupported. Hop in the driver’s seat. Can you see enough out the rearview mirror? If not, you might need to adjust the position slightly forward (without blocking the hatch!). Take a short test drive around the neighborhood before the big trip. Listen for any unusual whistling or rattling noises – these can indicate a mounting issue or something loose inside. Pay attention to how the car feels. Handling okay? No weird vibrations? Feeling confident now? That’s awesome! You’ve earned that adventure.
Conclusion: Install Smart, Adventure Hard
Look, installing your Thule Motion 3 shouldn’t feel like rocket science, but skipping steps or making assumptions is legit asking for headaches. By avoiding these common mistakes – neglecting crossbar prep, ignoring the PowerClick “click”, bad positioning, forgetting to SlideLock, overloading poorly, misusing accessories, picking the wrong size, or blindly trusting the seal – you set yourself up for smooth, secure travels. Taking that extra time upfront saves you stress, protects your investment (both the box and your car!), and keeps your gear safe. Now that you know what not to do, mounting your Motion 3 should be a breeze. Get it done right, load it up, and go chase those horizons! Your next epic journey is waiting. Need more inspiration for the perfect road trip setup? See our top picks for essential car top carriers.
Your Thule Motion 3 Quick Spec Guide
Feature | Details |
|---|---|
Sizes | Multiple options (e.g., 16 cu ft, 18 cu ft, 21 cu ft XL Low Profile) |
Key Strength | Max Load Capacity: 165 lb |
Mounting | PowerClick system with audible/feel “Click” torque indicator |
Locking | SlideLock system (separate close & lock), visual indicator (red=locked) |
Access | Forward positioning designed for full trunk/hatch access |
Opening | Dual-side opening, wide handle for one-handed operation |
Aerodynamics | Wing-shaped profile, forward-leaning nose for reduced drag |
Accessories | Available: Interior LED Light, Protective Box Liner, Storage Cover |
Key Fit | Fits Thule WingBar Evo, AeroBlade, SquareBar Evo (others may need adapters) |
Security | Integrated locks; One Key System compatible |
Your Thule Motion 3 Installation Questions Answered
- How far apart should Thule roof bars be?
Off the top of my head, Thule generally recommends spacing crossbars 24 to 32 inches apart, measured center-to-center. But dude, this isn’t a one-size-fits-all thing! Your specific vehicle’s roof mounting points dictate the absolute minimum and maximum safe distances. Always, always check your vehicle’s owner’s manual first – it has the gospel truth for your ride. Then, cross-reference with the installation instructions for your specific Thule foot pack or roof rack system. Getting the spacing wrong can mean your Motion 3 won’t mount securely or could overload parts of your roof. Better safe than sorry, for real. - How should a roof box be positioned?
Positioning is key for both function and safety. The golden rule is to ensure you can fully open your trunk or rear hatch without it hitting the box – test this first! Thule designs the Motion 3 to sit more forward on the roof to help with this. You also want the aerodynamic nose catching clean airflow, so aligning the front of the box roughly with the top of your windshield is often a good starting point. Make sure the box is centered left-to-right on the crossbars and sitting completely flat on them, no overhang. Finally, hop in the driver’s seat and ensure your rear visibility isn’t badly blocked. It’s a balancing act between access, aerodynamics, and visibility. - Should the roof of the cargo box be centered?
Centering the box left-to-right on your crossbars? Absolutely, yes! This ensures the weight is evenly distributed across the bars and your vehicle’s roof structure. Centering it front-to-back (lengthwise on the car)? Not necessarily! In fact, placing it dead center front-to-back often causes problems. It frequently blocks your trunk/hatch from opening fully and might not optimize the aerodynamics. The Thule Motion 3 is designed to sit further forward to maximize rear access. So, center it side-to-side, but prioritize forward positioning for hatch clearance and airflow over strict front-to-back centering. - How to position a Thule roof box?
Positioning your Motion 3 correctly is a step-by-step process. First, loosen the mounting clamps enough so you can slide the box. Place it roughly centered left-to-right on the bars. Slide it forward enough so you can definitely open your trunk/hatch all the way – get out and physically check this! Next, sit in the driver’s seat; make sure you can see enough out the back. Once the position looks good for access and visibility, ensure the box is sitting completely flat on both crossbars with no part hanging off. Now, tighten the PowerClick clamps evenly, listening for that crucial “click” on all four feet. Finally, do another quick check of hatch clearance and your rear view. - Does a roof box need to be in the middle?
Does it need to be smack dab in the middle of the roof? No way! Centering it perfectly front-to-back (lengthwise) is often the wrong move. Think about it: if it’s dead center, your trunk or hatch will likely smash right into it when you try to open it. That sucks! Thule specifically advises a more forward position for the Motion 3 to avoid this exact headache. The aerodynamic shape also works best catching clean air flowing over the windshield. Centering it perfectly side-to-side (left-right) is essential for balance, though. So, center it across the width of the car, but definitely shift it forward enough for full hatch access.
Our team is creating outdoor-gear relevant articles with passion. If our articles can help you to find the correct solutions for your questions, we will be happy about that. In the content creation process, we usually collect accurate and useful information online or offline to compile our content in an organized way. Consequently, we can guarantee that you can discover some expected answers to your questions. We appreciate your time on our site.