How’s it going? So, you’ve got a small truck, and you’re staring at that bare metal bed, thinking about all the scrapes, dings, and potential rust that’s coming its way. You know you need a bed liner, but the quotes from professional shops? Dude, that’s crazy! You’re probably thinking, “Are you kidding me? There has to be a more affordable way to protect my investment.” Exactly. I get it. You’re not looking for a showroom finish that costs a fortune; you want solid, dependable protection that won’t empty your wallet.
Well, guess what? There is a legit, cheap way to get the job done, and it’s totally within your reach. We’re talking about the DIY rattle-can route. Now, before you roll your eyes and say, “Forget it, that’ll never work,” hear me out. This isn’t about just grabbing any can of spray paint. We’re diving into the world of specialized aerosol bed liner coatings. It’s a game-changer for budget-conscious truck owners like you. This guide is going to walk you through every single step, from choosing the right product to applying it like a pro, all while keeping your cash where it belongs—in your pocket.
Why a DIY Spray-On Liner is Your Smartest Move
Let’s be real, protecting your truck bed is a no-brainer. Without a liner, you’re looking at scratched paint, which leads to rust, which absolutely sucks. A rusted-out bed is a one-way ticket to plummeting resale value and a whole lot of headaches. So, what are your options? You could drop your truck off for a professional spray-in, which is awesome but can easily set you back $500 to $800 or more. Then there’s a drop-in plastic liner, which is cheaper but can trap moisture underneath and still scratch your paint. Not a big deal? It can be.
That’s where the DIY aerosol method comes in. For a fraction of the cost—we’re talking well under $100 for a small truck bed—you can achieve a rugged, textured, and protective coating yourself. How many times do I have to tell you? This isn’t a compromise; it’s a smart, strategic choice. It’s perfect if your truck is your workhorse, if you’re restoring an old classic, or if you just want peace of mind without the professional price tag. You get to be in control, you learn a new skill, and you get that awesome feeling of accomplishment when you’re done. Sounds good, right?
Understanding What You’re Really Paying For
When you look at a professional liner, you’re paying for a few key things: the material itself, which is usually a high-quality, thick polyurea or polyurethane, the specialized spray equipment, and the technician’s labor and expertise. That labor cost is a huge part of the bill. With a DIY kit, you’re cutting out that labor cost completely. You’re the grunt! The materials in a consumer-grade can are different, often a rubberized or acrylic texture, but for a small truck used for typical hauling, they are more than tough enough. You’re trading ultimate, industrial-grade thickness for incredible affordability and convenience. Fair enough?
Choosing the Right Budget Bed Liner Spray
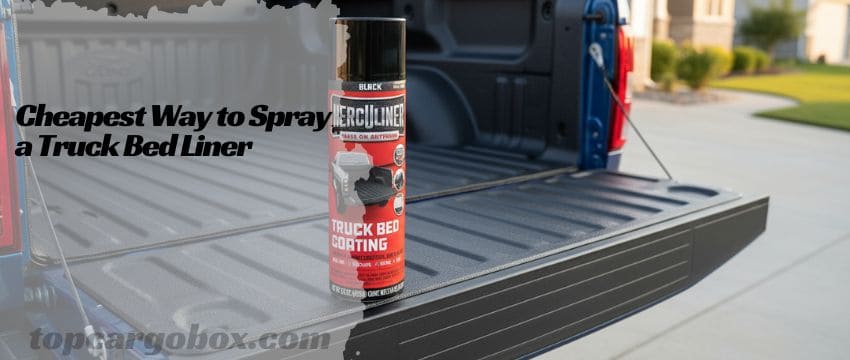
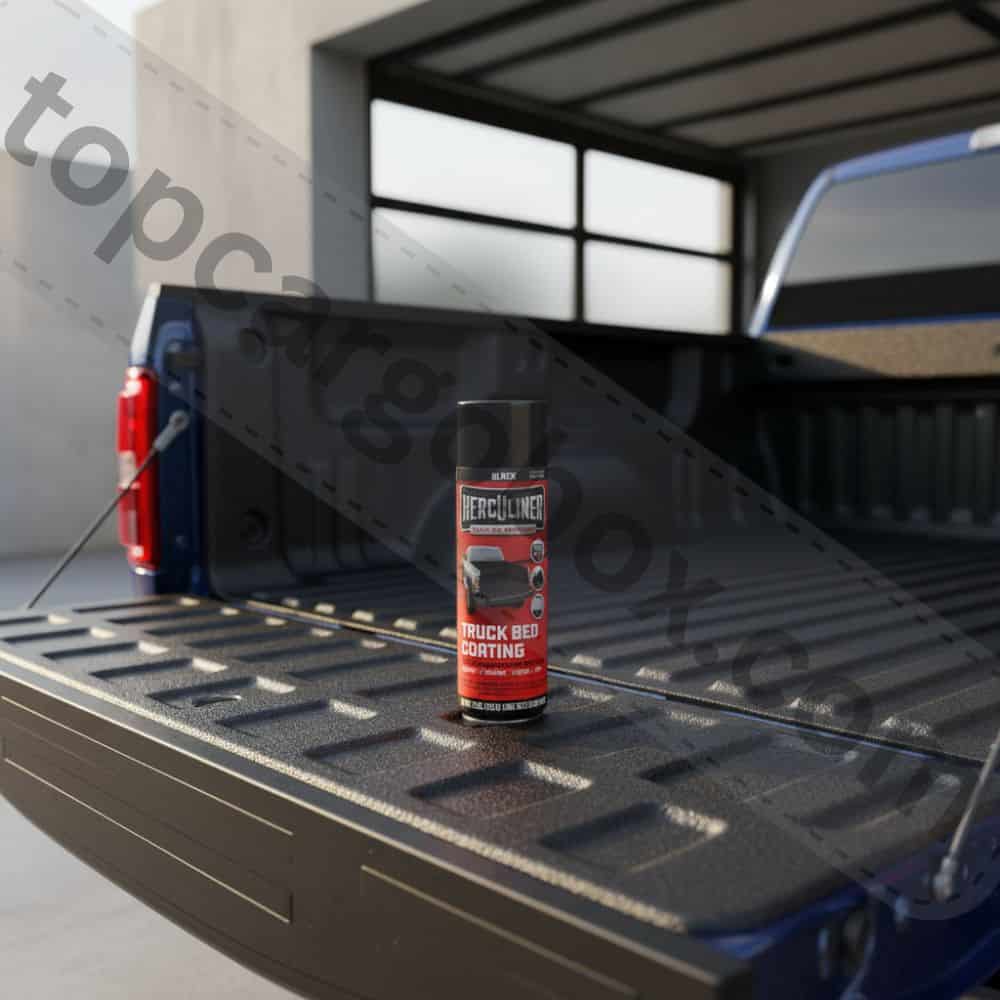
Alright, this is where the magic happens. Walk into any auto parts store, and you’ll see a few options staring back at you. Not all spray-on liners are created equal, my friend. Your goal is to find a product that balances cost, durability, and ease of application. Off the top of my head, brands like Herculiner, Dupli-Color, and Plasti Dip often come up. But based on real-world use, one stands out for delivering legit results without the drama.
Let me tell you a quick story. I once tried a well-known brand’s spray-on liner, and the experience was a complete disaster. The coverage was pathetic, the texture was gloopy, and it started peeling after a few months. I was feeling under the weather about the whole DIY idea. But then I switched to a different product, and it was like night and day. The can was fresh, it mixed well, and it sprayed on with a consistent, high-pressure stream that laid down a perfect, even texture. The difference in product quality and performance was beyond awful versus totally acceptable.
Key Features to Look For in a Can
So, what should you be looking for? First, check the coverage. A 15-ounce can typically covers about 6 to 7 square feet. Go ahead, grab a tape measure and figure out the square footage of your truck bed. For a compact truck like a Ford Ranger or Toyota Tacoma, you’re probably looking at a bed area of around 20 to 25 square feet. Do the math—that means you’ll need three to four cans to do the job right with multiple coats. Always buy an extra can, I’m telling you. You do not want to run out halfway through.
Next, look at the texture. You want a product that promises a consistent, non-slip, rugged finish. The best ones dry to a deep, rich black that makes your truck look brand new. Also, pay attention to dry time and recoat windows. A product that dries touch-dry in 30 minutes and is ready for a second coat in 2 hours is ideal for a one-day project. And for real, make sure it explicitly states it protects against rust, scratches, and UV fading. That’s the whole point!
Here’s a quick table to break down the main specs you’ll be dealing with:
Feature/Specification | Details for a Typical Aerosol Liner |
|---|---|
Coverage per Can | Approximately 6 to 7 square feet |
Finish Texture | Textured, non-slip, rugged surface |
Key Protections | Resists scratches, rust, and UV fading |
Primary Uses | Full bed liners, touch-ups, exterior trim, bumpers, wheel wells |
Drying Time | Touch dry in 30 minutes, full cure in 24 hours |
Application Method | Shake-and-spray aerosol can; requires no special tools |
The Absolute Must-Do Prep Work
Okay, this is the part most people want to skip. Come on, don’t be that person! The single biggest reason DIY liners fail isn’t the product; it’s poor preparation. Proper prep is the grunt work that makes the difference between a liner that lasts for years and one that starts peeling in weeks. You good? Let’s dive in.
First, you need to get that truck bed completely empty and clean. I mean, sweep out every leaf, every speck of dirt, every old fastener. Then, you’re going to give it a serious wash with soap and water to get rid of grease and grime. After that, you need to degrease it. A strong degreaser or something like acetone is your best friend here. Wipe down the entire surface; this removes any invisible oils that would prevent the liner from sticking. This step is non-negotiable.
The Sanding and Scuffing Grind
Now for the fun part—sanding. Ugh, I know, it sucks. But it’s arguably the most critical step. The liner needs a rough, textured surface to mechanically bond to. You can’t just spray it onto smooth, shiny paint. You need to scuff up the entire bed surface. An orbital sander with 80-grit to 120-grit sandpaper makes this job a million times easier. If you’re doing it by hand, get a sanding block and prepare for a workout. You’re not trying to remove all the paint, just putting thousands of tiny scratches in it so the liner has something to grip. Think of it like Velcro.
After you’ve scuffed every single inch, you have to clean it again. And I mean, really clean it. Use a tack cloth to wipe away all the sanding dust. Any dust left behind will get trapped under the liner and create a weak spot. Follow up with another wipe-down with your degreaser. Your bed should be absolutely, perfectly clean, dry, and rough to the touch. At this point, it should look like a blank canvas, ready for your masterpiece. How’s it going so far? Hang tight, we’re almost to the spraying part.
Your Step-by-Step Spraying Strategy
Feeling a little nervous? Don’t be. Applying the liner is actually the easiest part if you’ve prepped correctly. The key is to take your time and work in manageable sections. You’ll want a nice, dry day with low humidity and moderate temperatures—think 60°F to 80°F is the sweet spot. If it’s too cold, the material won’t cure properly; too hot, and it can dry too fast and get weird.
Before you even point the can at your truck, you gotta practice. Shake that can for a solid two minutes after the mixing ball is rattling freely. Then, find a big piece of cardboard and test your spray pattern. Get a feel for the trigger, the distance, and the pressure. These cans are often under higher pressure than regular spray paint, so the spray streak is stronger and more focused. This takes a bit of getting used to so you don’t deposit too much material and cause a run. Oh snap, a run is what you want to avoid!
Mastering the Coat and the Cure
Start with the bed walls and the front of the bed, then move to the floor. Why? Because if you do the floor first, you’ll be leaning over it and potentially messing it up while doing the walls. Hold the can about 8 to 12 inches away and use a steady, sweeping motion. Don’t just hold the button down in one spot! Overlap each pass by about 50 percent. Your first coat should be a light “tack” coat. It might look a little thin and uneven, and that’s totally fine. You’re just building a base for the next coats to stick to.
Let that first coat dry for the time recommended on the can, usually about two hours. Then, come back with your second coat. This is where you start building the texture and thickness. Apply it a little heavier, but still with those smooth, sweeping motions. If you want an even more rugged finish, a third coat is the way to go. After your final coat, you have to be patient. I know you’ll want to use your truck, but you need to let it cure fully. That means 24 hours to touch it, and ideally 48 to 72 hours before you throw any heavy, sharp, or dirty cargo in there. It is what it is—patience pays off with durability.
Beyond the Bed: Other Awesome Uses
So, you’ve got this tough, textured black coating, and it’s legit. Who says you have to stop at the truck bed? This stuff is incredibly versatile. Once you see how awesome your bed looks, you’ll get a kick out of using the leftover spray on other parts of your truck. For real, it’s like a makeover in a can.
Think about your exterior plastic trim. Over time, it fades to a nasty gray, right? That sucks. A light scuff and a coat of bed liner spray will bring it back to a deep, durable black that lasts way longer than those temporary trim restorers. What about your wheel wells? Coating the inside of your wheel wells protects them from rocks, salt, and grime, fighting off rust and making the whole underside of your truck look cleaner. You can even use it on bumpers, running boards, or as a non-slip surface on trailer ramps or toolboxes. The possibilities are pretty good, don’t you think?
A Real-Life Example: The Tailgate Transformation
I recently used a can to do the inside of a tailgate on an old Series 3 Land Rover. The metal was a bit rusty and just looked tired. After a quick wire-brushing and a rust converter treatment, I sprayed on three coats of the liner. It sprayed on easy, looked really nice with a prominent and even texture, and hardened well. It wasn’t as thick as a traditional, professionally sprayed liner, but for that application, it was perfect. It protected the metal, looked a thousand times better, and cost almost nothing. That’s the power of this stuff—it lets you realize the vision you have for your vehicle without a huge investment.
The Honest Downsides You Need to Know
Look, no product is perfect, and it’s only fair we talk about the cons. The DIY aerosol liner is not going to be as thick or as durable as a professional, spray-gun-applied liner. If you’re running a landscaping business and constantly shoveling sharp gravel directly into your bed, a pro liner might be a better long-term investment. But for 90% of us, the DIY version is more than tough enough.
The other big thing is the smell. This stuff is potent. It takes about 24 hours for the smell to finish airing out. You must use this in a very well-ventilated area. If you’re in a garage, keep the door open and a fan running. Honestly, doing it outside on a nice day is your best bet. And be careful about overspray! Once it’s on and dry, it’s not cleaning up. So, mask off everything you don’t want coated with painter’s tape and plastic sheeting. That means your tailgate, your lights, your windows—everything. A little masking saves a ton of regret later.
Is It a Long Shot for a Full-Size Truck?
For a small truck, this method is absolutely ideal. But what if you have a full-size, long-bed truck? It’s not a long shot, but it becomes less cost-effective. The bed area is much larger, so you might need six to eight cans or more. At that point, the cost starts creeping up, and the physical effort of spraying that large of an area with small cans becomes a real chore. For a full-size truck, a roll-on DIY kit or even a professional job might start to make more sense from a labor and coverage standpoint. But for your compact truck? You’re in the sweet spot.
Final Thoughts and Your Next Steps
So, there you have it. The cheapest way to spray a truck bed liner for your small truck is totally within your grasp. It’s a project that requires a weekend of your time, some elbow grease, and a positive attitude. You’ll save a ton of money, you’ll learn something new, and you’ll get that awesome feeling of pride every time you drop the tailgate and see that fresh, professional-looking bed.
You’ve got the knowledge: choose a quality aerosol liner like the one we discussed, prep that bed like your truck’s life depends on it, and apply it with patience and care. Remember, the goal is solid protection, not perfection. A few minor texture variations? Not a big deal. You’ve just added years of life to your truck bed for less than the cost of a nice dinner out. That’s lit!
Now, what are you waiting for? Go grab those cans, clear your weekend, and get ready to transform your truck. You’ve got this. Catch you later with a brand-new, protected truck bed.
Our team is creating outdoor-gear relevant articles with passion. If our articles can help you to find the correct solutions for your questions, we will be happy about that. In the content creation process, we usually collect accurate and useful information online or offline to compile our content in an organized way. Consequently, we can guarantee that you can discover some expected answers to your questions. We appreciate your time on our site.