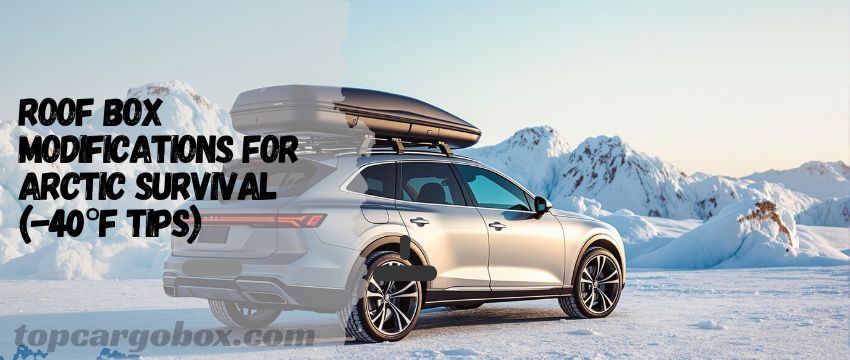
What’s up, adventurer? If you’re planning an Arctic expedition, you’ve probably wondered: How do I keep my gear safe in -40°F conditions? Spoiler: Your average roof box won’t cut it. Let’s dive into how to transform that rooftop carrier into a frost-proof beast.
Why Your Roof Box Needs Arctic-Level Upgrades
Let’s face it—standard roof boxes are built for weekend road trips, not polar nightmares. At -40°F, plastic becomes brittle, seals crack, and hinges freeze shut. Ever tried prying open a frozen box with numb fingers? That sucks. Modifications aren’t just nice-to-have; they’re survival essentials. Trust me, you don’t want to learn this the hard way mid-expedition.
Understanding the Arctic’s Worst Enemies
Cold isn’t your only foe. Wind speeds in the Arctic can hit over 60 mph, turning snow into abrasive sandpaper. Moisture sneaks into gaps, freezes, and expands—warping lids or snapping locks. Even UV rays (yes, they exist up there!) degrade materials over time. Oh, and polar bears? They’re curious. A flimsy box is basically a snack dispenser. No way you’re risking that.
Insulation Hacks to Beat Extreme Cold
You wouldn’t camp without a sleeping bag, so why leave your gear exposed? Line your roof box with 1–2 inches of closed-cell foam. This stuff’s lightweight, moisture-resistant, and traps heat like a champ. For extra credit, add adhesive foil insulation to reflect radiant cold. Pro tip: Leave small air gaps between layers—it’s like giving your gear a thermal blanket. Still worried? Throw in hand warmers activated before sealing. Legit game-changer.
Reinforcing Seals and Hinges
Factory seals are about as reliable as a screen door on a submarine. Swap them out for silicone-based gaskets—they stay flexible at -40°F. For hinges, ditch aluminum for stainless steel, and coat ’em with marine-grade grease. If you’re feeling under the weather about DIY, hire a pro to weld reinforced brackets. Oh, and always test your seals by spraying soapy water on closed edges—bubbles mean trouble.
Aerodynamic Tweaks for Brutal Winds
Wind drag isn’t just a fuel-efficiency buzzkill—it strains mounts and rattles gear. Start by streamlining the box’s shape with a front deflector. If your model’s boxy, attach a removable PVC fairing. Secure loose parts with lock nuts, not standard bolts, because vibrations will shake things apart. Bonus: A smoother profile cuts through snow drifts better. Still hearing whistling noises? Apply foam tape along seams. Problem solved.
Anti-Theft and Wildlife-Proofing
Bears aren’t your only thieves. Frost heaves can pop open weak latches. Install dual-point locking systems with tamper-proof screws. For peace of mind, loop a steel cable through the box and roof racks. Add motion-activated LED strips—they startle animals and humans alike. How’s it going, Mr. Polar Bear? Not so bold now, huh?
Weight Distribution: Don’t Flip Your Rig
Overloading one side turns your ride into a toboggan. Keep heavy items (fuel cans, tools) centered and low. Use adjustable cargo bars to partition the space—no big deal to rearrange mid-trip. Check your vehicle’s manual for max roof weight; exceeding it risks collapse. And hey, if your rear suspension sags, you’ve gone too far. Same here—balance is everything.
Maintenance Rituals for Longevity
Arctic grime is relentless. After each trip, rinse the box with warm water (not hot—it cracks cold plastic!). Dry thoroughly to prevent ice buildup. Lubricate locks and hinges with dry Teflon spray every month. Store it indoors, or at least wrapped in a UV-resistant tarp. Skipping this? That’s crazy! You’ll replace the box twice as often.
Emergency Prep: Gear You Can’t Afford to Lose
Your roof box should hold backups for your backups. Think: spare batteries, a satellite phone, fire starters, and a portable jump starter. Pack these in vacuum-sealed bags with oxygen absorbers—moisture’s a silent killer. Throw in a GPS tracker too; if the box detaches, recovery’s a long shot without one. You good? Better be.
Final Checklist Before Departure
Test all locks, re-grease hinges, and double-check insulation. Confirm the box is aligned with your vehicle’s centerline—crooked boxes drag worse. Snap a photo of your packed layout for quick repacking later. Lastly, duct-tape a note inside with emergency contacts. Feeling chill yet? You should be.
Conclusion: Own the Arctic Like a Pro
Modifying a roof box for -40°F isn’t just about survival—it’s about thriving. With these tweaks, you’ll protect your gear, vehicle, and sanity. Remember: The Arctic doesn’t compromise, so neither should your prep. Now go crush that expedition like the legend you are. Catch you later!
What Not to Put in a Roof Box?
Avoid perishables (they’ll freeze solid), electronics not rated for cold, and aerosol cans (they explode). Compressed gas tanks are risky—temperature swings cause leaks. Lastly, skip loose items like cookware; they’ll rattle nonstop. Seriously, nobody wants a bent pan symphony at 3 a.m.
How Should a Roof Box Be Positioned?
Center it between roof rails for even weight distribution. The front edge should sit 6–12 inches behind the windshield to reduce drag. Angle it slightly downward so snow slides off. Check clearance when opening hatchbacks or trunks. Fair enough? Good—now bolt it down.
What to Put in a Rooftop Cargo Carrier?
Stash bulky, cold-tolerant gear: tents, sleeping bags, recovery boards, and dry food. Include a shovel, tow straps, and extra clothing. Keep daily essentials (meds, snacks) accessible in smaller bags. Totally makes life easier when you’re not digging mid-blizzard.
Where Do You Store a Roof Box When Not in Use?
Clean it, dry it, and stash it indoors—a garage or shed works. If stuck outdoors, use a breathable cover to prevent mold. Avoid hanging it; prolonged pressure warps the shape. Old school tip: Flip it upside down to keep critters out.
Should You Strap a Roof Box?
For real? Absolutely. Use ratchet straps crossed over the box for tension. Secure loose ends with zip ties to prevent flapping. Check straps every 100 miles or after rough terrain. Skipping this is like inviting the Arctic to play Jenga with your gear. Don’t risk it.
Stay frosty out there, and remember: Prep smart, or get owned by Mother Nature. You’ve got this!
Our team is creating outdoor-gear relevant articles with passion. If our articles can help you to find the correct solutions for your questions, we will be happy about that. In the content creation process, we usually collect accurate and useful information online or offline to compile our content in an organized way. Consequently, we can guarantee that you can discover some expected answers to your questions. We appreciate your time on our site.