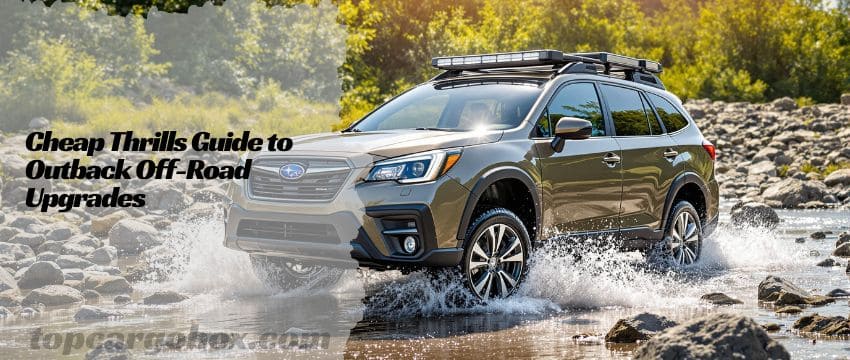
What’s up, fellow Outback adventurer? So you’ve got this awesome wagon that’s almost ready to conquer the backcountry, but maybe your wallet’s feeling a bit thin after the purchase? No worries, dude, I totally get it. Transforming your Subie into a trail-ready beast doesn’t mean you gotta drain your bank account. Forget those crazy expensive builds you see online – let’s hang out and talk about the real budget-friendly mods that actually make a difference without the financial sting. Seriously, you’d be surprised how much capability you can unlock without selling a kidney!
Why Bother Modding Your Outback for Dirt?
Unlocking Hidden Potential
Okay, let’s be real for a sec. Your Outback stock is pretty darn capable, right? Subaru didn’t skimp on the Symmetrical AWD and decent ground clearance. But come on, haven’t you felt that little pang of anxiety when the trail gets rougher than expected? Maybe you scraped the underside on a rock, or spun a wheel in some loose gravel. That sucks, but it’s also a sign! Those moments show where the factory setup hits its limit. Budget mods are all about smoothing out those rough edges, giving you more confidence to explore further without that nagging worry. Think of it as helping your trusty wagon truly live up to its adventurous spirit. Isn’t that the whole point of owning an Outback?
Quick-Pick list of Accessories For Subaru Outback Offroad:
Item | Description | Price Range | Link |
|---|---|---|---|
XHRING Back Seat Organizer | Keeps gear organized and accessible with multiple pockets and durable materials | $ | |
powoq Trunk Liner | Heavy-duty all-weather cargo mat protects against mud, spills, and scratches | $$ | |
OEM Subaru Cargo Tray | Genuine Subaru liner with raised edges for maximum protection | $$ | |
KEYOOG Mud Flaps | Rugged splash guards for off-road protection and aggressive styling | $ | |
Subaru Rear Bumper Protector | OEM part to shield your bumper from scratches and dents during loading | $$ | |
Subaru Wilderness Cladding | Factory-style rugged side cladding for a more aggressive off-road look | $$ |
Budget Doesn’t Mean Cheap & Nasty
Hear me out. When I say “budget-friendly,” I absolutely do not mean flimsy junk that’ll break the first time you need it. For real? That’s just throwing money away. We’re talking about smart, strategic upgrades using reliable brands and solid designs that punch way above their price point. It’s about prioritizing the mods that give you the biggest bang for your buck in terms of actual off-road performance and protection. Who doesn’t want more capability without the premium price tag? Let’s find those sweet spots where value meets real-world grit. Trust me, it’s totally possible.
The Absolute Essentials: Tires & Wheels
Your Tires: The Only Thing Touching the Ground
How’s it going with those stock all-seasons? Probably fine for the mall, but hit some mud or loose dirt and suddenly you’re wishing for more grip, right? No way around it: the single best upgrade for any off-road vehicle, especially on a budget, is a set of proper all-terrain (A/T) tires. They’re the magic link between your AWD system and the unpredictable terrain. Think massively improved traction on dirt, gravel, sand, and light mud, plus way tougher sidewalls to resist punctures from sharp rocks or sticks. Is there anything better than the confidence of knowing your tires won’t let you down miles from pavement?
Budget-Friendly A/T Tire Champions
You don’t need the absolute top-tier (and crazy expensive) mud-terrains. Solid mid-range A/Ts offer fantastic performance without the noise or huge hit to fuel economy. Look at options like the Falken Wildpeak A/T Trail (designed for crossovers/SUVs!), Toyo Open Country A/T III, or BFGoodrich Trail-Terrain T/A. These often fit your stock wheels perfectly, saving you even more cash. Expect to pay around $180-$250 per tire installed – a significant investment, sure, but the performance leap is undeniable. That’s awesome value for the capability boost.
Wheels: When to Swap (And When Not To)
My bad if I got you excited about wheels right away! Honestly, your stock Outback wheels are usually just fine for budget builds, especially if you stick with stock-size A/T tires. Swapping wheels is mostly for looks or if you want a slightly narrower width (for better sidewall bulge on rough terrain) or different offset. If you do crave that tougher look or specific fitment, check out affordable options like LP Adventure, Method Race Wheels (MR502s are popular), or even some Black Rhino designs. But legit, tires come first – wheels can wait if funds are tight. No big deal if you rock the stockers!
Guarding the Goods: Skid Plates & Protection
Why Your Underbelly Needs Armor
Ever scraped or thunked something vital underneath? That’s crazy! (And scary). The Outback’s engine oil pan, transmission, and rear differential are surprisingly vulnerable to rocks, stumps, and even deep ruts. Factory “skids” are often just flimsy plastic covers meant for aerodynamics, not protection. What’s the point of having great AWD if a single rock takes out your oil pan and strands you? Adding real skid plates is like cheap insurance for your most expensive components. It is what it is – trails are unpredictable, so armor up!
Affordable Armor Solutions
You don’t need inch-thick aerospace aluminum. For real, robust 3/16-inch or 1/4-inch steel plates from brands like Primitive Racing offer fantastic protection without breaking the bank. They cover the crucial bits: engine, transmission, and often the rear differential. Expect to pay $400-$700 for a full set, which feels like a lot upfront, but compared to a $3000 transmission repair? Totally worth it. Installation is usually straightforward bolt-on, sometimes needing basic hand tools. Feeling under the weather about the cost? Start with just the front engine/transmission plate – it protects the most expensive stuff.
Primitive Racing 3/16″ Steel Skid Plate Set (Example Specs)
Feature | Specification |
|---|---|
Material | 3/16″ Steel (Durable, cost-effective) |
Coverage | Engine, Transmission, Rear Differential |
Finish | Primer (Ready for paint) or Powder Coated |
Compatibility | Fits most Outback generations (Check specifics) |
Installation | Bolt-on using factory mounting points |
Weight | Significant but manageable (Adds protection!) |
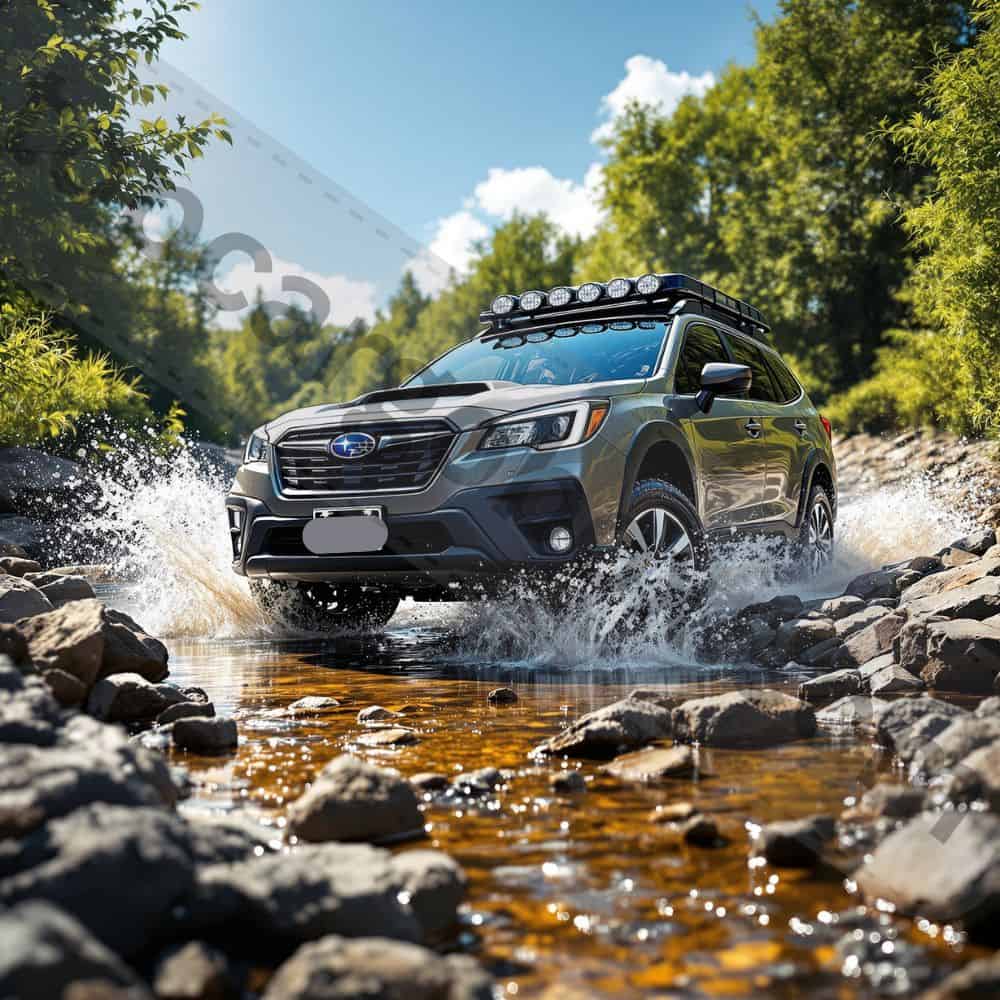
Lighting Up the Night: Seeing Beyond the Headlights
Stock Lights vs. The Deep Dark
How many times have you been caught out after dusk on a forest road, straining to see past the weak glow of your headlights? It sucks, plain and simple. Off-road at night demands way more light to spot obstacles, animals, and the actual trail edges. Stock lights just aren’t cut out for true darkness away from streetlights. Adding auxiliary lighting isn’t just cool; it’s a massive safety upgrade. Can you imagine navigating a tricky section blind? Not a big deal we want to experience!
Budget-Bright Lighting Upgrades
What’s new in affordable lighting? LED technology is your best friend! Forget old school halogens that suck power and burn out. Modern LED light bars and pods are insanely bright, energy-efficient, and surprisingly affordable. Look for a 20-inch single or dual-row light bar mounted behind the grille (clean look, good spread) or some smaller LED pods on a hood bracket or lower bumper. Brands like NiLight or Auxbeam offer decent quality starting around $50-$150. That’s lit (literally!) without torching your budget. Wiring kits are usually included, and installation is DIY-friendly.
Getting Unstuck: Basic Recovery Gear
Hope For the Best, Prepare For the Stuck
Let’s bounce this idea around: Getting stuck isn’t a matter of if, but when. Especially when you start pushing your limits thanks to your new mods! Are you kidding me if you think AWD is invincible? Mud, deep sand, snow, or even a slick incline can stop you cold. Being self-reliant is key. What’s the point of venturing out if you have to wait hours for a costly tow truck? Basic recovery gear is non-negotiable, and thankfully, the essentials are budget-friendly. Totally essential for peace of mind.
The Must-Have Recovery Kit (On a Dime)
You don’t need a winch right away (though they are awesome!). Start with these absolute basics:
- A Quality Recovery Strap (Kinetic Rope preferred): $50-$100. This stretches to help yank you out, way safer than a tow strap. Get a 20,000+ lb rating.
- D-Ring Shackles (Rated): $20-$40 each. You need at least two. These connect the strap to anchor points. DO NOT use cheap tow hooks!
- A Decent Shovel: $25-$50. A compact, sturdy shovel to dig out tires or clear debris. Forget it trying to dig with your hands!
- Traction Boards: $100-$200 a pair. Brands like GoTreads or affordable MAXTRAX clones work wonders under spinning tires on sand/mud/snow. Game changer!
Stash this kit in the back – you good when things get slippery? Sounds good to be prepared.
Keeping It Clean(ish): Mud Flaps & Splash Guards
More Than Just Looks: The Functional Flap
Ever get a kick out of hearing rocks ping off your paint? Yeah, me neither. Off-roading throws a ton of debris – mud, gravel, rocks – directly at the sides of your Outback and, worse, the cars behind you. That’s not cool. Factory splash guards are usually tiny and ineffective. Proper mud flaps serve a real purpose: protecting your paint, reducing spray for others, and keeping your lenses cleaner. Who knew such a simple mod could save you chips and headaches? Fair enough, they also make your rig look tougher.
Rugged & Affordable Mud Flap Options
Skip the flimsy universal flaps. You need something tough that can handle brush and debris without tearing. Brands like Rally Armor (UR series) offer durable, flexible urethane flaps with sturdy brackets starting around $100-$150 a set. For a more rigid option, look at RekGen or even some Subaru OEM Wilderness-style flaps if you find a deal. Installation is usually straightforward, often using existing holes or simple drilling. Bummer to get new paint chips, right? Totally preventable.
Organizing the Adventure: Interior & Cargo Solutions
Taming the Chaos: Why Organization Matters Off-Road
Feeling under the weather because your recovery strap is buried under camping chairs, and your first aid kit vanished? Off-road adventures mean gear – lots of it. Without organization, stuff slides around, gets damaged, or becomes impossible to find when you need it most (like that recovery gear!). Securing your cargo isn’t just tidy; it’s safer, prevents projectiles during bumps, and saves you massive frustration. Is there anything better than knowing exactly where your stuff is? Absolutely not.
Budget Organizers That Actually Work
You don’t need a fancy drawer system (yet!). Start smart:
- Cargo Nets & Organizers: Hook onto seatbacks or trunk anchors to hold bags, tools, or loose items. Super cheap and effective. Check out versatile organizers like the XHRING Back Seat Organizer (approx $30-$50).
- Heavy-Duty Cargo Liners: Protect your carpet from mud, gear, and spills. All-weather liners like the powoq Trunk Liner (approx $100-$150) are worth every penny. Consider the OEM Cargo Tray too.
- Simple Storage Bins: Durable plastic bins keep gear contained and stackable. No big deal, but super effective. I’m down for less chaos.
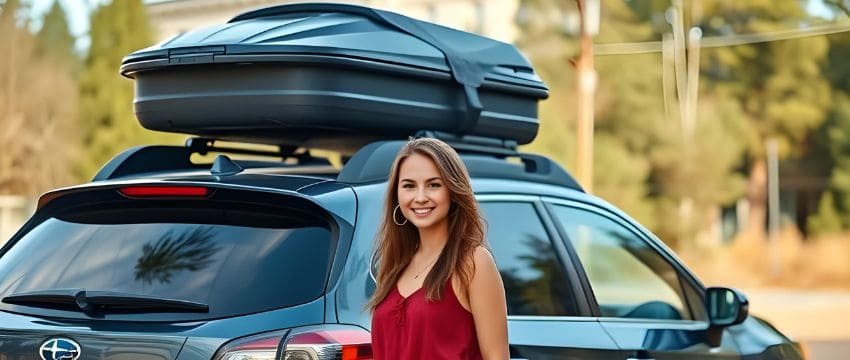
Bonus: Roof Racks & Carriers (The Storage Game Changer)
When the Trunk Just Isn’t Enough
Long time no see, trunk space! Seriously, once you add coolers, camping gear, recovery stuff, maybe a spare tire, the Outback’s generous cargo area fills up fast. What if there was a smarter way to free up precious interior space? That’s where the roof comes in. Adding a roof rack system opens up a whole new world of carrying capacity for bulky, lightweight, or dirty items. Think roof boxes, cargo baskets, bike racks, kayak carriers, or even just strapping down gear. Why do bad things happen to packed trunks? Off the top of my head, get stuff off the floor!
Budget Roof Solutions: Crossbars First!
The foundation is crossbars. If you don’t have factory rails with crossbars, that’s step one. Don’t cheap out on no-name brands that might fail. Look for reputable budget options from Yakima (BaseLine or JetStream), Thule (Evo WingBar), or even Subaru’s own accessory crossbars which are often rebranded quality bars. Expect to pay $250-$_400 for a good set. Once you have bars, the sky’s the limit! Add a cargo basket for bulky items (like traction boards, fuel cans, a spare), or a roof box for weatherproof storage. Need bike hauling? Check out our guides on the Best Roof Racks for Subaru Outback and Best Bike Racks for Subaru Outback. Thinking big? Explore Why a Cargo Box for Your Subaru Outback makes sense. That’s for sure a game-changer for road trips and camping!
Bonus Splurge (If Budget Allows): Lift Kits & Spacers
A Tiny Lift, A Big Difference
Could be better, right? That ground clearance. While tires give you a small boost (maybe 0.5 inches), a dedicated lift kit or spacer kit can add 1 to 2 inches of precious height. This significantly improves your breakover angle (clearing humps without scraping) and departure angle, letting you tackle more rugged terrain confidently. How wonderful would it be to glide over obstacles that used to make you cringe? I’m so glad these exist!
Affordable Lift Options: Spacers Rule
Full suspension lifts (new springs/struts) are awesome but pricier ($1000+ installed). For budget builds, subframe spacer kits are king. Brands like LP Adventure, Anderson Design & Fabrication (ADF), or RalliTek offer high-quality 1-inch or 1.5-inch spacer kits made from aluminum for around $250-$500. These go between your struts and body/subframe, lifting the entire vehicle. Installation requires more mechanical skill or a shop ($300-$500 labor), but the total cost is much lower than a full suspension lift. Important: Lifting stresses CV axles slightly more, so don’t go crazy off-roading immediately after – let things settle. Hang tight and drive gently at first. Get a kick out of that new commanding view!
Putting It All Together: Your Budget Off-Road Build Plan
Priority Order: Spend Smart
Off the top of my head, where do you even start? Don’t sweat it, here’s a smart order based on impact vs. cost:
- Tires: Non-negotiable first step. The foundation of all traction.
- Basic Recovery Gear: Be prepared before you need it. Strap, shackles, shovel, maybe boards.
- Front Skid Plate: Protect your engine and transmission – critical components.
- Mud Flaps: Cheap protection for your paint and others.
- Lighting: Essential for night adventures or early mornings/late evenings.
- Cargo Organization: Keep your gear safe and accessible (nets, liners, bins).
- Roof Crossbars: Unlock roof storage potential.
- Rear Skid Plate: Added protection for the rear diff.
- Spacer Lift: If clearance is a consistent limiting factor.
- Roof Accessories: Box, basket, bike/kayak carriers as needed.
Sounds good? This order maximizes safety and capability gains early on.
The Journey is the Reward
Dude, the best part? You don’t need to do this all at once! Pick one or two mods that address your immediate frustrations or planned trips. Maybe start with tires and a recovery strap. Next paycheck, grab a front skid plate. Then some lights or mud flaps. Building it slowly makes it affordable and lets you appreciate each upgrade. What’s up next on your adventure list? Let that guide your choices. Catch you later on the trail with your increasingly capable rig! Take it easy, build smart, and go explore. That’s awesome you’re taking the plunge!
Your Outback Off-Road Questions Answered
Is the Subaru Outback good for offroad?
Absolutely! The Outback punches way above its weight class for a wagon/crossover. Its standard Symmetrical AWD system is excellent for traction on slippery surfaces like dirt, gravel, snow, and light mud. Ground clearance, ranging from 8.7 to 9.5 inches on newer models and the Wilderness trim, rivals many traditional SUVs. While it’s not a hardcore rock crawler, it’s incredibly capable for forest service roads, moderate trails, overlanding routes, and snowy conditions. That’s for sure why it’s so popular with adventurers – it blends daily comfort with serious off-pavement ability. I suppose so that for extreme terrain, a dedicated 4×4 might be better, but for most people’s adventures, the Outback is legit.
How to make a Subaru Outback look cool?
What’s new in Outback cool? It’s all about embracing its adventurous spirit! Start with the essentials that also look tough: beefy All-Terrain tires instantly change the vibe. Adding black or gunmetal wheels helps too. Rally-style mud flaps (like Rally Armor) add a sporty, functional flair. A subtle lift (even just 1 inch) gives it a more commanding stance. Roof racks with a cargo basket or box scream “ready for adventure.” Consider blacking out chrome trim or adding black overlays for badges. Wilderness trim accents (like the front bumper cladding or decals) can be added to non-Wilderness models for that aggressive look. Dude, just adding some trail dust helps! It is what it is – a capable rig looks cool naturally.
Which Subaru is best for off-roading?
Off the top of my head, the Subaru Outback Wilderness is specifically engineered as Subaru’s most off-road capable model. It boasts 9.5 inches of ground clearance, a factory-tuned suspension with taller springs and specific dampers, a reinforced body structure, standard all-terrain tires, unique front and rear bumpers for better approach/departure angles, and a tuned CVT with a lower final drive ratio and a true dual-function X-Mode. The Crosstrek Wilderness is also very capable in a smaller package. Among non-Wilderness trims, the standard Outback is generally considered more capable than the Forester due to its longer wheelbase offering better stability, though the Forester has excellent visibility. The Forester Wilderness is another strong contender. That’s crazy how good they’ve gotten!
Is the Subaru Outback a good road trip car?
For real? It’s arguably one of the best road trip cars out there! Its combination is killer: a super comfortable and spacious interior (especially for passengers and cargo), excellent fuel efficiency for its size and capability (especially the non-turbo models), renowned safety features, and that confident AWD system for handling all weather conditions. The ride is smooth and quiet on highways, and the cargo space is massive, easily swallowing luggage and gear. Adding a roof box expands capacity even further. Long-term comfort for driver and passengers is top-notch. Who doesn’t want a car that eats up highway miles comfortably and can detour down that scenic forest road without hesitation? Exactly why it’s so popular.
What year Subaru Outback should I stay away from?
While generally reliable, some model years had more reported issues. The 2010-2012 Outbacks (4th gen) are often flagged due to higher rates of the infamous Subaru head gasket failures, particularly in the 2.5L non-turbo engines. The 2013 model year (first of the 5th gen) also had some early teething problems reported, including oil consumption issues in some 2.5L engines and potential CVT concerns. 2015 saw complaints about excessive oil consumption persisting in some 2.5L engines. It’s always crucial to get any used Subaru, especially these years, thoroughly inspected by a trusted mechanic familiar with Subarus, checking specifically for head gasket history, oil consumption tests, and CVT condition. How terrible to buy a problem! Check our guide on Common Subaru Outback Problems and Reliable Years for Subaru Outback.
What is considered high mileage on a Subaru Outback?
Pretty good news! Subarus, including the Outback, are known for their longevity. While “high mileage” is subjective, an Outback hitting 200,000 miles is a significant achievement but not uncommon with proper maintenance. Many well-cared-for examples reach 250,000 or even 300,000 miles. The key factor isn’t just the number, but the maintenance history. An Outback with 150,000 miles and meticulous records is often a better bet than one with 120,000 miles and an unknown past. Critical items like timing belts/chain (depending on year), head gaskets (if applicable), CVT fluid changes, and regular oil changes are paramount. That’s for sure the secret to high miles. See Subaru Outback Maintenance Costs for what to expect.
What is the best year for a Subaru Outback?
It is what it is, there’s no single “best” year, as it depends on priorities (features, budget, avoiding known issues). However, generations known for strong reliability include the later 4th gen (2013-2014), the mid-cycle refreshed 5th gen (2015-2019 – though watch for oil consumption in ’15), and the current 6th gen (2020-Present). The 2022+ models benefit from the larger 11.6-inch touchscreen and often more standard features. The Wilderness trim (2022+) is the pinnacle for off-road focus. For balancing features, reliability, and value, 2018-2019 (5th gen refresh) or 2023+ (6th gen with some early kinks worked out) are often highly recommended. I’m not sure about absolute best, but research is key! Our 2024 Subaru Outback Buyer’s Advice and Reliable Years Guide help.
Why does Subaru have head gasket problems?
Tell me about it! This was a notorious issue, primarily affecting the EJ-series 2.5L naturally aspirated “boxer” (flat) engines found in many pre-2012 Subarus. The design placed the head gaskets lower in the engine block, potentially exposing them to more heat and stress cycles. The specific gasket material used wasn’t always up to the task long-term, leading to external leaks (oil or coolant) and, less frequently, internal leaks causing overheating. That sucks, but Subaru addressed it significantly. By 2012, they switched to a much more robust multi-layer steel (MLS) head gasket design in the newer FB engines, which largely resolved the widespread failure problem. So, while older models (pre-2012ish) are infamous for it, it’s far less common in modern Outbacks.
Will a Subaru last 20 years?
Same here, hoping it will! Absolutely, a Subaru Outback can last 20 years or 300,000+ miles, but it’s not guaranteed. Hitting that milestone depends entirely on consistent, meticulous maintenance (following the manual religiously), addressing small problems before they become big ones, using quality parts and fluids, driving habits, and climate (rust is a killer). Reaching 20 years often requires replacing wear items like suspension components, exhaust parts, possibly the CVT or engine seals, and staying vigilant against rust. It’s a long shot without dedication, but many Subaru owners prove it’s possible with care. That’s for sure a testament to their build quality when maintained well.
Our team is creating outdoor-gear relevant articles with passion. If our articles can help you to find the correct solutions for your questions, we will be happy about that. In the content creation process, we usually collect accurate and useful information online or offline to compile our content in an organized way. Consequently, we can guarantee that you can discover some expected answers to your questions. We appreciate your time on our site.