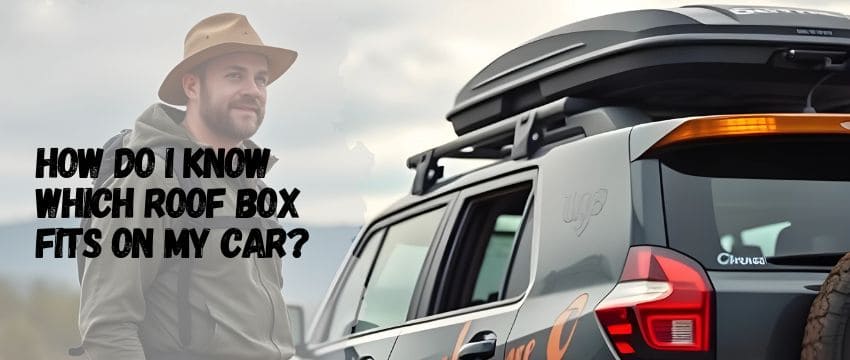
Hey there, Thule Motion 3 user! How’s it going? Planning another epic trip but already dreading the gear-tetris game? Ugh, we’ve all been there. Stuffing the car until the doors barely close, sacrificing legroom for luggage, maybe even arguing about what really needs to come along. What if I told you your Thule Motion 3 roof box could be the absolute hero of your next adventure? Totally legit! This sleek beast isn’t just about extra space; it’s about unlocking freedom and ditching the packing panic. Forget the frustration of cramming everything inside the cabin. We’re talking about smart, organized, and easy packing. Ready to transform how you travel? Let’s dive into the best ways to organize your Thule Motion 3, packed with killer tips and hacks you’ll wish you knew sooner.
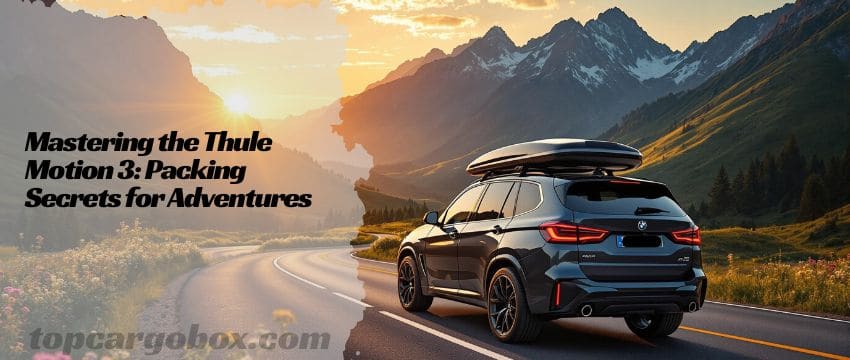
Understanding Your Thule Motion 3: More Than Just a Box on Top
Alright, before we start tossing gear in, let’s get cozy with what makes the Motion 3 tick. It’s way more than a plastic container, dude! Think of it as your high-tech, aerodynamic travel partner. Knowing its features is like knowing the secret handshake – it makes everything smoother. Ever wondered why it looks so slick? That wing-shaped profile and forward-leaning nose aren’t just for show; they seriously cut down on wind noise and drag, meaning you save gas on those long hauls. How awesome is that? Plus, that SlideLock system? Pure genius. It automatically locks the lid securely when you close it and gives you a clear “click” confirmation. No more second-guessing if it’s shut tight! And the PowerClick mounting? Seriously quick and secure, with a torque indicator that actually clicks when it’s mounted perfectly. Takes the guesswork right out.

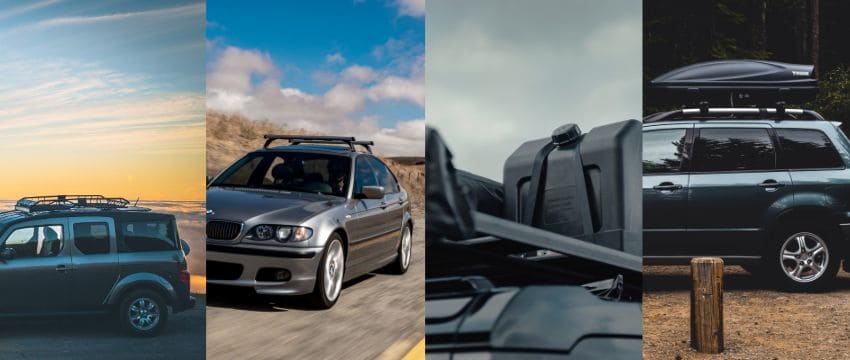
Size matters, right? The Motion 3 comes in a bunch of sizes, including those new low-profile options. Picking the right one for your ride and your typical gear load is step zero. You wouldn’t wear shoes three sizes too big, would you? Same principle applies here. Worried it’ll block your trunk? No big deal! Its design allows for full trunk access, even when it’s mounted further forward on your roof. Ever tried wrestling a bulky box open while balancing on your tiptoes? The Motion 3’s one-handed opening is a game-changer. That wide handle and sturdy lid design mean you can pop it open smoothly, even if you’re holding your skis or a wriggly kid. Isn’t it time packing felt less like a grunt and more like a breeze?
| Thule Motion 3 Key Features & Specs (Example – L Size) |
|---|
| Volume: 16 cu ft – Seriously spacious! |
| External Dims: 76.5 x 34.2 x 16.5 in |
| Internal Dims: 72 x 28 x 15 in |
| Height off Crossbar: 15 in |
| Max Load Capacity: 165 lb – Pack smart! |
| Mounting System: PowerClick (Fast & Secure) |
| Weight: 43.6 lb |
| Locking System: SlideLock (Auto-locks on close) |
| Locks Included: One Key System compatible |
| Ski Capacity (Pairs): 5-7 |
| Snowboard Capacity: 3-5 |
| Max Ski Length: 180 cm |
| Fits: Thule WingBar Evo, AeroBlade, SquareBar Evo |
Laying the Groundwork: Essential Packing Principles
Okay, let’s talk strategy before you start heaving stuff onto the roof. Packing the Motion 3 isn’t just about filling space; it’s about packing smart for safety, efficiency, and protecting your gear. First rule? Never, ever exceed that 165 lb max weight limit. Seriously, it’s not just a suggestion. Overloading strains the box, your roof rack, your car, and is downright dangerous. How would you feel if stuff went flying on the highway? Not worth the risk! Weigh bulky items if you’re unsure – better safe than sorry. Second golden rule: Weight distribution is king. You want the heaviest items centered over the roof rack crossbars. Think about balancing a tray – put all the weight on one end and it tips, right? Same deal up top. Centered weight keeps your car handling predictably.
Third principle: Protect your precious cargo. Even though the Motion 3 is tough, stuff bounces around inside. Ever open your box to find scratched skis or a dented cooler? That sucks! Use soft bags, packing cubes, towels, blankets, or even bubble wrap (old school but effective) to cushion items and prevent them from rubbing against each other. Think of it like wrapping your valuables before a move. Fourth: Accessibility matters. What will you need during the drive or first at your destination? Those things go in last, near the opening. Nobody wants to unpack the entire box at a rest stop just to grab a jacket. Finally, seal it up tight! Double-check that SlideLock is fully engaged. Hearing that solid “click” means peace of mind. Why gamble with your gear’s security?

Gear Up: Packing Strategies for Different Adventures
Now for the fun part! Let’s talk about packing for your specific mission. The beauty of the Motion 3 is its versatility. Whether you’re chasing powder, waves, or just a relaxing family getaway, the approach shifts slightly. Ready to optimize?
Conquering the Slopes: Ski & Snowboard Perfection
Headed for fresh tracks? Awesome! Packing ski and snowboard gear efficiently is an art form. First off, protect those expensive edges! Lay skis and boards flat on the bottom of the box, ideally base-to-base or top-sheet to top-sheet. Use pipe insulation or padded ski/snowboard bags if you have them. Got poles? Slide them along the sides. Boots are next. Pack them near the front (car’s rear) or sides, soles facing the walls or each other. Stuff them with gloves, hats, or socks to save space and keep their shape. Pro tip: Use a dedicated boot bag – it keeps the stink contained and makes carrying easier! Helmets can nest inside boots or get their own spot padded with clothing. What about bulky jackets and pants? Roll them tightly and use them as filler in gaps or pack them in compression sacks. Remember weight distribution! Spread the heaviest items (boots, multiple pairs of skis) evenly over the crossbars. Thinking of just tossing it all in? You’ll regret it when your favorite board gets scratched! For a deep dive on winter prep, check out how the Motion 3 handles snow and rain conditions.
Hitting the Road: Family Vacation & Road Trip Essentials
Family trip on the horizon? How wonderful! This usually means lots of stuff. The key here is organization and maximizing every cubic inch. Packing cubes are your absolute best friends. Seriously, they’re life-changing. Group outfits by person or day into different cubes. Imagine not having to dig through a mountain of clothes for little Timmy’s PJs! Soft-sided duffel bags work great too and mold into the box’s shape better than hard suitcases. Pack bulky, lightweight items first: Beach chairs, inflatable toys, sleeping bags, and tents go in first, pushed towards the far end (car’s front). Next layer: Place heavier, more compact items like suitcases or coolers (make sure it’s empty or has sealed liquids!) centered over the crossbars. Strollers and gear? Break them down if possible. Wheels can often be removed or folded. Protect delicate parts with towels. Leave room near the opening for: The diaper bag, a bag with road trip snacks and entertainment, maybe a jacket or two. Pro Hack: Use vacuum storage bags for bulky bedding or off-season clothes – it’s incredible how much space you save! Need to know if the Motion 3 fits your SUV? See which cars are perfectly matched for it.

Adventure Calls: Camping, Biking & Outdoor Gear
Gearing up for the great outdoors? That’s lit! The Motion 3 loves hauling adventure gear. Start with the big, awkward stuff: Tents (pack the poles separately along the sides if possible), rolled sleeping pads, camp chairs, and your folded canopy go in first, towards the front of the box. Bikes? Whoa, loading bikes into the box? It’s possible with larger sizes if you remove the front wheels and maybe handlebars/stems (check your bike’s manual!). Pad the frames heavily with moving blankets or foam to prevent scratches and secure them so they can’t shift. Often, it’s better to use a dedicated bike rack, but the box is great for wheels, helmets, and bike bags. Backpacks? Load them last near the opening if you need trailhead access, or stuff them with lighter gear like sleeping bags. Cooking gear? Stoves and fuel canisters (ensure they are EMPTY and valves OPEN if transporting – safety first!) should be packed securely, surrounded by soft items. Use dry bags inside for clothes and sleeping bags – extra waterproofing never hurts, even in a weather-resistant box! Got bulky wetsuits or paddleboards? They fit! Roll wetsuits tightly. Paddleboards go in last if they fit the internal length (check those specs!). It’s all about creating stable layers.
Bringing Fido Along: Pet Gear & Travel Essentials
Road tripping with your furry co-pilot? How awesome! They need stuff too. A large, sturdy crate or dog bed often goes in first, pushed to the front. If the crate is collapsible, even better – pack it flat. Pack heavy bags of dog food or litter centered over the crossbars. Use sealed containers to prevent spills and keep critters out. Pro Tip: Portion food into smaller bags or containers for the trip duration to avoid hauling the giant bag everywhere. Towels, blankets, and toys make great filler around other items and cushion the crate. Pack their travel bag (leash, bowls, poop bags, meds, favorite toy) last near the opening for easy access during stops. Worried about temperature? For real, avoid putting anything super sensitive to heat or cold in the roof box during extreme weather. The box interior can get hotter or colder than the car cabin. Their favorite bed or blanket? Totally fine, just maybe not their raw food!
Next-Level Packing Hacks & Accessory Power-Ups
Alright, you’ve got the basics down. Let’s kick it up a notch with some legit hacks and those sweet accessories. This is where you go from “packed” to “masterfully organized.”
Packing Cubes & Compression Sacks: Dude, I can’t even stress this enough. These are absolute game-changers. Use different colored cubes for different people or types of gear (clothes, tech, toiletries). Compression sacks shrink bulky jackets, sleeping bags, and bedding down to a fraction of their size. Imagine fitting everyone’s winter coats into one bag! It’s like magic. Stuff smaller sacks into gaps and odd spaces for maximum space utilization. Seriously, why pack any other way?
Bungee Cords & Cargo Nets: Prevent the dreaded gear avalanche! Secure a cargo net horizontally across the inside of the box once it’s partially loaded, especially before adding lighter items on top. Use short bungee cords with hooks to lash awkward items (like folded chairs or a toolbox) to the reinforced tie-down points inside the box. Ever open the lid and have everything try to escape? Not a big deal with these securing things.
Light It Up (Literally!): The Thule Interior Box Light accessory? Worth every penny if you often arrive in the dark or pack/unpack at night. Ever tried finding a black duffel bag in a pitch-black roof box? Sucks! This motion-activated LED strip lights up the whole interior brilliantly. Why fumble with a flashlight when you can have hands-free light?
Protect Your Box (Inside & Out): That Thule Protective Box Liner? It’s like a fitted sheet for your cargo box. It protects the interior from scratches, dirt, and spills (imagine leaking sunscreen or dog food!). Keeps the box looking newer for longer. Easy to remove and clean. The Storage Cover? Essential if you store the box outdoors when not in use. Shields it from UV rays, dirt, and bird droppings, preventing fading and deterioration. Want your investment to last? Protect it!
Label Everything: Seems simple, but it’s gold. Use masking tape and a sharpie or luggage tags on bags/cubes. Label with contents (“Kids Swim Gear,” “Camp Kitchen,” “Mom’s Shoes”). Saves so much time digging when you need one specific thing. How many arguments start with “Where’s the…?” Solve that problem!
Loading Like a Pro: Step-by-Step Execution
Okay, theory is great, but let’s get practical. How do you actually load this thing efficiently and safely?
- Prep is Key: Gather everything you plan to load near the car. Group items by category (heavy, bulky, light, fragile, needed first). Have your packing cubes, straps, bungees, and padding ready. Feeling organized already?
- Heavy & Bulky First: Open the Motion 3 (one hand, remember? Easy!). Place the heaviest, most stable items (coolers, toolboxes, crates, large bags centered over the crossbars. Push them towards the front of the box (the end facing the front of your car). This is your foundation. Got those centered? Awesome.
- Build Stable Layers: Layer medium-weight items (suitcases, duffels, storage bins) on top of or around the heavy base. Fill gaps with rolled sleeping bags, tents, or clothing sacks. Aim for a relatively flat surface before adding the next layer. Think building blocks, not a junk pile!
- Light & Fragile Fillers: Use soft, lightweight items (sleeping bags, pillows, blankets, stuffed toys, clothing cubes) to fill remaining gaps and cushion everything. Place fragile items (like a box of glasses or electronics) securely within this soft padding, surrounded by buffer material. Protect the breakables!
- Accessible Essentials: Place items you’ll definitely need during the trip or immediately upon arrival near the opening of the box. This could be a roadside emergency kit, a bag with snacks and drinks for the drive, your pet’s travel bag, or the first bag you need for your hotel. No more unpacking half the box at the first rest stop!
- Secure the Load (Internally): Before closing, take a moment to assess. Does anything look like it could shift dramatically? Use soft items to wedge things in place, or deploy your cargo net or bungee cords strategically. Prevent internal chaos while driving!
- Close & Lock: Carefully lower the lid. Ensure no straps or fabric are caught in the seal. Press down firmly near the lock until you hear and feel the distinct “CLICK” of the SlideLock engaging. That sound equals security! Visually confirm the lock indicator shows it’s fully closed and locked. Give the lid a gentle tug near the lock – it shouldn’t budge. Peace of mind achieved.
Keeping Your Motion 3 Happy: Maintenance & Care Tips
Alright, let’s get your Motion 3 maintenance game strong for the long haul. You’ve totally got packing down, but keeping this beast in top shape? That’s how you ensure epic trips for years. Seriously, a tiny bit of care makes a huge difference! First up: cleaning. After your adventure, especially if it involved mud, sand, or salty roads, give the inside a good rinse with plain water. Got stubborn grime clinging on inside or out? Grab a gentle soap and a soft cloth – no need to scrub like crazy. Harsh chemicals or rough sponges? Nice try, but they’ll mess up the finish, dude. Crucially, let the whole thing dry completely before you stash it away or shut it tight for ages. Trapped moisture is basically inviting mildew to a party in your box. That funky smell? How annoying is that? Totally avoidable!
Moving on, think about those seals and locks. Annually, treat the main lid seal with a silicone-based lube made for rubber. This magic potion keeps the seal flexible, locks in that watertight barrier, and stops the rubber from drying out and cracking like old boots. Remember, a little dab’ll do ya – wipe off any extra so it doesn’t attract gunk. How about the locks? Every few months, just work the SlideLock and the key cylinder. Feel smooth? Awesome. Feeling gritty or stiff? Don’t sweat it, a tiny drop of graphite lock lube (oil’s a no-go here!) usually sorts it right out. Storage smarts are key too. Your Motion 3 loves chilling indoors – garage, basement, shed, whatever works. Stuck storing it outside? For real, use that official Thule Storage Cover! Sunlight absolutely sucks for plastic over time, fading and weakening it. Taking five minutes to care for your gear means it’ll reliably care for your stuff trip after trip. Skip the headaches and peek at common Thule Motion 3 installation mistakes to dodge other potential grunts.
Unlocking Your Adventure Potential
Okay, let’s ditch the formal wrap-up and just chat about what this box really means for your next trip. Forget calling it just a storage bin on your roof – your Thule Motion 3 is basically your key to unlocking way smoother, way less chaotic adventures. How awesome is that? Think about it: once you get how its features work (that slick SlideLock, the easy-open lid), nail down your packing strategy (heavy stuff centered, soft stuff cushioning), and maybe toss in some clever hacks like packing cubes or that interior light, this thing transforms. It goes from being a plastic tub to your ultimate, go-anywhere gear command center. No more playing that exhausting game of Tetris inside your car, shoving bags behind seats and hoping the trunk latches. Seriously, who needs that grunt? And definitely no more heartbreakingly leaving behind the kayak paddle or the extra camp chairs because “there’s just no room.” Dude, that feeling sucks.

Imagine rolling up to the campsite after hours on the road. You pop open the Motion 3 (one hand, easy!), and bam – everything is exactly where you packed it, protected and ready. No frantic digging, no discovering your sleeping bag got crushed under the cooler. You just grab what you need, first thing. That’s the real freedom this box gives you when you pack it smart. It’s about ditching the pre-trip stress and the mid-drive “where is it?!” panic. Your gear is secure, accessible, and organized, leaving your actual car cabin free for people, pets, and maybe even some legroom. How amazing would that feel? So, are you ready to actually enjoy the drive to the adventure, knowing your stuff is squared away perfectly up top? Your next epic getaway is calling, and your Motion 3 is totally prepped to help you own it. Let’s do this!
Still have some burning questions? Fair enough! Let’s tackle a few common ones:
Can I really fit skis and snowboards easily?
Absolutely! The Motion 3 is practically designed for it. For skis up to 180 cm, you can lay them flat on the floor. Boards usually fit easily too. Use the width – lay them base-to-base or topsheet-to-topsheet to protect the surfaces. Poles slide down the sides. Don’t just chuck them in! Protect those edges with padding or bags. The low lip makes loading long gear way easier than you might think. Heck yeah, winter adventures just got smoother! For specifics on how many, check the capacity guide linked earlier.
Is the Thule Motion 3 actually waterproof?
It’s weather-resistant, meaning it shrugs off rain and snow like a champ under normal driving conditions. The dual seals (lid seal plus the gutter system) do an excellent job. But “waterproof” like a submarine? Probably not under extreme pressure washing or if parked under a torrential downpour at a weird angle for hours. For real-world trips? Totally reliable. Your gear stays dry. Want proof? See the rigorous Thule Motion 3 waterproof test results.
How do I decide between the Motion 3 L and XL sizes?
It boils down to your usual gear load and vehicle size. The XL gives you significantly more space (16 cu ft vs less in the L) for big families, lots of bulky gear, or longer trips. The L is more than enough for couples, smaller gear loads, or if you have a lower-profile vehicle. Consider the new XL Low Profile too! It offers great capacity in a sleeker shape. Still unsure? Our detailed Thule Motion 3 L vs XL comparison breaks it down perfectly.
What’s the difference between the Motion 3 and the Motion XT?
Great question! The Motion 3 is the newer generation, focusing on enhanced aerodynamics, the improved SlideLock system (auto-locking!), and a slightly more modern aesthetic. The Motion XT (previous gen) is still solid, often found at good prices, and has a slightly different locking mechanism (SecureLift). The Motion 3 generally offers quieter driving and slightly easier operation. Which is right for you? Depends on budget and how much you value the latest refinements. We compare them head-to-head in our Thule Motion 3 vs Motion XT L guide.
Is buying a used Thule Motion 3 a good idea?
It can be a smart way to save money! But be careful. Thoroughly inspect the seals for cracks or brittleness – replacements can be pricey. Check the locks function smoothly and that you get all keys. Look for significant cracks, deep scratches, or stress marks on the shell, especially around mounting points. Test the lid opening/closing. Ask about its history – accidents matter! A well-maintained used box is a great find. Arm yourself with our comprehensive used Thule Motion 3 buying guide.
Our team is creating outdoor-gear relevant articles with passion. If our articles can help you to find the correct solutions for your questions, we will be happy about that. In the content creation process, we usually collect accurate and useful information online or offline to compile our content in an organized way. Consequently, we can guarantee that you can discover some expected answers to your questions. We appreciate your time on our site.