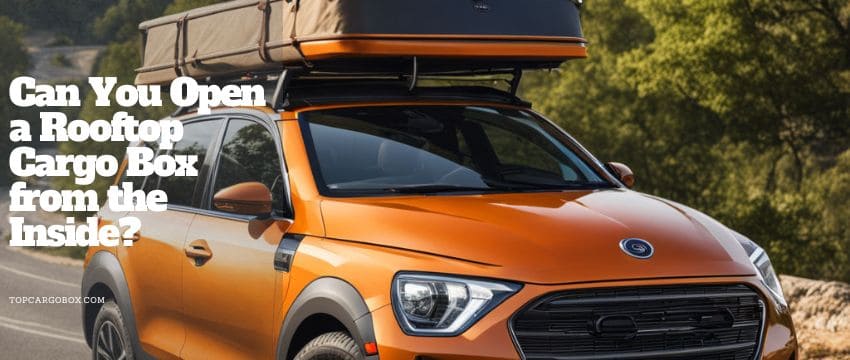
What’s up, road warriors and weekend adventurers? Feeling that familiar pang of frustration when you start packing for the big trip, only to realize your trusty sedan or hatchback just doesn’t have enough cargo space inside? You eye those sleek SUVs with their factory roof rails and fancy cargo boxes zooming by and think, “Man, that would solve everything… but my car doesn’t have those rails.” Hold up! Before you resign yourself to playing luggage Tetris inside the cabin or stuffing things in footwells, let me tell you a secret: You absolutely CAN install a roof cargo box on a car without roof rails. Seriously, it’s not only possible, it’s a legit game-changer for expanding your vehicle’s capacity. Forget the myth that you need factory rails – we’re diving deep into the world of aftermarket solutions designed specifically for cars like yours. How awesome is that? Let’s unlock that precious rooftop real estate together!
Why Factory Roof Rails Aren’t The Only Game In Town
Okay, let’s get real for a second. Factory-installed roof rails look slick, no doubt. They seem like the obvious starting point for adding a roof box. But what if your car rolled off the lot without them? Maybe you bought it used, maybe it was a base model, or perhaps you just never thought you’d need them. Totally understandable! The good news is, car manufacturers know that not everyone gets the fully loaded trim, and more importantly, the aftermarket industry thrives on solving exactly this kind of problem. Think about it: Millions of cars on the road lack integrated rails. Do you think companies like Thule, Yakima, Inno, and SportRack are just gonna ignore that massive potential customer base? No way! They’ve engineered brilliant systems that clamp securely to your car’s door frames or utilize existing mounting points hidden under the roof’s weather stripping. It might feel like a long shot, but trust me, the solution is tried, tested, and totally reliable when done right. You aren’t stuck with a tiny trunk forever.
Understanding The Core Challenge: Finding Solid Attachment Points
So, how’s it going wrapping your head around this? The fundamental trick to mounting anything securely on your roof, box included, is finding strong, reliable attachment points. Factory roof rails provide these points obviously. On cars without them, we need to get a bit more creative, but definitely not sketchy! The engineering focuses on transferring the load safely. Your car’s roof structure itself is surprisingly strong, but we can’t just slap pads directly onto the sheet metal – that would scratch it terribly and likely dent it under load. Instead, the magic happens at the door frames. These areas are reinforced to handle impacts and stresses. High-quality aftermarket “towers” or “feet” are designed to clamp onto these reinforced zones along the top of your door openings, distributing the weight effectively. It’s kinda like how a suspension bridge uses strong cables anchored to solid towers – the clamps are your towers, anchoring the whole system to the strongest parts of your car’s upper structure. Finding the exact right fit for your specific make, model, and year is absolutely crucial though. One size definitely does not fit all here. Messing this up? That’s a recipe for disaster, my friend.
What Exactly Are You Clamping Onto?
Think about the top of your car’s door frame. When you open the door, you see that metal lip running along the roof edge? That’s the primary clamping zone for most no-rail systems. It’s structurally sound. Some systems might also utilize mounting points hidden beneath plastic trim pieces near the windshield or rear window – these are less common for standard sedans/hatchbacks but worth knowing about. The clamps themselves have specially shaped pads or jaws that grip this lip securely without damaging the paint. They’re engineered to bite down hard only where the metal is thick enough to handle it. Trying to clamp onto the actual curved roof surface? Forget it, dude – that’s a big no-no and will definitely cause damage.
Choosing Your Weapon: Roof Rack Systems For Bare Roofs
Alright, let’s talk gear. This is where things get exciting! You need two main components: a solid base rack system designed explicitly for vehicles without factory rails (often called a “naked” or “bare” roof system), and then the roof cargo box itself that mounts onto that rack. Don’t even think about trying to rig a box directly onto pads or universal bars – that’s asking for trouble. The base rack is your essential foundation. The big players here are Thule and Yakima, but excellent options also exist from Inno, SportRack, and others. Each brand has specific “fit kits” or “fit finders” on their websites – this is your starting point, no exceptions! You must enter your exact car details (make, model, year, even trim level sometimes) to find the compatible feet/towers and the correct length crossbars.
Key Components of a Bare Roof Rack System
- Towers/Feet: These are the workhorses that clamp onto your door frame. They come in specific models designed only for your car type. They include the clamping mechanism and adjustable elements. Never try to force-fit incompatible feet!
- Crossbars: These are the horizontal bars that span the width of your roof. They connect to the towers and provide the platform the cargo box attaches to. Length is critical – too short and the box won’t fit, too long and they look goofy and create wind noise. The fit kit tells you the right length.
- Fit Kit (Often Included with Feet): This isn’t always a separate box; it usually refers to the specific adapter pieces within the tower kit designed for your car. It ensures the clamp shape and pad contact points match your vehicle’s contours perfectly.
- Locks (Highly Recommended): Core component locks for the towers and crossbars deter casual theft of the rack itself. Seriously, get locks.
Popular Bare Roof Rack Systems & Key Features
Feature/Specification | Description | Why It Matters |
|---|---|---|
Attachment Method | Clamps onto reinforced door frame lip | Provides secure, non-damaging hold on strongest part of roof structure. |
Vehicle Specificity | Requires EXACT match to make, model, year (often trim) via Fit Kit/Vehicle Specific Feet | Ensures proper clamping location, pressure distribution, and avoids damage. Non-negotiable. |
Crossbar Length | Determined by vehicle width and required spread between towers; specified in Fit Guide | Box needs proper mounting points; incorrect length affects stability and box compatibility. |
Weight Capacity | Dynamic (driving) capacity: Typically 100-165 lbs total for rack + load; Static (parked): Higher | CRITICAL: You MUST stay under dynamic limit. Includes weight of box + gear. Exceeding is dangerous. |
Locking | Integrated or optional core locks for towers and crossbar connections | Deters theft of expensive rack components. Worth the investment. |
Aerodynamics | Design of feet and crossbars impacts wind noise and fuel efficiency | Aero bars are quieter and cause less MPG drop. Consider if noise bothers you. |
Material | Typically aluminum or steel crossbars; high-grade plastic/composite for feet | Durability and resistance to elements. Trust reputable brands for materials. |
Real Talk: Thule vs. Yakima vs. The Others
You’ll see Thule and Yakima mentioned constantly – for good reason. They’re the giants, with massive R&D budgets and incredibly comprehensive fit guides. Thule systems like the Evo Clamp or Rapid Traverse are super popular for bare roofs. Yakima’s BaseLine or Q Tower systems are equally robust. But don’t sleep on Inno – they offer fantastic value and performance, often with sleek designs. SportRack (owned by Thule) provides excellent budget-friendly options that still prioritize safety and fit. Checking out reviews for systems compatible with your specific car is time well spent. Feeling overwhelmed? Totally get it. Sometimes browsing forums for your exact car model can reveal what other owners successfully use.

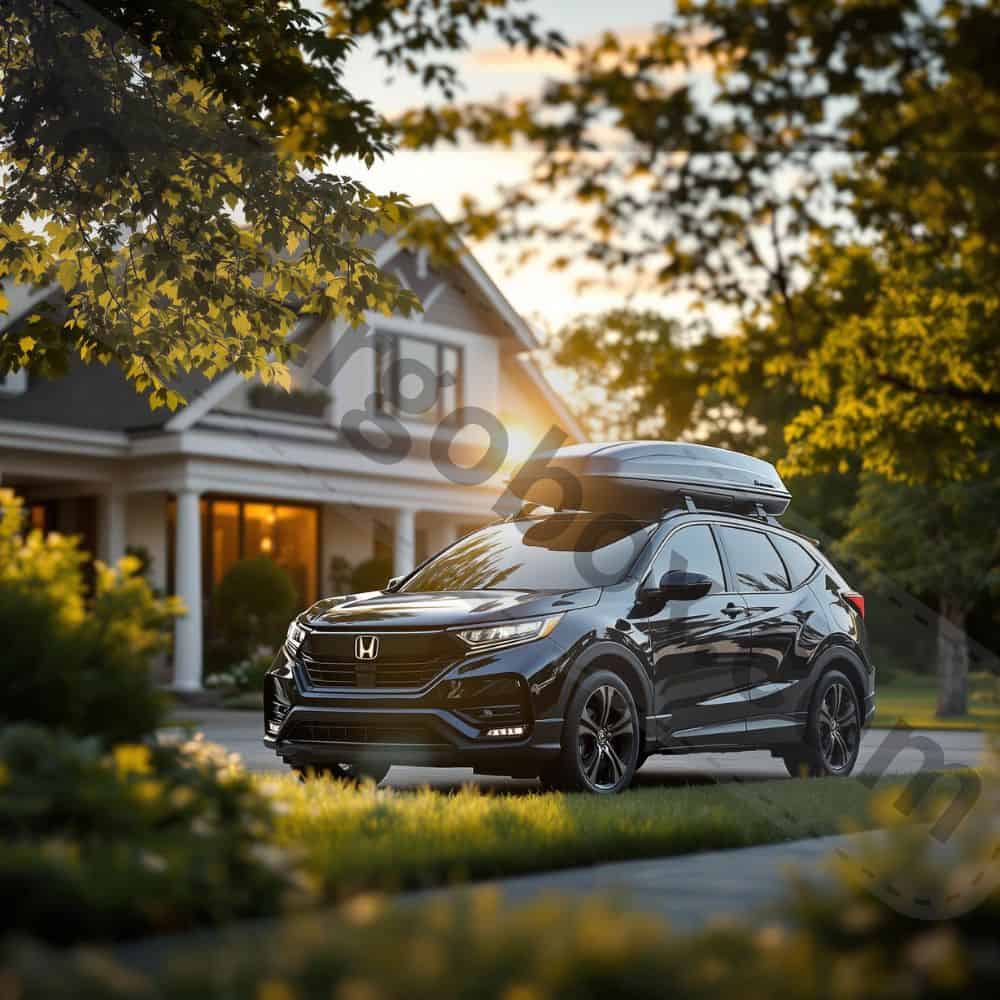
Finding Your Perfect Roof Cargo Box Match
Now for the fun part: picking the box! With your solid base rack chosen and ready to go, you can select from a huge range of cargo boxes. The key here is ensuring the box is compatible with the type and spacing of your crossbars. Most modern boxes use a universal mounting system (like T-track or a clamp style) that works with standard aero or round bars from Thule, Yakima, etc. But you absolutely need to check the box’s mounting requirements against your specific rack setup. Boxes come in all shapes and sizes: long and narrow, short and wide, aerodynamic, hardshell, softshell (though hardshell is generally preferred for security and weather protection). Consider what you need:
- Capacity: How much stuff are you really hauling? Boxes range from 10 cubic feet (perfect for skis/snowboards) up to 21 cubic feet or more (family road trip beast). Remember the weight limit!
- Shape: Low-profile (better MPG, less noise, easier garage clearance) vs. taller (more capacity, easier loading).
- Opening: Dual-side opening is super convenient. Single-side is usually cheaper.
- Security: Look for integrated locks (keyed alike is a bonus!).
- Ease of Use: How easy is it to mount? How stiff is the latch mechanism? Read reviews!
Awesome Box Options Worth Checking Out
Once you know your rack specs, explore boxes that fit. Here are some top contenders, and yeah, we’ve got the inside scoop (check out those internal links for deep dives!):
- Thule Force XT: Awesome blend of space, aero, and value. Comes in multiple sizes. Solid choice for most folks. Learn more about the Thule Force XT specs and user experiences.
- Thule Motion XT: The premium big brother. Super sleek, ultra-aero, fantastic build. If budget allows, it’s top-tier. See why the Thule Motion XT is a favorite.
- Yakima SkyBox: Super popular, known for its durability and user-friendly design. Great capacity options. Explore the Yakima SkyBox features and reviews.
- Yakima RocketBox Pro: The low-profile king for skis/boards or maximizing garage clearance. Less interior height, but super sleek. Get the details on the streamlined Yakima RocketBox Pro.
- Inno Wedge or Shadow: Offer fantastic performance and style, often at a slightly better price point than Thule/Yakima. Great quality. Discover Inno’s sleek rooftop solutions.
- SportRack Horizon: A fantastic budget-conscious option that doesn’t skimp on essential features. Perfect for getting started. Check out the SportRack Horizon value proposition.
- Thule Sidekick: Okay, this one is actually a bag designed for bare roofs with specific mounting, but it’s worth mentioning as an alternative if your needs are smaller. See how the Thule Sidekick works differently.
- Trunx: A newer brand offering competitive features and pricing. Worth a look! See what Trunx cargo carriers bring to the table.
Gathering Your Tools & Prepping Like a Pro
How’s it going so far? Feeling more confident? Awesome! Before you start wrenching, let’s get prepped. You don’t need a mechanic’s garage, but having the right stuff makes life easier. Gather:
- Your roof rack system components (Towers/Feet, Crossbars, Fit Kit parts, Locks, Keys!)
- Your roof cargo box
- The vehicle-specific instruction manuals for BOTH the rack system and the cargo box. DO NOT SKIP READING THESE. Seriously, dude, they contain critical torque specs and placement diagrams for your car.
- A torque wrench (This is non-negotiable for safe installation. Over-tightening damages your car, under-tightening risks failure).
- Basic tools (usually Allen wrenches/hex keys provided with the rack, maybe a screwdriver).
- A tape measure.
- A helper (makes positioning the crossbars and box way easier, trust me).
- Clean microfiber cloths.
- Mild soap and water (for cleaning contact points).
- A level (optional but helpful for crossbar alignment).
Pre-Installation Car Prep: Don’t Skip This!
Give your car some love first. Wash the roof and, crucially, clean the top of the door frames where the clamps will attach. Get rid of any dirt, grime, or old wax buildup. Dry it thoroughly. Why? Because a clean surface ensures the rubber pads on the clamps grip properly and won’t trap grit that could scratch your paint. Take a good look at the clamping areas – any major dents or damage? Probably best to get that checked before proceeding. Finally, park on a level surface. Trying to install this on a hill? Forget it, that’s just asking for misalignment headaches.

Step-By-Step: Installing Your Bare Roof Rack System
Let’s get down to business! This is where patience and precision pay off. Follow the rack manufacturer’s instructions religiously. Here’s a general overview, but your manual is king:
- Identify Clamp Points: Using the manual and fit kit guide, locate the exact spots on your door frames where the tower feet need to clamp. There will be specific measurements from the windshield or rear window. Mark these spots lightly with painter’s tape if needed. Getting this placement wrong affects everything.
- Position the Towers/Feet: Place the front towers onto the marked spots on the driver and passenger side door frames. Don’t tighten anything yet! Just get them seated roughly in position. Repeat for the rear towers. Ensure the feet are oriented correctly (front vs. back matters!).
- Attach the Crossbars: Slide the front crossbar into the front towers according to the manual. Again, don’t fully tighten the clamp bolts yet, just get it snug enough to hold. Repeat for the rear crossbar. Double-check that the crossbars are parallel to each other and perpendicular to the car’s centerline. Use your tape measure to ensure the distance between the bars matches the cargo box mounting requirements and the rack manual’s specs. A level across the bars can help ensure they are even side-to-side (though your car’s roof might not be perfectly level, so focus more on parallel).
- Final Positioning & Torque: Now, meticulously adjust the front-to-back position of the towers if needed. Once perfect, it’s torque wrench time! Following the manual EXACTLY, tighten the tower clamp bolts to the specified torque setting. Do not guess this! Over-tightening can crush your door frame or distort the metal; under-tightening is terrifyingly unsafe. Tighten in stages, alternating sides. Repeat the torque process for the crossbar end caps/clamps that secure them to the towers.
- Install Locks: Insert the locking cores into the towers and crossbar connections as per instructions. Test the keys work smoothly.
- The Tug Test: Give the whole rack a firm, controlled shake and tug in all directions. It should feel absolutely solid, with no movement, shifting, or creaking. If it moves, STOP. Recheck placement and torque. Don’t proceed until it’s rock solid.
Mounting Your Roof Cargo Box Securely
Your foundation is set! Now for the box itself. Always follow the cargo box manufacturer’s mounting instructions. General steps:
- Position the Box: With your helper, carefully lift the box onto the crossbars. Center it left-to-right. Position it front-to-back according to the box manual – often slightly further back than you think to minimize wind buffeting and maximize rear hatch clearance. Mark the ideal position with tape on the crossbars if needed.
- Open the Box & Access Mounts: Unlatch and open the box lid. Locate the mounting mechanisms inside – usually sliding clamps or bolts along tracks near the front and rear.
- Attach Front Mounts: Loosen the front mounting mechanisms. Position them over the front crossbar. Tighten them securely onto the crossbar according to the box manual’s instructions (often involving a specific torque setting here too!). Ensure the clamps are gripping the crossbar properly.
- Attach Rear Mounts: Move to the rear of the box. Loosen the rear mounts, position them over the rear crossbar, and tighten securely. Double-check that the box hasn’t shifted out of position while doing this.
- Final Tightening & Locking: Go back and double-check the tightness of all mounting points. Engage any box-specific security latches on the mounts. Lock the box using its integrated lock(s). Test the locks work. Close and latch the box lid securely.
- The Box Tug Test: Give the box itself a firm shake and tug. It should feel like an extension of the rack – solid and immobile. If it shifts or rattles, identify the loose point and tighten it.
Crucial Safety Checks & Driving Adjustments
Woohoo! It’s on! But hold off on loading it up just yet. Let’s talk safety and driving dynamics because things change up there.
- Double-Check Everything (Again!): Seriously, go back and re-tug the rack and the box. Visually inspect all clamps and connections. Are the crossbars still parallel? Is the box centered?
- Know Your Weight Limits: Remember that dynamic weight capacity? 100-165 lbs is typical. This includes the weight of the EMPTY BOX itself plus everything you put inside. Weigh your empty box. Then weigh your gear. Stay significantly UNDER the limit. Overloading is incredibly dangerous – it stresses the rack, your roof, and drastically affects handling. Distribute weight evenly inside the box, keeping heavier items centered and low.
- Height Clearance: You just added 12-18+ inches to your car’s height. Be hyper-aware of drive-thrus, parking garages (measure the entrance height!), low-hanging branches, and even your own garage door! Measure your new total height and write it on a sticky note on your dash.
- Driving Dynamics: Expect increased wind noise (aero bars/boxes help). Fuel economy will drop – maybe 2-5 MPG or more depending on size and speed. Be prepared for crosswinds to push the car more. Accelerate, brake, and corner more gradually and smoothly. The extra weight up high changes the center of gravity. Allow more stopping distance.
- Regular Checks are Mandatory: Before every trip, and at least every few hours on long drives or after rough roads, pull over safely and check:
- Are all clamps and mounts still tight?
- Is the box securely latched and locked?
- Is the rack still solid with no movement?
- Are the crossbars straight and parallel?
- Legal Requirements: Ensure your license plate isn’t obscured by the box. Check local regulations about overhanging loads (though boxes usually stay within footprint). Lights and reflectors must be visible.
What If You Hear Noise Or Feel Movement?
Whoa there! If you hear something funky up top – a weird new rattle, a sudden whistle instead of the usual whoosh, anything that just doesn’t sound right – don’t just crank the radio louder and hope it stops! Seriously, pull over somewhere safe the second you can. Give that whole setup a good once-over. Maybe one of those clamp feet decided to take a little vacation and isn’t gripping like it should? Could be the box itself shifted a bit on the bars, or hey, maybe your stuff inside is just bouncing around like crazy. Is that whistling just the wind doing its thing, or is it screaming at you that there’s a gap where stuff shouldn’t be? Play detective for a minute. Figure out exactly what’s making that noise and fix it before you hit the gas again. Cruising down the highway with a loose rack or a box that’s not fully secure? That’s not just annoying, it’s a major hazard waiting to happen. For real, ignoring it is rolling the dice you don’t wanna roll. Get it sorted; your gear (and everyone else on the road) will thank you. No joke.
Loading Up Smart: Packing Your Roof Box For Success
Alright, packing time! How you chuck stuff into that roof box seriously changes the game – we’re talking staying safe, keeping the noise down, and not watching your gas gauge plummet faster than your phone battery. Think of it like packing a backpack for a big hike; do it wrong and it’s miserable, do it smart and you’re golden. So, ditch the chaos and let’s get organized up there. Trust me, your future self cruising smoothly down the highway will thank you big time.
First rule? Heavy stuff goes low and smack dab in the middle, right between those crossbars. Picture your bulkiest gear – think that solid cooler full of drinks, your toolbox, or those bins of camping supplies. Plonk those bad boys down first, hugging the floor of the box. Why? Because keeping that weight centered and low stops your car from feeling like it wants to tip over when you take a corner. It’s like building a stable foundation; get that wrong and everything feels shaky. Nobody wants that “uh-oh” feeling mid-turn, right?
Next up, balance is everything. Don’t shove all your weight towards the front, cram it at the back, or pile everything on just one side. Spread the love! Try to make the left and right sides feel about equal, and keep the front-to-back load as even as you reasonably can. Ever tried carrying a super heavy bag on just one shoulder? It pulls you sideways and just sucks. Same deal up on the roof – an unbalanced load makes your car handle like a shopping cart with a wobbly wheel. Aim for equilibrium; it makes the drive way less of a grunt.
Don’t leave empty spaces for stuff to party! Use soft duffel bags, rolled-up towels, or even those inflatable packing cubes to fill the gaps around your gear. Loose items rattling and banging around inside aren’t just annoying (seriously, that constant thumping will drive you nuts), they can actually break your stuff or even damage the box itself over a bumpy road. Secure anything that might shift – it’s a simple step that makes a huge difference in peace and quiet. Think of it as tucking everything in for a safe journey.
Fair enough, your hardshell box keeps most rain out, but let’s be real – it’s not a submarine diving to the ocean floor. For the things you absolutely cannot get wet (think cozy sleeping bags, your favorite hoodie, phones, or a camera), double down. Pack them inside waterproof stuff sacks or sealed plastic bins before they go in the roof box. Especially crucial for long hauls or if you see storm clouds brewing. Tossing in a few silica gel packs helps fight that damp feeling too. Ever opened a bag to find musty clothes? Total bummer. Nice try, Mother Nature, but we’re prepared this time!

Pack smart for pit stops too. Stuff you know you’ll want during the drive – snacks for hangry passengers, an extra sweater when the temp drops, maybe that phone charger – should be the last things you load in. That way, you can grab them quick without having to unpack half the box at a rest stop. Nobody wants to dig through tents and coolers just to find the granola bars! Accessibility makes life on the road way smoother.
Finally, respect the box’s space. If you’re having to sit on the lid or wrestle the latches shut, you’ve gone too far. Forcing it stresses those hinges and the plastic shell, and honestly, it’s just asking for trouble down the line. If it doesn’t close easily, you either packed too much or you need to rearrange things more efficiently. There’s a limit for a reason – pushing past it compromises everything. Know when to say “that’s enough” and maybe leave that giant inflatable flamingo behind this trip.
Long-Term Care & Seasonal Considerations
Alright, you’ve got that roof box humming along perfectly? Sweet! Let’s make sure it stays your trusty adventure buddy for countless trips down the line. Think of it like your favorite pair of boots – a little TLC goes a long way. Seriously, neglecting it means facing headaches later, and nobody wants that mid-road trip grunt. A tiny bit of effort now saves you major hassle (and cash) later, for real.
Give that box and rack a good bath now and then – nothing fancy, just mild soap, water, and a soft cloth or sponge. Skip the harsh chemicals or scrubby pads; they’ll dull the finish or worse. Pay special attention to those rubber pads where the clamps grip your car. Gunk buildup there? That’s bad news, making the grip less reliable and risking scratches. While you’re at it, hit the moving parts – locks, latches, hinges – with a quick shot of dry silicone spray every so often. It keeps things opening smoothly and fights off annoying squeaks. How annoying is that sticky latch when you’re trying to grab gear fast? Exactly.
Planning to stash the box for a while? Maybe winter rolls in and skiing isn’t happening, or you just won’t need the space for months? Don’t just leave it baking up there! Take it off, give it one last super thorough clean inside and out, and make absolutely sure it’s bone dry. Store it somewhere cool and dry, ideally indoors like a garage shelf or basement. If that’s not possible, at least throw a UV-protective cover over it outside. Why? Because the sun absolutely wrecks plastic over time, turning it brittle and sad. Fair enough if you wanna leave the crossbars mounted for convenience, but pulling the whole rack off when you don’t need it? That’s a legit win – less wind noise whistling at you and better gas mileage on your daily drives. No big deal to pop it back on when adventure calls.
Here’s a pro tip most folks forget: Vibration is sneaky. Even if you torqued everything perfectly during install, miles of bumpy roads can slowly work things loose over time. Play it safe. Every few months, or definitely before you load up for a big getaway, grab that trusty torque wrench again. Give all the tower clamp bolts and crossbar connections a quick re-check, tightening them back to the exact spec in your manual. It only takes a few minutes, but it’s your best defense against a scary “what was that noise?!” moment later. Think of it like checking your tire pressure – simple peace of mind.
Lastly, just give everything the eyeball test occasionally. Scan the box shell for any tiny cracks (super rare, but possible, especially if something heavy shifted badly inside). Check those crucial rubber clamp pads – are they cracked, super worn down, or looking rough? Inspect any metal bits for rust or corrosion, especially if you live near the ocean or deal with salty winter roads. Spotting small issues early means you can usually fix them easily and cheaply before they turn into a roadside disaster or force you to buy a whole new setup. Nice try, wear and tear, but we’re staying on top of it!
Busting Myths & Answering Your Burning Questions
You’ve got questions? Totally fair! Let’s tackle some common ones head-on.
Will This Damage My Car’s Roof?
Not if installed correctly with the proper vehicle-specific kit. The clamps are designed to distribute pressure on reinforced areas without causing dents or damage. Using universal fit garbage or ignoring torque specs? Yeah, that could cause damage. Stick with quality brands and follow the instructions, and your roof will be fine. The paint protection from the rubber pads is generally sufficient.
Is It Really Safe Driving With All That Weight Up High?
Absolutely, when you respect the weight limits and drive accordingly. The dynamic weight limit (100-165 lbs total for rack + box + gear) is calculated with safety margins for normal driving forces. Exceeding it compromises safety. Driving like you stole it with a loaded box is also unsafe. Stay under the limit, drive smoothly and attentively, perform regular checks, and it’s perfectly safe. Millions of people do it every day.
How Much Does All This Cost? Is It Worth It?
Let’s be real, it’s an investment. A good bare roof rack system can run $400-$800+. A quality cargo box is another $500-$1500+. So yeah, potentially $900-$2300+ total. But consider the cost: Renting a larger vehicle for a week-long trip can easily cost $800-$1500+. Buying a whole new car with more space? Way more! For frequent travelers, campers, or families, the convenience and long-term value are huge. It pays for itself in avoided rental fees and keeps your daily driver usable for adventures. Plus, resale value on quality gear is decent.
Can I Install This Myself, Or Do I Need A Pro?
Totally get it if you’re eyeing those instructions wondering “Can I really handle this install?” Listen, if you’re the type who doesn’t mind getting your hands a little dirty, can follow steps carefully without rushing, and pays serious attention to details like getting those torque settings just right – yeah, you’ve absolutely got this in the bag. It’s not like you’re rebuilding an engine or anything super wild; it’s more about taking your time, measuring twice, and using that torque wrench like your new best friend. But hey, let’s be real – if the thought of wrenches makes you sweat, or you just don’t feel super confident about where those clamps need to bite down, shelling out a bit for a pro at a local auto shop is a seriously smart play. Why stress yourself out or risk a wonky setup? Getting it wrong isn’t just a “oops” moment; it could mean scary noises, potential damage, or worse on the highway. Your peace of mind and safety? That’s worth way more than saving a few bucks trying to muscle through it alone if you’re feeling shaky. Nice try, doubt, but we’re making safe choices here!
What About Wind Noise And Fuel Economy?
Expect some increase in both. How much depends heavily on the aerodynamics of your rack (aero bars are quieter) and the box (sleek, low-profile boxes are best). Wind noise can range from a mild whoosh to a noticeable whistle. Fuel economy drop is real – think 2-5 MPG or potentially more at highway speeds, especially with a big box. It’s the trade-off for all that extra space. Removing the box when not needed helps significantly.
Ready, Set, Adventure! Your No-Rail Journey Starts Now
Alright, how’s that confidence level looking now? Seriously, I’m hoping you’re feeling pumped and ready to ditch that constant worry about where to cram everything. That frustration of never having quite enough room inside your ride? You can absolutely wave goodbye to it. Putting a roof box on a car without built-in rails isn’t some far-fetched dream – it’s a totally doable, legitimately safe, and honestly freeing solution, if you grab the right gear and stick to the plan. Imagine unlocking a whole new world for your weekend getaways, camping trips, hauling sports gear, or just avoiding the “stuff shoved around your passengers” scenario. How’s that for freedom?
The magic formula is pretty straightforward, honestly: Get the exact fit kit designed for your specific car, never ever overload it (respect those weight limits like your safety depends on it, because it does!), use that torque wrench religiously, give it a solid check before you roll and on long drives, and adjust your driving style for the extra height and weight. Nail those, and you’re setting yourself up for smooth sailing. Forget the stressful packing puzzle inside the cabin. Picture this instead: cruising down the open highway, all your gear securely tucked away overhead, ready for whatever adventure you dream up. Sounds pretty awesome, right? So what are you waiting for? Get planning that next trip! Still curious about specific boxes or rack setups? Peek at those real-user reviews we linked up earlier – they’re jam-packed with honest insights and experiences. Catch you on the road, and drive safe out there!
Our team is creating outdoor-gear relevant articles with passion. If our articles can help you to find the correct solutions for your questions, we will be happy about that. In the content creation process, we usually collect accurate and useful information online or offline to compile our content in an organized way. Consequently, we can guarantee that you can discover some expected answers to your questions. We appreciate your time on our site.