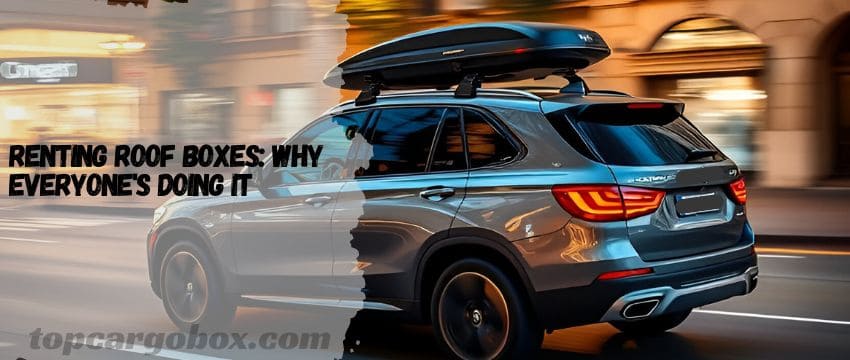
How’s it going, How to pack a roof cargo box? Planning that epic cross-country adventure or maybe just a weekend getaway to the mountains? Totally get it – the open road calls! But let’s be real, stuffing everything you and the family need into the car itself can feel like playing Tetris on expert mode. That’s where a roof cargo box becomes your absolute hero. Seriously, it unlocks so much extra space! But here’s the bummer: just tossing your gear up there willy-nilly is a recipe for disaster. Ever had that sinking feeling when you hear stuff sliding around overhead on the first bumpy road? What if packing it right meant less stress, better fuel economy, and everything arriving safe and sound? That’s awesome, right? No big deal, though – mastering roof box packing is totally doable. Stick with me, and I’ll walk you through every step to make your next trip smoother than ever. Sound good? Let’s bounce!
Why Perfect Packing Matters More Than You Think
Okay, dude, I know what you’re thinking: “It’s just a box on the roof, how hard can it be? Chuck it in and go!” Hold up. For real? Doing it wrong isn’t just annoying; it can be downright dangerous and cost you money. Picture this: you’re cruising down the highway, feeling good, when suddenly the car feels weirdly unstable, like it’s swaying more than it should. That sucks, and it’s often because weight is unevenly loaded up top, messing with your center of gravity. Think about it – your car’s suspension and handling are designed for weight down low. Add a poorly packed box weighing over 100 pounds way up high? That’s crazy! It makes your car handle like a wobbly shopping cart, especially in wind or during evasive maneuvers. Not cool.
Plus, who wants to arrive and find their favorite camping chair snapped in half because a heavy cooler shifted onto it? Or discover their suitcase soaked because the box wasn’t sealed properly against a surprise downpour? Bummer city, population: you. And get this: stuffing things in haphazardly can actually make the box less efficient, creating more wind drag and killing your gas mileage. We’re talking potentially dropping from 25 MPG down to 20 or even less on a long haul. Ouch, that adds up fast at the pump! Finally, exceeding the weight limits? Big mistake. You risk damaging your roof, the box mounts, or the box itself. Trust me, taking the time to pack smart is way less hassle than dealing with those headaches. Fair enough?

Getting Started: Know Your Box and Your Limits
Alright, let’s grunt work first. Before you even think about packing a single sock, you gotta know the rules of the game. First up: your car’s roof. How much weight can it actually handle? No way should you guess this! Dig out your owner’s manual – seriously, do it now – and look for the “maximum roof load capacity” or “dynamic weight limit.” This is the absolute max weight (box + contents) your roof can safely carry while moving. Off the top of my head, many sedans and smaller SUVs max out around 165 pounds, while larger trucks/SUVs might handle 220 pounds or more. Don’t even think about exceeding this! It is what it is.
Next, your cargo box itself. Check its manual or the sticker/label usually inside the lid. It will tell you two crucial things: its empty weight and its maximum load capacity. Subtract the box’s weight from your car’s roof capacity, and boom, that’s the actual weight limit for your stuff. For example: Car limit = 165 lbs. Box weighs 40 lbs. Your gear max = 125 lbs. Write this number down! Totally worth knowing your box’s internal dimensions too – especially length and width at the base. Helps big time when planning how to arrange things. Feeling overwhelmed choosing the right box? Hit me up later, or check out this super helpful guide on how to choose a car roof box to find your perfect match. Catch you later on that!
Key Roof Box Specs You MUST Know
Feature | What It Means & Why It Matters |
|---|---|
Your Car’s Roof Weight Limit | The MAX total weight (box + gear) your car can safely handle while driving. Found in your owner’s manual. Non-negotiable! |
Cargo Box Empty Weight | How much the box itself weighs. Crucial for calculating how much gear you can actually put inside it. |
Box Max Load Capacity | The MAX weight the box structure is designed to hold. Usually found on a label inside the box or in its manual. |
Internal Dimensions (LxWxH) | The actual space available inside, especially width at the base and height. Essential for planning item placement. |
Weight Distribution | The principle that heavier items belong LOW and CENTERED over the roof rails for stability. |
Gathering Your Gear: What Goes Up Top vs. Stays Below
So, you’re psyched and ready to start loading? Hang tight! What’s up with deciding what actually goes in the roof box versus staying inside the car? Smart packing starts with smart sorting. Think of the roof box as your overflow zone for bulky, durable, and less essential items – especially things you won’t need until you arrive or at major stops. You good with that concept?
Perfect candidates for the roof box:
- Bulky Bedding & Linens: Sleeping bags, pillows, blankets, air mattresses (deflated!). They take up crazy space inside but are light and pack flat.
- Tents & Camp Chairs: Usually bulky but relatively light. Just make sure tent poles are secured so they don’t become battering rams!
- Outdoor Gear: Coolers (empty them first! Water is HEAVY), camp stoves (fuel removed and stored safely INSIDE the car – important!), fishing rods (in a protective tube), beach umbrellas, inflatable kayaks/paddleboards.
- Off-Season Clothing: If you’re heading somewhere warm, pack the heavy winter coats and boots up top. Saves tons of cabin space.
- Durable Toys: Bikes (often need a separate rack, but accessories go in the box), sleds, boogie boards, bulky but sturdy kids’ toys.
- Empty Storage Bins: Collapsible bins you’ll use at your destination are great to stash up top.
Stuff that MUST stay INSIDE the car:
- Super Heavy Items: Toolboxes, generators, full water jugs, large cast iron cookware. Remember that weight limit? This stuff blows past it fast. Put it in the trunk or footwells, low down.
- Valuables & Essentials: Laptops, cameras, jewelry, important documents, wallets, purses. Don’t risk theft or potential weather damage.
- Fragile Items: Glassware, ceramics, electronics (unless extremely well padded and non-essential). The roof box vibrates and jostles way more than the cabin.
- Things You Need Access To: Snacks, drinks, diapers, wipes, medicine, entertainment for kids, jackets for changing weather. You don’t want to pull over and unpack the roof box every hour!
- Hazardous Materials & Fuel: Propane tanks, gasoline cans, bear spray, firestarter. For real? These often can’t legally go inside the passenger cabin either and need special secure transport – definitely not loose in the roof box! Check regulations.

Get a kick out of maximizing space? Absolutely consider soft, compressible duffel bags instead of hard suitcases for the roof box. They mold into the shape of the box much better, leaving fewer awkward gaps. Old school rolling luggage has rigid corners that waste precious cubic inches up there. Think about using space-saving bags (vacuum bags) for bulky clothing and bedding – it’s lit how much space they save! Wondering what else these boxes can handle? Check out what car roof boxes can do for you for more inspiration. Awesome!
The Golden Rules: Weight Distribution is EVERYTHING
Alright, here’s the real meat and potatoes of roof box packing. I’m down to tell you this is THE most critical step for safety and handling. Mess this up, and you’ll feel it every mile. What’s the point? Keeping that center of gravity as low and centered as possible over your car’s roof rails. Think of your car like a spinning top – weight high and off-center makes it unstable. Weight low and centered keeps it steady. Legit.
How to nail weight distribution:
- Start Heavy, Low, and Dead Center – No Debating This! Listen up: your absolute heaviest gear – think that empty cooler, your clunky camp kitchen bin, or the toolbox – goes in first, shoved right onto the floor of the box. You’ve gotta line it up smack-dab in the middle, lengthwise, between those roof rails. Picture an imaginary line splitting your roof in half – that’s your bullseye. Why? It locks everything down and stops that sketchy swaying feeling. For real, tossing heavy junk near the front or back? That’s a one-way ticket to wobbly-town, like a gnarly seesaw effect you don’t want at 65 mph. Trust me, zero exceptions here.
- Layer Up Light and Outward – Like Building a Cake! Once those heavy anchors are planted low and centered, it’s your turn to pile medium stuff around ’em – clothes duffels, tents, chairs – still hugging that middle zone. Then? Top it off with the light, fluffy things: sleeping bags, pillows, that puffy duvet. Tuck those toward the outer edges and ends. They’re not just filler; they help smooth out the airflow a bit, like shaping a lil’ aerodynamic pillow fort up there. Nice try cramming it all in one spot – this way, you use space smart and stay steady.
- Balance Front-to-Back – Don’t Be That Person! Okay, heads up: while your heaviest anchors chill near the middle (usually over the axles), you still gotta spread the total weight pretty even between the front and back halves. Don’t dump everything near the tailgate or cram it all up by the windshield. Aim for about 60% of the load’s weight centered in the middle stretch, with the leftover 40% split between the front and rear sections. Why? Load it lopsided, and your steering feels wonky – nobody needs that stress. Need a visual? Peep our cargo box size guide for the deets. Fair enough?
- Fill Gaps (But Don’t Explode the Box!) Here’s the thing: empty pockets mean stuff will slide, rattle, and bang around when you hit bumps. Total mood killer, right? Fix it by stuffing soft items – think clothes, towels, spare blankets – into gaps around your heavier gear. Pack it snug so things can’t wander, but chill – don’t ram stuff in so hard you’re grunting to slam the lid shut or bulging the sides. That’s just asking for cracked plastic or a busted seal. It’s a long shot, but doing this plus securing stuff inside (more on that soon) keeps chaos at bay. How do you feel about finally winning the battle against rogue gear?
Securing Your Stuff Inside the Box (No Shifty Business!)
So you’ve got your weight distributed like a pro. Feeling pretty good? Hang on! How many times have you braked hard or hit a bump, only to hear a terrifying crash-scrape-slide symphony from above? That’s usually stuff moving inside the box itself. Preventing that internal shuffle is crucial for protecting your gear and maintaining that careful weight balance you just worked so hard on. No worries, securing things inside is easier than you think. My bad if I made it sound complicated!
Effective Internal Securing Tactics:
- Bungee Cord Nets are Your Best Friend: Hands down, the easiest and most versatile solution. Stretch a sturdy cargo net (the kind with multiple hooks) across your load inside the box, hooking it to the tie-down points or handles usually molded into the box’s interior sides. Apply tension to compress the load slightly and hold everything firmly in place. You can often use more than one net for different sections. This is legit the #1 tip for preventing chaos.
- Utilize Internal Tie-Down Points: Many boxes, especially larger or more premium models, have built-in D-rings or slots along the floor or sides. Use these! Run ratchet straps or cam straps internally over your heaviest items, anchoring them directly to these points. This is gold for locking down bulky, heavy things like coolers or toolboxes. Just ensure the strap doesn’t rub against sharp edges.
- Strategic Packing with Soft Items: Remember those towels and blankets we mentioned for filling gaps? They double as padding and friction enhancers. Wrap fragile items (even if they are relatively durable, like camp stoves) in towels or clothing. Place blankets between items that might rub together. The friction helps prevent sliding.
- Containers Within the Container: Use smaller, sturdy duffel bags, plastic bins with lids (that fit!), or even cardboard boxes to group similar items together. This keeps small things from migrating and makes loading/unloading sections easier. Just make sure the containers themselves are packed snugly and can’t tip over.
- Avoid Loose, Heavy Missiles: Seriously, are you kidding me? Never toss in loose, heavy objects like tools, rocks, or dumbbells (yes, people do this!). If it can shift and gain momentum, it can become a destructive force inside the box, damaging other items and potentially stressing the box structure. Always contain small heavy items within a secured bag or box.
Ever wonder how long it takes to get all this set up? Get the lowdown on how long to fit a car roof box – packing time is part of the equation! Pretty good to know before you start, right?

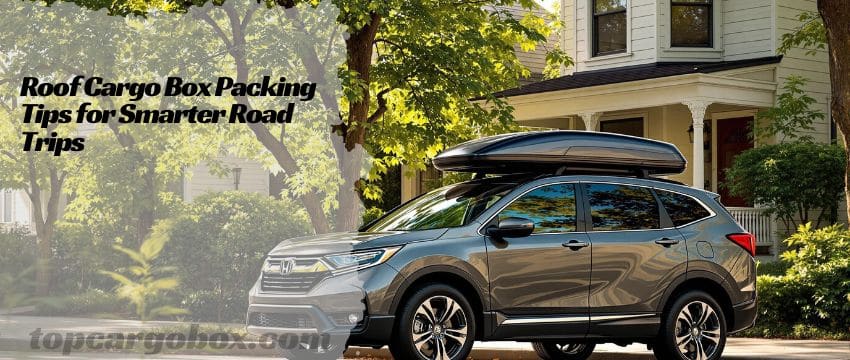
Packing Techniques: Tetris Meets Common Sense
Okay, let’s get hands-on. You know the rules, you’ve sorted your gear, you understand weight and securing. Time to actually pack the beast! How’s it going so far? Don’t stress – think of it like a puzzle where safety is the main prize. Here’s the play-by-play:
- Prep the Box: First things first. Open it wide! Give the interior a quick wipe-down if needed (more on cleaning later). Check that the floor is dry. Locate those internal tie-down points or spots where a net can hook. Got your bungee net(s) and maybe an internal strap or two ready? Awesome.
- Load the Heavy Anchors: Grab your heaviest items (cooler, toolbox, heavy bin). Place them directly on the floor, centered left-to-right (between the rails) and ideally positioned near the middle of the box lengthwise (over the car’s center point). Place them carefully – this is your foundation. If using an internal strap, secure this anchor item now before adding more around it. Snug it down.
- Build the Core: Pack your medium-weight items (duffels of clothes, tents, camp chairs) around and against your heavy anchors. Fill the gaps between them and the sides/ends with softer bags or rolled items. Think stability. You want these items to buttress the heavy stuff and fill the base layer tightly. Use towels or blankets to wedge things if they seem loose.
- Add the Lightweight Bulky Layer: Now pile in your sleeping bags, pillows, inflatable mattresses, and any other large but light items. Place these on top of your core layer and towards the outer edges and ends of the box. They help fill the upper space and create a slightly more aerodynamic profile than leaving a hollow dome.
- Lock it Down Internally: This is crucial! Stretch your bungee cargo net tightly over the entire load, hooking it securely to the interior attachment points. Apply real tension – you should see the net compressing the load slightly. If you have another net or a strap for a specific heavy item, add it now. Give the box a firm shake from side to side and front to back. Hear any shifting? Feel movement? Add more padding (blankets/towels) into gaps or apply more tension. It should feel like one solid block inside.
- Mind the Lid: Before closing, double-check that nothing is poking up so high that it presses forcefully against the lid or blocks the latching mechanism. Also ensure straps or net hooks aren’t dangling where they could get caught in the seal. Gently lower the lid partway to check clearance. All good? Secure the lid according to your box’s instructions (latches, locks, maybe an external strap). Hear that satisfying click? That’s the sound of readiness!
Pro Tip: Off the top of my head, packing the box while it’s on the car is usually easier than trying to lift a pre-packed box up there (which is often unsafe and awkward). Just be careful on that ladder or step stool! Exactly how you access it depends on your car and box height. Safety first, always.
Weatherproofing and Protection: Don’t Let the Elements Win
Mother Nature, am I right? One minute it’s sunny, the next you’re driving through a monsoon. Even the best roof boxes aren’t 100% submarine-proof, but you can take steps to keep your gear dry and protected. Because honestly, opening the box to find soggy sleeping bags sucks big time.
Keeping Things Dry:
- Give Those Seals and Latches a Quick TLC Check: Before you hit the road, take literally two minutes to eyeball that rubber gasket around your box lid. Wipe off any dirt or pine needles stuck in it – those little jerks can wreck your seal without you noticing. Peek for cracks or tears too; even a tiny one is leak city waiting to happen. Then, fiddle with the latches: are they closing smooth? Do they click shut tight without you wrestling them? If they feel gritty, maybe squirt a tiny bit of lubricant (check your manual first!). #1 truth bomb? A busted seal is almost always why people find soggy sleeping bags. Been there? Total bummer.
- Waterproof Bag Everything – Seriously, No Jokes! For real? Trusting just your box seal is like hoping it won’t rain because you washed your car. Nice try. Anything that hates water – clothes, sleeping bags, that fancy down comforter – needs its own fortress first. Shove ’em into heavy-duty trash bags, contractor bags (way tougher!), or legit waterproof sacks before they go in your duffel or the box. Double-bag the super important stuff – think heirloom quilts or expensive gear. It’s stupid cheap insurance, dude. Why risk ruining your trip over a $2 bag?
- Smart Packing = Extra Waterproof Armor Here’s a slick trick: once your gear’s safely bagged, place those waterproof bundles toward the outside edges and top of your load inside the box. Why? If any sneaky moisture does get past the main seal (wind-driven rain is crafty!), those bags become your second line of defense. Think of it like a moisture sandwich! Avoid dumping super sensitive stuff (like electronics, even bagged) right against the box walls though – condensation loves to form there on humid days. Who wants a damp surprise?
- Bonus Hack: Toss in Some Thirsty Silica Gel Buddies: Feeling extra? Grab a few of those little “do not eat” silica gel packs (the big ones work best) and chuck ’em in the box before you seal it up. They quietly suck up stray moisture hanging out in the air inside, which is golden on super long drives through sticky, humid zones or rainy mountain passes. Not a must-do, obviously, but if you’ve got ’em handy, why not? It’s like giving your gear a tiny dehumidifier buddy for the ride. Pretty chill, right?

Protecting Your Gear (Beyond Weather):
- Padding is Paramount: Use towels, blankets, bubble wrap (reused is fine!), or clothing liberally to wrap fragile items and fill spaces. Prevent items from rubbing directly against each other or the hard plastic walls of the box. That camp stove might be metal, but its paint will thank you.
- Contain Small Items: Never, ever toss loose small items into the box. They will disappear into corners, rattle incessantly, and potentially damage other gear. Always pack them into smaller bags or boxes within the main load.
- Mind Sharp Edges: Be aware of items with sharp corners or protrusions (like tent poles, bike parts, some tools). Wrap the sharp bits in cardboard or heavy cloth and position them so they aren’t pressing directly against the box wall or other vulnerable items.
What if your box gets dirty inside or out? No big deal, keeping it clean helps seals last. Check out our simple guide on how to clean your car roof box. Pretty good practice for longevity! I really appreciate a clean gear setup, you good with that?
Hitting the Road: Driving with a Loaded Roof Box
Alright, you’re packed like a pro, the box is latched, and the open road awaits! Feeling awesome? Totally. But hold up – driving with a loaded roof box isn’t quite the same as driving without. It’s not rocket science, but a few adjustments make the journey safer and more comfortable. Who knew a box could change things, huh?
Key Driving Adjustments:
- Mind the Height! This seems obvious, but you’d be surprised. You just added a foot or more to your vehicle’s height. Be hyper-aware of low-clearance obstacles: drive-thru overhangs, parking garages (seriously, measure twice!), low-hanging tree branches (especially on backroads), even some gas station canopies. That “thunk” sound sucks. Big time.
- Leave WAY More Room Ahead – Seriously! That extra weight riding high on your roof? It turns your car into a freight train when you need to stop. Your brakes gotta work harder, and you’ll need way more pavement to come to a halt. Give yourself a huge cushion – like double or triple your normal space – between you and the next guy. Think “if they slam brakes, I need time to chill.” Better safe than spinning out, right? That buffer is your new best friend on the highway.
- Wind & Big Rigs Will Shove You – Don’t Freak! Get ready: crosswinds hitting the side of your loaded box? Feels like a giant hand trying to push you into the next lane. And passing a semi-truck (or getting passed by one)? That air blast is no joke – it’ll rock your ride. Grip that wheel firmly with both hands, stay calm, and just steer gently back on track. No jerking! Expect it every single time you’re near those big rigs. It’s normal, just stay smooth.
- Ease Up on Curves and Ramps – Feel the Lean? Notice how your car tilts more going around bends now? That’s the high-up weight making it feel a bit tippy, like a tall coffee cup you don’t wanna spill. Take every curve, off-ramp, and on-ramp a solid 5-10 MPH slower than usual. Seriously, dial it back. And steer like you’re carrying grandma’s fine china – super smooth inputs, no sharp turns. Jerky moves? Recipe for pucker factor.
- Chill on the Gas & Brakes – Channel Your Inner Zen Driver: Stomping the pedal from a stoplight or slamming the brakes last minute? Big mistake with a roof load. That sudden lurch makes all that weight up top sway and strain your mounts. Instead, pretend there’s an egg under both pedals. Ease onto the gas gently, coast more, and brake early and gradually. Think “smooth operator,” not race car driver. Your gear (and your passengers) will thank you.
- Your MPG Will Take a Hit – Plan for It! Let’s be real: that box turns your car into a giant wind catcher. Aerodynamics? Basically gone. Don’t be shocked when your gas mileage drops – we’re talking 15-25% or even more, especially if you’re cruising over 65 MPH. Yeah, it sucks, but it is what it is. Factor that into your gas budget – maybe add an extra stop or two. Pro tip? Hanging around 60-65 MPH instead of pushing 75+ makes a huge difference in saving fuel. Every little bit helps! (Btw, driving with an empty box? That’s a whole other conversation!)
Ever ponder driving with the box empty? Is it okay? Get the scoop on can you drive with an empty car roof box – the answer might surprise you! That’s crazy, but good to know.
Unpacking and Post-Trip Care: Don’t Just Ditch It!
Woohoo! You made it! Destination achieved, adventure had, memories made. Time to unpack, right? Totally. But don’t just yank everything out and forget the box exists until next year. A little post-trip TLC goes a long way in keeping your roof box in top shape for the next journey. I’m beat after a trip too, but trust me, this is worth it.

Smart Unpacking & Storage:
- Unpack Like a Pro (Not a Tornado!) For real, resist that dump-it-all urge when you open the box. First thing? Unclip those internal bungee nets or straps – don’t just yank gear over them. Then, reverse your packing order: pull out the light, fluffy stuff on top (sleeping bags, pillows) first. Only then dig down for your heavier anchor items. Why? It stops stuff from avalanching out and smacking you or the pavement. Total face-palm moment avoided. Plus, it keeps things organized instead of creating a gear explosion at your feet. How’s it going so far? Smooth, right?
- Sneak in a 5-Minute Clean Sweep: While that box is empty, crack the lid wide open and take a peek inside. Grab a broom or handheld vac – sweep out any dirt clods, leaves, sand, or random trail glitter that hitched a ride. Got sticky spots? A quick wipe with a damp cloth does wonders. It’s not deep cleaning, just kicking out the obvious junk so it doesn’t fester. Want the full spa treatment details? Our how to clean your car roof box guide has you covered. A quick tidy now means way less grime later – nobody enjoys opening a dirty box next trip. Fair enough?
- Do a Quick Damage Check – Future-You Will High-Five You: I know, you’re tired, but spend just five minutes eyeballing things. Scan the box shell for any new cracks or deep gashes you didn’t notice before. Poke that rubber lid seal – is it cracked, brittle, or torn anywhere? Test every latch: do they snap shut smoothly and lock tight? Don’t forget the mounting feet/clamps – look for bent parts, weird wear, or stress marks. Catching a tiny crack or worn latch now saves you from a massive roadside disaster later. Totally worth the tiny effort. Been burned before? Yeah, sucks.
- Air it Out – Kill the Funk Before it Starts: Drove through rain? Packed a damp tent? Leave that box OPEN (prop the lid securely!) in a dry spot like your garage or shed for 1-2 days. Let the air flow through it and whisk away any sneaky moisture hiding inside. Why? Sealed-up dampness equals mold and mildew stink – imagine opening it next summer to a faceful of gym-sock aroma. No thanks! Proper drying stops that grossness dead. Smell something funky already? Oh no… time for a deeper clean!
- Store it Smart – Don’t Just Toss it Aside! Leaving the box on your roof year-round? Nice try, but UV rays are brutal – they’ll turn that plastic brittle and faded, like sun-bleached lawn chairs. The winning move? Get it off the car, into somewhere clean, dry, and shaded. Hanging it from ceiling hooks (if yours has the spots) is gold-star storage. No hooks? Park it on a sturdy shelf or at least on a mat/cardboard (never bare concrete!). Before you walk away, close the latches gently – this helps the lid seal keep its shape, but skip locking it unless it’s safely indoors. Protect your investment! How do you feel about gear that lasts for years? That’s awesome.
Following these steps means your trusty roof box will be ready to rock for your next adventure without any nasty surprises. Exactly how you want it! I’m really grateful for gear that lasts, aren’t you?
Common Packing Mistakes (And How to Dodge Them Like a Pro)
Look, nobody’s perfect. We’ve all made a packing blunder or two. But learning from others’ mistakes (or our own!) is how we level up. Here’s the lowdown on the classic roof box packing fails and how to totally avoid them:
- The Weight Distribution Wobble: Mistake: Heavy stuff at the very front or very back of the box. Why it sucks: Creates a pendulum effect, making the car feel unstable, especially during braking (front-heavy) or acceleration (rear-heavy). Fix: Always anchor heaviest items LOW and CENTERED over the roof rails. No exceptions.
- The Overstuff Shuffle: Mistake: Jamming in so much gear that the lid is bulging or latches are straining. Why it sucks: Stresses the box structure and latches, can break the lid seal causing leaks, and often makes items shift more because they’re under pressure. Fix: Respect the weight limit! Pack snugly but not explosively full. If it doesn’t close easily without excessive force, remove something.
- The Loose Cannon: Mistake: Throwing items in loose, especially small, heavy, or hard objects, with no internal securing. Why it sucks: Items become destructive projectiles inside the box during driving, damaging other gear and potentially the box itself. Constant rattling is annoying! Fix: Use a bungee net! Contain small/heavy items in bags or boxes. Fill gaps. Make it one solid unit inside.
- The “It’ll Be Fine” Weather Gamble: Mistake: Packing moisture-sensitive items (clothes, sleeping bags) without any waterproof protection inside the box. Why it sucks: Even good boxes can seep in heavy, wind-driven rain. Finding soggy gear is a major trip mood-killer. Fix: Bag it up! Use trash bags, contractor bags, or dry sacks for anything that can’t get wet. Cheap and effective.
- The “Forgot the Manual” Limit Breaker: Mistake: Guessing the weight limit or ignoring it entirely. Why it sucks: Risks damaging your car’s roof, the mounting points, the box itself, and critically compromises vehicle handling and safety. Fix: Know your numbers! Car roof limit minus box weight = your gear limit. Use a bathroom scale to weigh heavy items/bags if unsure. Non-negotiable safety.
- The “Set It and Forget It” Mounting Error: Mistake: Not double-checking the box is securely mounted to the roof racks before driving off. Why it sucks: A box coming loose at highway speed is catastrophic. Fix: Every single time you load the box, before driving, physically check each mounting foot/clamp is tight and secure according to the instructions. Give the box a firm shake – it shouldn’t move independently of the car.
Avoiding these pitfalls makes your trip safer, smoother, and way less stressful. That’s for sure. Want the full packing picture? Our ultimate guide on how to pack a car roof box covers even more ground. Check it out!

Final Thoughts: Pack Smart, Travel Farther, Stress Less
Packing That Roof Box? It’s a Legit Superpower, Buddy.
Forget just tossing gear in—nailing this skill totally transforms how you road trip. Imagine: way more breathing room inside the car for your crew, zero last-minute panic trying to Tetris everything into the trunk, plus the freedom to bring that kayak, extra camp chairs, or giant inflatable unicorn because why not? Who wouldn’t wanna roll like that? It’s not just space—it’s peace of mind packed in plastic. Been stressed trying to fit it all before? Yeah, sucks. This flips the script.
You’ve Got the Blueprint Now – Own It!
Lock down your weight limits, sort gear like a pro, anchor heavy stuff dead-center low, strap it all tight inside, weatherproof like a boss, and drive like you’re carrying treasures (’cause you are!). Do this, and that roof box goes from sketchy rattletrap to your silent, trusty co-pilot. Seriously—it turns “ugh, this thing” into “heck yes, more adventure gear!” Every. Single. Trip. How’s that for a glow-up?
Yeah, It Takes Effort Upfront – But C’mon, Look at the Payoff!
Sure, you’ll spend extra minutes loading it right. But stack that against white-knuckle driving from bad weight balance, finding your tent pole punched through your sleeping bag, or worse—a total vacation buzzkill from soaked gear? Totally worth the grind. Picture pulling up, popping the lid, and everything’s exactly where you left it: dry, safe, ready to roll. That feeling? Pure magic. Zero panic. All stoke.
Next Adventure Calling? You’re So Ready.
When that open-road itch hits (and it will!), grab that box like an old friend. Use these tricks, pack it smart, then cruise out knowing your setup’s solid. Hit play on that playlist, point toward mountains or beaches, and go make stories you’ll binge-talk about for years. Drive smooth, stay safe, and soak up every mile. You’ve earned this.
(Psst… still tweaking your packing game? Our ultimate roof box guide dives even deeper!)
Our team is creating outdoor-gear relevant articles with passion. If our articles can help you to find the correct solutions for your questions, we will be happy about that. In the content creation process, we usually collect accurate and useful information online or offline to compile our content in an organized way. Consequently, we can guarantee that you can discover some expected answers to your questions. We appreciate your time on our site.