Seriously, ever been pumped for an epic trip, loaded up your Thule 614 Pulse cargo box, hit the highway, only to be driven nuts by an incessant wobble and that awful, droning whistle? Yeah, me too. It totally sucks. That excitement fades fast when your roof sounds like it’s about to take flight or harbors a swarm of angry bees. I get it – you just want extra space without the extra headache. You want reliability, peace, and quiet. Good news: Achieving a wobble-free, whisper-quiet Thule 614 Pulse install on any roof rack isn’t just possible; it’s totally doable if you nail the details. Forget the frustration; let’s get this done right.
Unboxing & Getting Acquainted with Your Thule 614 Pulse
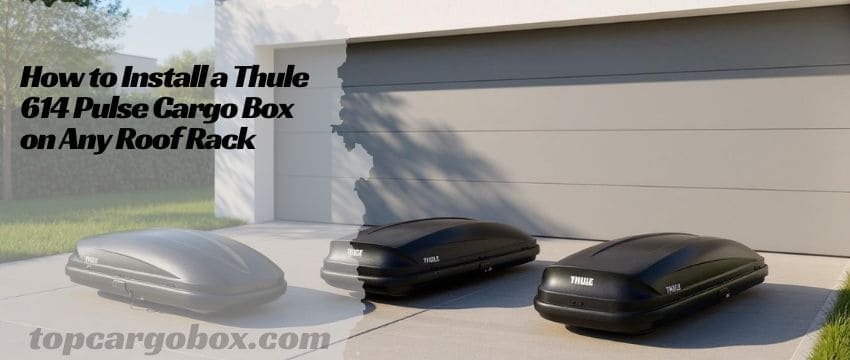
Alright, first things first. How’s it going unpacking that beauty? When you crack open the Thule 614 Pulse box, you’ll find the sleek black box itself, the mounting hardware kit (usually in a little bag or box), and the all-important instruction manual. Don’t toss that manual aside just yet! Give it a quick scan. I know, manuals can feel old school, but Thule packs specific nuances in there, especially about their FastGrip system and the Central Locking. Take a minute to lay out all the parts. You should see the main clamps, likely some T-bolts, the locking cylinders, the Thule Comfort Key, and probably some rubber pads or shims. Spot anything missing? Give Thule customer service a shout before you’re halfway up the ladder. Familiarize yourself with the box itself – locate the mounting tracks underneath where the clamps will attach. Notice how the lid opens passenger-side? That’s a sweet feature for curbside loading. Feeling good so far?
Thule 614 Pulse Cargo Box Key Specs
Medium (614), Large (615), and Alpine (613) – to help you pick the perfect road trip partner:
Feature | Thule Pulse Medium (614) | Thule Pulse Large (615) | Thule Pulse Alpine (613) |
|---|---|---|---|
Best For | Most Vehicles & Versatile Gear | Long Roofs & Max General Capacity | Ski Trips & Low Clearance |
Capacity | 14 cubic feet | 16 cubic feet | 11 cubic feet |
External Dims | 67″ L x 35″ W x 16″ H | 76″ L x 33″ W x 16.5″ H | 88.5″ L x 25.5″ W x 12.5″ H |
Internal Dims | 61″ L x 33″ W x 14″ H | 71.25″ L x 31″ W x 14.5″ H | 82.75″ L x 23.5″ W x 10.5″ H |
Shape Profile | Tall & Boxy – Great for bulky items | Longer & Taller – Maximizes volume | Super Long & Sleek – Low wind resistance |
Height Off Bars | 16 inches | 15 inches | 11.3 inches |
Weight (Empty) | 34 lbs | 36 lbs | 30 lbs |
Snowboards | Fits 3-5 boards (max 155cm) | Fits 3-4 boards | Fits 3-4 boards |
Skis | Not specifically listed (best for boards) | Fits 4-6 pairs | Fits 4-6 pairs |
Key Strength | Width & height for suitcases, bins, bulky gear | Largest overall cargo volume | Aerodynamics, garage clearance, ski length |
Watch Out For | Wind noise if placed too far forward | Overhang on short roofs, garage height | Narrow width limits bulky items |
Pre-Installation: Your Roof Rack Health Check
Before we even touch the box, let’s talk about what it’s sitting on: your roof rack. This is where so many wobble and noise problems start. Off the top of your head, when did you last really inspect those crossbars? Give them a solid once-over. Are they the factory OEM bars that came with your car, or aftermarket ones like Thule WingBar Evo or Yakima JetStream? Factory bars are notoriously flimsier and more prone to flexing and noise than dedicated aftermarket bars. Run your hands along them. Any significant dings, bends, or cracks? Even a slight bend can throw everything off. Next, grab each bar firmly and try to shake it, twist it, and move it side-to-side. Does it feel solidly anchored to the roof rails or feet? Or is there noticeable play, movement, or – worse – actual looseness?

Any movement here will be magnified tenfold once you add the wind-catching profile of the cargo box. If your rack feels loose, stop everything and tighten it according to its manual first. Wondering if your current rack is up to snuff? It might be worth checking out comparisons like the Thule Motion 3 vs Yakima Low to see if an upgrade makes sense, especially if you’re planning more adventures. Also, are your crossbars parallel? Grab a tape measure. Check the distance between them at the front and the back. If they’re even slightly skewed, the box will bind or stress the mounts. Finally, clean the tops of those crossbars! Dirt, grime, or old rubber residue prevents the clamps from gripping properly. A quick wipe-down with isopropyl alcohol works wonders. Feeling confident about your rack’s foundation now?
Positioning the Box: Location is Everything
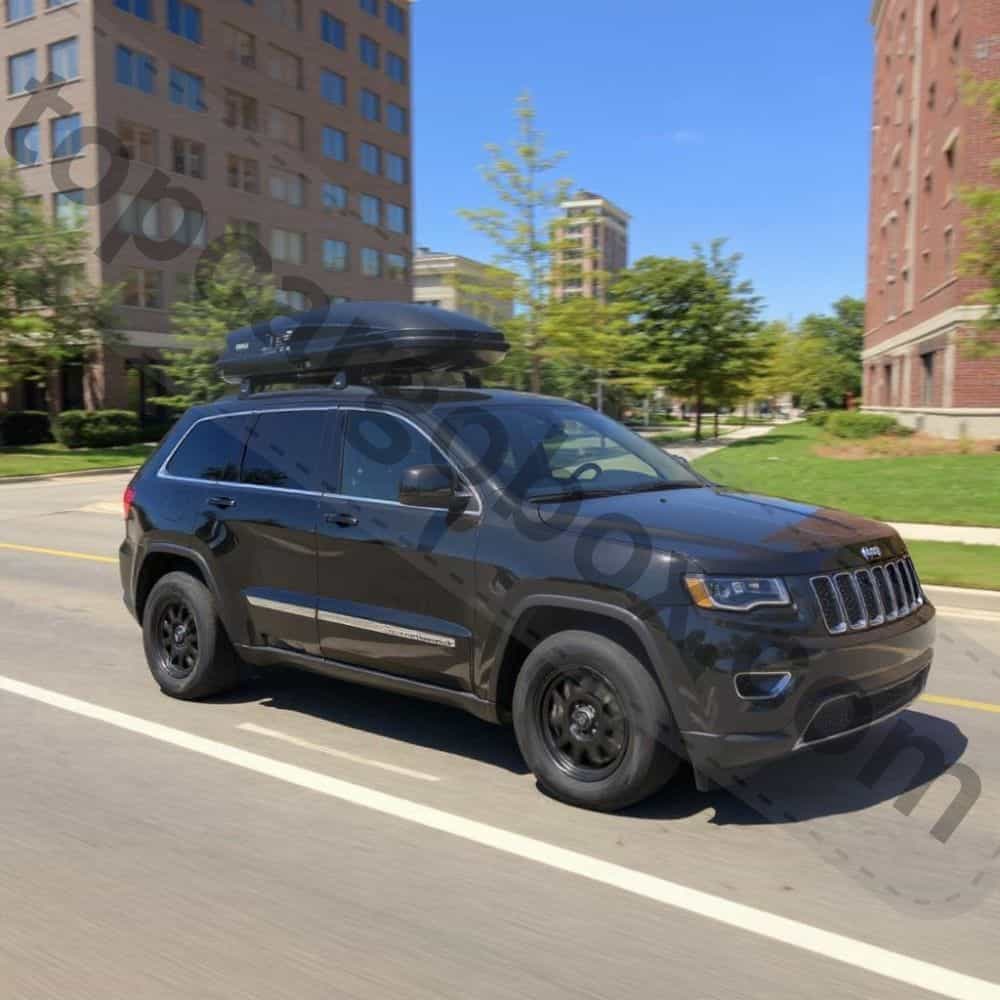
Alright, let’s get your Thule 614 Pulse up on the roof! Seriously, this isn’t just about getting it on there; where you plop it down makes all the difference between a smooth, quiet ride and a noisy, shaky nightmare. Forget just chucking it up anywhere and hoping for the best – that’s asking for trouble. First rule? Get it centered side-to-side. Step back and eyeball it; it should look perfectly balanced from the front or rear bumper, not leaning off to one side like it had one too many. But here’s where the real secret sauce is: front-to-back placement. You absolutely want the front edge of the box sitting just a tiny bit back – we’re talking roughly 1-2 inches – from the very front of your car’s roof (think where the windshield meets the roof or just behind a sunroof). Why sweat this tiny gap? It lets the air rushing over your windshield flow smoothly up and over the box instead of slamming into it. Get this right, and you massively cut down on that awful wind buffeting and whistling that makes you want to turn the radio up to max. Nice try just guessing, but precise placement is key.
Mess up this spot, and you’ll definitely feel it. Slide the box too far forward? Congrats, you’ve basically built a giant scoop on your roof that grabs all the turbulent air, creating drag, noise, and maybe even making your car feel sluggish. Not awesome. Push it too far back towards the tailgate? Now you’re potentially overloading the rear suspension more than needed, and you might find you can’t even pop your trunk or hatch open without a crunch – total bummer. Ever notice how some folks seem totally chill driving with a roof box while others look stressed? Nine times outta ten, it’s because they nailed this positioning sweet spot. Oh, and think ahead about how you’ll pack it! If you know you tend to stash heavier gear towards the back of the box, positioning the whole unit just a smidge more forward over the car can help balance things out naturally. And hey, don’t just take my word for it – give your vehicle’s manual a quick peek. It might have specific zones marked for roof loads, especially on EVs like the Cadillac Lyriq, where that 110 lb max matters even more. Getting this placement dialed in perfectly makes everything else about the install way simpler. Trust me, it’s worth the extra minute.
Mastering the Thule FastGrip System
Here’s where the Thule 614 Pulse shines and where getting it tight is non-negotiable. The FastGrip system is legit awesome for quick mounting, but “quick” doesn’t mean “sloppy.” Open the box lid to access the mounting tracks. You’ll see the pre-installed clamps inside the tracks. Loosen them significantly using the tool usually provided (often a flat wrench or hex key) – you need plenty of room to maneuver. Carefully lift the box onto your crossbars, aligning the mounting tracks directly over each bar. This is way easier with two people, but manageable solo if you take it slow. Once it’s roughly sitting centered on the bars, it’s clamp time. Work on one clamp at a time. Slide the clamp assembly so the jaws firmly grip the side of your crossbar, not just the top. This side grip is essential for stability. Now, tighten it down. But how tight is tight enough? This is the million-dollar question to prevent wobble.
Thule says tighten until you see the rubber pads compress significantly. You should be putting some decent grunt into it – think firm handshake pressure on the wrench, not just finger-tight. You want those rubber pads squished and conforming to the shape of your crossbar. Under-tightening is the #1 cause of box movement. Do all four clamps this way. Seriously, don’t skip the effort on any of them. Give the box a firm shake side-to-side and front-to-back. Any movement? Tighten more! That initial “is this too tight?” feeling is usually just right. Feeling the burn? Good!
Securing it Like Fort Knox: Locks & Safety
Dude, nice work getting that Thule 614 Pulse clamped down tight! Seriously, feeling pretty good about it, right? But hold up – tight isn’t the only thing that matters. You gotta make darn sure that box isn’t going anywhere and your gear inside stays locked up tight too. That’s where Thule’s slick Central Locking system and that little Comfort Key become your best friends. See those lock cylinders near each mounting foot? Grab your key and slide it into the main one, usually hanging out near the front of the box. Give it a solid turn. Listen close and feel for it – you should hear and sense four distinct, satisfying CLUNKS as the locks at every corner snap securely into place. That sound is pure music!
But here’s the absolute golden rule you cannot skip: That Comfort Key should ONLY slide out smoothly when every single one of those four locking points is 100% fully engaged and secure. If you can yank the key out but something feels loose or one corner didn’t quite clunk? Whoa, red flag! Something’s definitely off. Go back immediately and double-check each clamp and lock point. Don’t just shrug it off – this little key trick is your built-in, foolproof guarantee everything is truly locked down. For real, never ever hit the road without testing this key-removal step. It’s your instant safety check, plain and simple.
Think of that key sliding out easily as your green light, your all-clear signal. It’s Thule’s genius way of giving you peace of mind right in your hand. Pretty cool, huh? Oh, and remember, that same key locks the actual box lid itself. So once you’ve stuffed all your adventure gear inside, slam that lid shut, latch it, and turn the key. Double-check it’s actually locked before you pull away – a simple habit that saves major headaches down the road, especially at crowded trailheads or rest stops. Just picture arriving somewhere only to find your lid flapping open because you forgot that last turn of the key. Total facepalm moment, right? This whole system keeps your stuff safe and lets you actually relax on your drive. Stressing about scratching a leased ride with a roof box? Totally get that worry – we dive into those specifics over here. Taking these extra seconds to lock it down right means you can cruise easy, knowing your gear and your setup are solid. No second-guessing, just smooth travels.
Silencing the Whistle: Noise Reduction Tactics
Okay, the box is on tight and locked, but what about that dreaded wind noise? Don’t worry, we can tackle this. Noise usually comes from gaps, vibrations, or turbulent airflow. First, re-check your positioning. Is the front edge slightly behind the windshield header? Even being an inch too far forward can make a huge difference. Second, inspect the seal between the box and the crossbars. Are the rubber pads on the FastGrip clamps making full, clean contact without any gaps? Sometimes adjusting the clamp position minutely helps. Third, vibration. Did you tighten every clamp sufficiently? A slightly loose clamp can vibrate like crazy at speed. Give them another firm tweak. Fourth, consider airflow. If your vehicle has a factory roof rack with raised rails or an awkward shape, it can create turbulence hitting the box.
A front fairing (wind deflector) designed for your specific roof rack system is often the absolute best solution. It smooths the airflow transition onto the box. Thule and Yakima make great ones. It might seem like an extra cost, but for highway serenity, it’s worth every penny. Lastly, ensure the box lid is sealing perfectly. Clean the gasket if it looks dirty. A whistling lid seal is less common but possible. How does your setup sound now? Hopefully much quieter!
Loading Like a Pro: Preventing Wobble from Within
You might be thinking, “I installed it perfectly, why is it wobbling now?” Often, the culprit is how you load it. This is huge! The Thule 614 Pulse has a solid 110 lb capacity, but distributing that weight correctly is key to stability. Never, ever overload the front or the back. Think of the box like a seesaw centered over your crossbars. Heavy items placed right at the very front or very rear create leverage, amplifying any tiny movement into a noticeable wobble. The golden rule: Pack the heaviest, densest items (like toolboxes, coolers full of drinks, heavy duffels) directly over the crossbars, centered between them.
Place medium-weight items around those anchors. Lightest items (sleeping bags, pillows, jackets) go towards the very front and very rear of the box. Aim for a balanced load, not necessarily symmetrical, but centered over the support points. Avoid packing things so tight they strain the box walls, but also avoid loose items that can shift and throw off balance during driving. Securing items inside with bungees or nets helps. Need ideas on what to pack? We’ve got a whole guide on maximizing your roof cargo box space. Loading smart makes a massive difference in how the box behaves on the road.
The Critical Pre-Drive Checklist & Testing
You’re almost there! Before you hit the gas, let’s run through a final, super-important checklist. This is your wobble-and-noise prevention insurance policy:
- Clamp Check: Physically try to twist or move each FastGrip clamp. Does it feel absolutely rock-solid? No movement whatsoever? Good.
- Lock Check: Confirm the Comfort Key inserts and turns smoothly. Crucially, does it ONLY come out when fully locked? Try removing it without locking – it shouldn’t budge!
- Crossbar Check: Re-grab your crossbars. Any movement now that the box weight is on them? If yes, you need to revisit your roof rack’s tightness, not the box clamps.
- Visual Alignment: Step back. Does the box look centered side-to-side? Is the front edge positioned correctly relative to the windshield?
- Lid Check: Is the lid fully closed, latched, and locked? Give the lid a gentle upward tug along the seal – no movement or gaping?
- The Tug Test: Firmly grasp the loaded box and try to shake it vigorously side-to-side and front-to-back. Hear any clunks? Feel any movement relative to the car? If yes, trace the source (likely a clamp needs tightening).
Now, for the real test: Drive. But start slow. Head out on local roads first. Listen intently. Any new sounds? Whistles, hums, rattles? Feel any vibration through the steering wheel or chassis? Gradually increase speed. Hit 45-50 mph – this is often where noise or wobble becomes apparent if it’s going to. If you hear or feel something, pull over safely and investigate. Is it wind noise? Recheck positioning and consider the fairing. Is it a rhythmic thump or shake? Recheck clamp tightness and load distribution. Don’t just ignore it hoping it will go away – it usually gets worse. Nailing it now means peaceful cruising later. Is a roof box even worth this effort? Totally, when done right – see why they can be a game-changer.
Long-Term Care & Wobble Prevention
Sweet, your Thule 614 Pulse is riding smooth and quiet – seriously satisfying feeling, right? But let’s be honest, that awesome performance won’t magically last forever if you ignore it. Think of it like your favorite pair of boots; a little regular care goes a long way. Make it super simple: Before any big road trip, and honestly at least once or twice a season even if it’s just chilling up there, give those FastGrip clamps a quick once-over. Grab your wrench and just check they’re still nice and snug. It literally takes less than two minutes, but skipping it? That’s asking for a wobble surprise halfway to the mountains.
Why bother? Extreme temps, constant road vibrations, and the simple act of loading and unloading your gear can slowly, sneakily loosen things up over weeks or months. Don’t let it happen! And hey, when you’re washing your car, give the cargo box itself and those mounting tracks underneath a decent rinse too. This is super important if you drive where they salt the roads in winter or love muddy backroad adventures. Grit and grime building up in the tracks can totally mess with how well the clamps grip and slide later. Nasty stuff!
While you’re up there giving things a look, take a sec to eyeball the rubber pads on the clamps themselves. How are they holding up? See any cracks starting, little tears, or are they looking super thin and worn down? If so, it’s no big deal – replacing those pads is cheap and easy, but crucial for keeping a solid, silent grip on your crossbars. Old, busted pads mean noise and potential slippage. Nobody wants that. Also, remember those locks and hinges? Every now and then – maybe once a year or so – squirt a little graphite-based lubricant (not regular oil, that just attracts dirt like a magnet!) into the key cylinders and the lid hinges.
Keeps everything turning smoothly and prevents frustrating jams. If you leave the box mounted for months on end, still stick to those quick seasonal checks. And when adventure season winds down and you take it off? Don’t just chuck it in a corner! Give it a good clean inside and out, make sure it’s bone dry, maybe even hit the outside with a UV protectant spray to keep that black plastic from fading. Store it somewhere cool and dry, ideally hanging from straps or resting securely on its side like the manual suggests – definitely not buried under heavy junk in the garage where it could get warped. Need the full lowdown on keeping it pristine off-season? We’ve got killer tips on smart roof box storage when it’s not in use. Treating your Pulse right means it’ll reliably haul your gear, trip after awesome trip, without any drama. Totally worth the tiny bit of effort!
Troubleshooting Persistent Wobble or Noise
Feeling under the weather because you followed the steps but still hear a rattle or feel a shimmy? Don’t sweat it yet; let’s troubleshoot. First, double and triple-check the absolute basics: Clamp tightness and lock engagement. Seriously, 90% of “persistent” issues trace back to something just needing another quarter turn. If clamps are tight and locks engaged:
- Identify the Noise/Vibration: Is it a high-pitched whistle? Focus on airflow (positioning, fairing). A low rumble/hum? Often aerodynamic too, but could be resonance. A rhythmic thumping? Usually points to something loose (clamp, rack component) or an unbalanced load shifting. A metallic rattle? Something internal loose in the box or potentially rack-related.
- Crossbar Culprit: Isolate the source. Drive without the box. Is the noise still there? If yes, the problem is definitely your roof rack system (feet, bars, connections). Tighten everything per the rack manual. If the noise vanishes without the box, the issue is box-related (installation or load).
- Load Check: Unload the box completely. Drive. Is the noise gone? If yes, your loading strategy is the culprit – redistribute the weight focusing heavy items over the bars. If the noise persists empty, it’s installation or the box itself.
- Clamp Position: Try slightly adjusting the position of one clamp at a time on a crossbar. Sometimes a tiny shift changes how forces are distributed. Ensure all rubber pads are intact and clean.
- Rack Compatibility: Are you using factory crossbars? Many factory bars simply lack the rigidity needed for completely wobble-free box use, especially when loaded. They flex. This flex translates to movement you feel and hear. Upgrading to robust aftermarket bars like Thule WingBar Evo or Yakima JetStream is often the ultimate solution. Compare options like Yakima GrandTour vs Thule Motion bars if you’re thinking upgrade.
- Box Inspection: Check the box mounting tracks for cracks or damage. Ensure the FastGrip mechanisms inside the tracks move smoothly and clamp evenly. If you suspect a defect, contact Thule support. They’re generally pretty helpful.
Conclusion: Enjoy the Quiet, Wobble-Free Ride!
Dude, you did it! Seriously, pat yourself on the back. Installing your Thule 614 Pulse cargo box rock-solid and quiet isn’t rocket science, but it demands attention to those critical details we walked through. It boils down to: a solid rack foundation, meticulous clamp tightening, smart positioning, balanced loading, and regular check-ins. Forget the white-knuckle drives wondering if your gear is okay or if that noise will ever stop. Now you can confidently pack that 14 cubic feet of space, hit the open road, and actually enjoy the journey. Crank up the tunes, have a conversation, or just soak in the quiet. That’s the freedom a properly installed roof box brings. Safe travels, and make some awesome memories out there! Need tips for specific setups, like putting this box on a Cadillac Lyriq? We’ve got you covered on Lyriq roof rails and weight considerations. Catch you later!
Our team is creating outdoor-gear relevant articles with passion. If our articles can help you to find the correct solutions for your questions, we will be happy about that. In the content creation process, we usually collect accurate and useful information online or offline to compile our content in an organized way. Consequently, we can guarantee that you can discover some expected answers to your questions. We appreciate your time on our site.