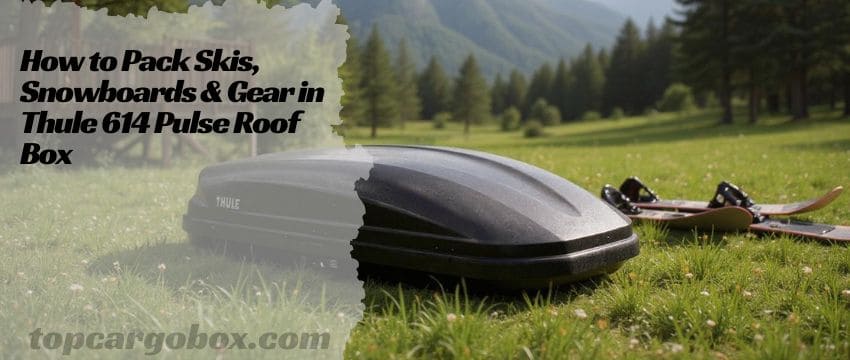
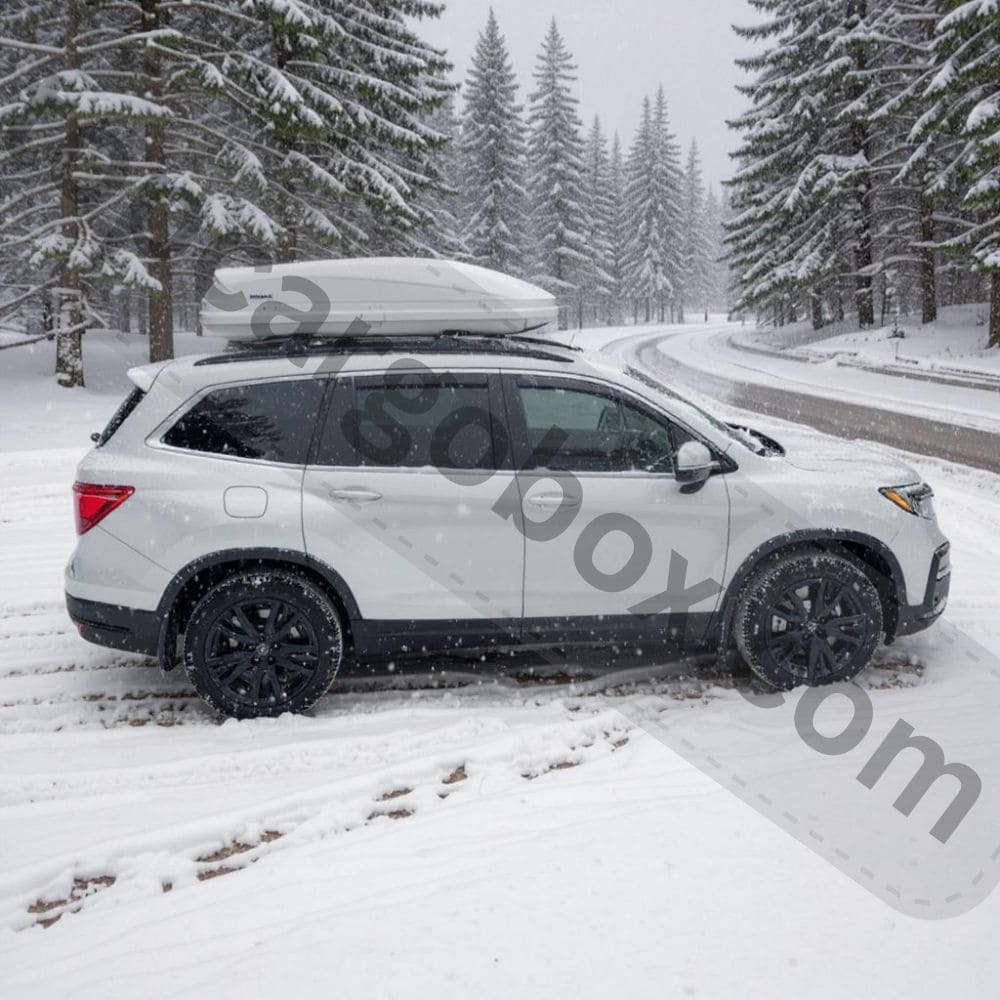
What’s up, snow chasers? Ever stood staring at your car, buried under a pile of skis, snowboards, boots, and gear, wondering how on earth it’s all going to fit? And then you remember you’ve got that awesome Thule 614 Pulse Box perched up top – your secret weapon for extra space. But let’s be real, just tossing everything in there willy-nilly is a recipe for scratched bases, tangled bindings, and that sinking feeling you forgot something crucial after you’ve locked it all down. Been there, done that, got the dented board to prove it? Totally sucks. What if you could unlock its max capacity safely and efficiently, fitting everything you need for an epic trip without the pre-departure stress headache? Dude, it’s totally possible! This guide is your deep dive into transforming your Thule 614 Pulse from a simple storage box into a perfectly organized, gear-protecting powerhouse. We’re talking real-world hacks, battle-tested strategies, and the nitty-gritty details to make packing a breeze. Get ready to ditch the chaos and pack like a pro!
Understanding Your Thule 614 Pulse Box: The Foundation
Before we start stuffing things in, let’s get intimately familiar with your trusty Thule 614 Pulse. Knowing its strengths and quirks is half the battle won. Think of it like understanding the exact dimensions of your favorite backpack before a big hike – it just makes everything flow better.
Key Specifications & Features: Your Blueprint
Alright, let’s break down the vital stats. This isn’t just boring numbers; this is your packing bible! Knowing these figures cold means you can plan precisely and avoid nasty surprises (like realizing your brand-new powder skis are just a bit too long – bummer!). Check out the essentials:

Feature | Specification for Thule 614 Pulse Box |
|---|---|
Internal Dimensions | 71.25″ L x 31″ W x 14.5″ H |
External Dimensions | 76″ L x 33″ W x 16.5″ H |
Weight Capacity | 110 lbs (Max!) |
Box Weight | 36 lbs |
Volume Capacity | 16 Cubic Feet |
Ski Capacity | Fits 4-6 pairs (depending on size/bindings) |
Snowboard Capacity | Fits 3-4 boards (depending on width/bindings) |
Opening Style | Single-side (Passenger Side) |
Mounting System | FastGrip Quick-Mount |
Locking System | Central Locking + Thule Comfort Key |
Material | Rugged ABS Plastic |
Min Bar Spread | 23-5/8″ (600mm) |
Why These Numbers Matter for Packing
Seriously, why should you care about 71.25 inches long inside vs. 76 inches outside? Because those precious inches are eaten up by the box walls! Trying to cram a 185cm ski (that’s 72.8 inches, folks) diagonally might be a long shot if you don’t account for the angle and the wall thickness. Knowing the internal height is 14.5 inches tells you instantly if that bulky boot bag standing upright is a dream or a non-starter. And that 110 lb limit? Crucial! Overloading isn’t just unsafe, it can damage the box and your roof rack. Ever tried lifting a fully loaded box that’s over limit? Not fun, and definitely not recommended. Weigh your gear beforehand if you’re pushing it – better safe than sorry on the highway.
The Passenger-Side Opening: A Loading Game-Changer (Mostly!)
Thule designed the Pulse to open conveniently from the passenger side. How’s that helpful? Imagine parallel parked on a snowy mountain road. Standing safely on the sidewalk/curb side to load is legit awesome. No more leaning precariously over traffic! The built-in lid lifters are a godsend too, holding the lid open hands-free while you wrestle gear in. But, here’s a real-talk moment: it also means accessing stuff near the driver’s side wall requires a bit more reach. Annoying when you just need that one glove buried deep? For real. Planning what goes where based on access needs becomes key – things you might need mid-trip (like extra layers or snacks) go near the opening!
Pre-Packing Prep: Setting Yourself Up for Success
Okay, you’re psyched and ready to pack. Hold up! Rushing in is how bindings get snapped and goggles get crushed. A little prep goes a massively long way. Let’s get organized before we even touch the box.
Gear Gathering & Inspection: The Essential First Step
Round up everything you think you need. I mean everything – skis/boards, poles, boots (in their bag?), helmets, goggles, gloves, base layers, outerwear, tools, maybe even the sled for the kids. Lay it out in the garage or driveway. This visual inventory does two huge things: First, you spot anything missing before it’s panic time at the mountain. Forgot your transceiver battery? Oh snap! Now’s the time to replace it. Second, you get a true sense of the volume and bulk you’re dealing with. Seeing it all spread out makes that 16 cubic feet feel real. It also lets you group items logically – soft goods together, sharp/heavy items needing protection, long items needing diagonal placement.
Essential Protection: Guard Your Investment!
Your gear is expensive! Protect it from each other and inside the box. Ski and snowboard edges are viciously sharp. Bases scratch if you so much as look at them wrong on gravel. How terrible would it be to find your pristine board gouged by a ski edge during transit? Totally avoidable. Use dedicated ski/snowboard bags if you have them – they’re the gold standard. No bag? No big deal (but maybe consider getting one!). At the very least:
- Use Socks or Tip/Tail Guards: Old tube socks pulled over the tips and tails prevent scratches and protect edges. Cheap and effective!
- Bindings are Knobby: Pack bindings facing away from other gear, especially delicate fabrics or other boards/skis. If stacking boards, put bindings together or binding-to-base.
- Wrap Delicates: Goggles and helmets are crushable. Stuff helmets with gloves/hats for internal support, and pack them surrounded by soft items like jackets or pants. Goggles go in their hard case always.
- Separate Sharp Tools: Screwdrivers, files, tuning kits? Wrap them in a towel or put them in a small tool bag. You don’t want them rattling loose and damaging anything.
Cleaning & Drying: Prevent the Funk!
This one’s simple but often overlooked. Never, ever pack wet or snowy gear! Come on, we’ve all been tempted after a long day, but stuffing soggy gloves or a snow-caked board in a sealed box is begging for mold, mildew, and a stench that’ll knock you out next time you open it. Give everything a chance to dry out, even if it’s just a quick wipe down. Your future self (and car mates) will thank you. Feeling under the weather from gear funk is the worst start to a trip.
Mastering Ski & Snowboard Packing: The Core Challenge
Alright, let’s tackle the big guys – the skis and snowboards. They’re long, awkward, and often the reason you bought the box in the first place. Getting these in efficiently and safely is mission critical.
Optimal Orientation: Diagonal is King (Usually!)
Off the top of my head, most people just chuck them in straight. Big mistake! Laying skis or boards straight down the 71.25-inch length eats up nearly all the space, leaving little room for anything else. The magic trick? Go diagonal. Angle them from the front passenger corner towards the rear driver-side corner (or vice-versa). This utilizes the maximum internal width (31 inches) and actually frees up significant space along the sides and center. It’s like Tetris for grown-ups! How much space can you save? Legit, sometimes the difference between fitting 4 boards and 5 boards, or having room for boots and the duffel. Experiment with the angle – sometimes a shallower angle fits more pairs, sometimes a steeper angle creates better side pockets. This low-profile design gives you just enough height (14.5 inches) to make this work beautifully without excessive stacking pressure.
Binding Management: The Key to Stacking
Bindings are the bulky, awkward bits that complicate stacking. How do you handle them?
- Bindings Down (Skis): Place the first pair base-down. If adding a second pair, stack them binding-to-binding. This locks them together and prevents the bindings from grinding on the delicate bases below. Need a third pair? You might need to go bindings-down again on top, carefully nesting bindings.
- Bindings Together (Snowboards): Snowboards stack best when placed binding-to-binding. This centralizes the bulk and creates a more stable stack. Place the first board binding-up or binding-down based on what else is going in. If stacking multiple, alternate the binding direction if possible to even out the stack height.
- Utilize the Corners: The corners offer slightly more height thanks to the box’s curved profile. This is often the only spot where boards with very tall bindings (or skis with large demo bindings) can stack without excessive pressure on the lid. Position the tallest bindings in the corners.
Maximizing Pair Count: Pushing the Limits Safely
The specs say 4-6 skis or 3-4 snowboards. Hitting the upper end requires smart packing and sometimes a bit of finesse (and gear compatibility).
- Ski Hacks for 6 Pairs: This often requires shorter skis (kids skis help!), minimal bindings (race bindings are lower profile), and perfect diagonal stacking with bindings nested efficiently. Pack the longest skis on the bottom layer. Use ski straps to bundle pairs tightly together before putting them in the box – it makes them easier to handle and keeps them neat.
- Snowboard Hacks for 4 Boards: Focus on standard-width boards (not super-wide powder boards). Stack them tightly binding-to-binding. Wider boards will naturally limit how many you can fit side-by-side diagonally. Sometimes placing one board flat and one angled on top works. Remember the 110 lb limit! Four boards, bindings, and other gear adds up fast. Weigh them if unsure.
- Mix & Match: Got a combo of skis and a board? Totally doable! Place the snowboard first, often flat on the floor or at a shallow angle, then position skis diagonally above or beside it, managing bindings carefully. The board can act as a partial “floor” for softer items placed on top later.
Packing Poles: Don’t Let Them Become Spears!
Ski poles are long, pointy, and surprisingly destructive if loose. Never just toss them in! Best practice:
- Bundle Them: Use a ski strap or a dedicated pole strap to bundle all poles together tightly, tips and grips aligned.
- Position Securely: Place the bundled poles along one side wall, ideally tucked beside or slightly under the diagonal skis/boards. The skis/boards help hold them in place. Alternatively, strap the bundle directly to a pair of skis before loading them.
- Tips Protected: Ensure the sharp pole tips are pointing towards the front of the box or safely tucked away, not jabbing towards soft bags or the box liner. A small piece of foam or even a cork on the tips adds extra protection.
Filling the Gaps: Packing Gear Like a Pro
Skis and boards are in, but you’ve still got boots, helmets, bags, and maybe even a small suitcase to fit. This is where the real space-maximizing artistry happens! 16 cubic feet sounds big, but it disappears fast. How do you utilize every nook?
Soft Goods are Your Filler Friends
Jackets, pants, base layers, gloves, hats – these are your packing peanuts! They are malleable and perfect for stuffing into the irregular spaces left around the rigid skis and boards. Roll them tightly to save space and make them easier to wedge.
- Fill Corners & Edges: Cram rolled jackets or pants into the tight corners and along the edges where the box curves upwards. This stabilizes the long items and prevents shifting.
- Layer Over Skis/Boards: Once your long gear is positioned and stable, lay softer items flat over the top. This creates a protective layer and starts building a level surface for more gear. Think of it like building a foundation.
- Protect Delicates: Use softer items to cushion helmets, boot bags, or anything else delicate. Nestle the helmet inside a rolled jacket, for example.
Boot Bags: The Bulky Necessity
Boot bags are essential for organization but can be space hogs. Standing them upright is usually impossible due to the 14.5-inch internal height. So, how to pack them?
- Lay Them Flat: Place boot bags flat on top of the initial layer of soft goods or directly on the skis/boards if protected. Position them towards the passenger-side opening for easier access if needed.
- Fill Empty Boot Shells: Got space inside the actual ski/board boots? Stuff socks, gloves, or beanies inside! It saves space in the bag and utilizes dead air.
- Consider Consolidation: If you’re really tight on space, can you pull the boots out and pack them individually (wrapped in a plastic bag to keep liners dry), packing the empty boot bag flat? Sometimes the bag itself takes up unnecessary bulk.
Helmets & Goggles: Protect the Precious
A crushed helmet is useless. Fogged, scratched goggles ruin a day. Treat these right!
- Goggles First, Always in Case: Seriously. Never pack goggles loose. Keep them in their hard protective case. This is non-negotiable. Place the goggle case somewhere stable and protected – often nestled within soft clothes or inside a helmet.
- Helmets: Structure & Padding: Helmets need to maintain their shape. Stuff the inside cavity with gloves, hats, or a rolled-up neck gaiter. This provides internal support. Then, place the helmet somewhere it won’t have heavy items crushing down on it – often on top of a boot bag or surrounded by jackets. Think of it like packing an egg.
Utilizing the Full Height: Strategic Stacking
The 14.5 inches of height is valuable real estate. Once your base layer (skis/boards, poles, maybe flat boot bags) and initial filler soft goods are in, you can start stacking upwards.
- Create a Stable Base: Ensure the bottom layer is packed tightly and won’t shift. Use soft goods to fill voids and lock things in place.
- Heavier Items on Bottom: Place heavier, denser items (like boot bags with boots inside, or a small suitcase) low down and near the center if possible. This keeps the center of gravity lower and prevents top-heavy shifting.
- Lighter, Softer Items on Top: Pile lighter, more compressible items (duffel bags with clothes, sleeping bags, pillows) on the upper layers. You can compress these down slightly when closing the lid without damaging anything.
- Mind the Lid Clearance: Before you slam that lid shut, do a visual check! Ensure nothing tall or rigid (like a helmet placed precariously or a tool handle sticking up) is pressing against the top of the box. The lid needs to close flush without resistance to engage the SecureLock system properly. A gentle press down on the top layer should feel slightly yielding, not solid.
Weight Distribution & Security: Safety First, Always
Packing isn’t just about fitting it all in; it’s about doing it safely for the journey. Improper weight distribution or loose items can be dangerous and damage your gear or the box itself. Let’s not have that happen!
The Golden Rule: Balancing the Load
You know that 110 lb limit? It’s not just a total; where you put that weight matters hugely for how your car handles. Imagine hitting the brakes hard with all the weight piled at the very front of the box. Scary, right? That’s crazy force shifting forward! Aim for balanced weight distribution:
- Front-to-Back: Try to distribute weight relatively evenly along the length of the box. Avoid piling all the heavy stuff (like multiple boot bags or tool kits) right at the very front or very back. Center-heavy is generally best for handling.
- Side-to-Side: Similarly, avoid loading everything heavily to one side. This can make your car feel unbalanced, especially on curves. If you have one heavy item, try to place it near the centerline of the box.
- Heavy Low, Light High: This reinforces stability. Keeping denser items lower down prevents the load from becoming top-heavy and prone to shifting during cornering.
Preventing Shifting & Damage: Lock it Down
Hear that rattling and banging over every bump? That’s your expensive gear getting beaten up and stressing the box. How do you stop it?
- Fill Every Void: This is absolutely crucial. Use every scrap of clothing, towels, or even soft gear bags to stuff into gaps around skis, boards, and between other items. Empty spaces allow things to move. Rolled items are fantastic void-fillers. Think of it like packing a moving truck – tight packing prevents damage.
- Strategic Bracing: Can you position a boot bag vertically to act as a brace between the box wall and a stack of skis? Or use a rolled-up sleeping pad to fill a long gap? Get creative with using bulkier soft items to block movement paths.
- Straps (Use Them!): Your Thule Pulse likely came with 2 tie-down straps. These aren’t just for show! Use them to lash bundles of skis together tightly, or to strap a bulky item (like a large duffel) down to the mounting points or around the whole load if possible. It’s an extra layer of security against shifting. Feeling lazy? Don’t skip this step! That one bump could cost you.
Respecting the Weight Limit: Non-Negotiable
110 lbs is the absolute max. Exceeding this stresses the box structure, the mounting points, and your roof rack system. It can lead to failure – imagine your box ripping off on the highway. Not worth it! Weigh your gear if you’re consistently packing heavy. Remember, the box itself weighs 36 lbs, so your actual cargo capacity is 110 lbs – 36 lbs = 74 lbs. Factor in the weight of racks too. Packing for a family of five? You might need to prioritize what must go up top vs. what can fit inside the car. Better to leave that extra case of beer behind than risk an accident. For real.
Lid Closure & Locking Up: Sealing the Deal
You’ve packed meticulously. Now, getting it closed and locked securely is the final, vital step. No one wants to drive off only to see their precious cargo spilling onto the road behind them. Oh no!
Ensuring a Proper Seal: The SecureLock Dance
Thule’s SecureLock system is brilliant, but it needs the lid to be fully closed to engage. Here’s how to nail it:
- Visual Lid Check: Before pulling the cord, walk around the box. Do you see any gaps between the lid and the base, especially at the corners or along the sides? Even a small gap means it’s not sealed. Push down gently on any high spots.
- The Pull Cord: Stand at the passenger side opening. Grasp the red pull cord firmly inside the box. Give it a confident, smooth pull straight down towards the floor of the box. You should hear distinct clicks as the locking mechanisms around the perimeter engage. Listen for them!
- The Lid Test: After pulling the cord, try to lift the lid slightly around the edges. It shouldn’t budge at all if SecureLock is fully engaged. If it lifts even a millimeter somewhere, release the cord and try again, focusing on pushing down on that area while pulling.
- Comfort Key Removal: Here’s the ultimate test: Insert your Thule Comfort Key into the central lock cylinder. Turn it to lock. Now, try to remove the key. If it comes out easily? Awesome, all locking points are secure! If the key won’t come out? That means one or more SecureLock points aren’t fully closed. Go back to step 1 – find the gap, push down, pull the cord firmly again. Never force the key or drive off if it won’t remove! That’s your safety indicator.
The Central Lock: Peace of Mind
Once the key removes cleanly, you know the Central Lock is engaged and the lid is physically locked shut. This deters casual theft and ensures the lid stays closed even over severe bumps. Make turning that key part of your pre-departure ritual, just like buckling your seatbelt. Simple, effective security. Feeling good about that? You should!
Real-World Packing Scenarios: Putting it All Together
Let’s see these hacks in action with some common situations. Theory is great, but practical examples make it click, right?
Scenario 1: The Couple’s Weekend Getaway (2 Skiiers)
- Gear: 2 pairs adult skis (~175cm), 2 pairs poles, 2 boot bags (boots inside), 2 helmets, 2 sets outerwear, gloves, goggles, small duffel with street clothes/toiletries.
- Packing Strategy:
- Place both pairs of skis diagonally, binding-to-binding stacked if possible, near the center/front.
- Bundle poles together, strap them, place along the side wall near the skis.
- Lay both boot bags flat on top of the skis, towards the passenger opening.
- Stuff outerwear (rolled) into gaps around skis and poles. Fill corners.
- Place helmets (stuffed inside) on top of boot bags or nestled in jackets.
- Goggle cases go inside helmets or deep within soft clothes.
- Place small duffel on top. Use any remaining soft items to fill the last gaps over everything. Pull cord, lock, done! Tons of room to spare? Maybe throw in the collapsible cooler for apres-ski drinks!
Scenario 2: Family Shred Fest (2 Adults, 2 Kids)
- Gear: 2 adult skis, 2 kid skis (~140cm), 4 pairs poles, 4 boot bags, 4 helmets, outerwear for 4, gloves/hats, large duffel with family clothes, small bag with snacks/toys.
- Packing Strategy (Maxing Out!):
- Place longest adult skis diagonally on the bottom layer.
- Stack second adult pair binding-to-binding or place beside.
- Place kid skis diagonally on top of adults or beside them in the remaining space (their shorter length helps!).
- Bundle adult poles together, kid poles together. Place along walls.
- Lay kid boot bags flat on the floor near the front/passenger side (lighter/easier access?).
- Place adult boot bags flat on top of the ski stack.
- Aggressively stuff all outerwear, hats, gloves into EVERY gap around skis, poles, and boot bags. Compact it well. This stabilizes the base layer.
- Place kid helmets (stuffed) on their boot bags. Place adult helmets on their boot bags or nestled securely.
- Goggle cases go inside respective helmets or deep within soft layers.
- Pack the large duffel flat on top, compressing slightly. Wedge the snack bag in last.
- Double-check weight! 4 boots/bags + skis/poles + duffel approaches the limit. Distribute weight evenly. Use straps to secure ski bundles if possible. Pull cord firmly, lock, breathe! It’s tight but doable. Need more space? Check out guides on the biggest cargo boxes or best car roof boxes for next season.
Scenario 3: Snowboard Crew (3 Riders)
- Gear: 3 snowboards (including one wide powder board), 3 boot bags, 3 helmets, outerwear x3, 3 goggle cases, large gear duffel.
- Packing Strategy (Width Challenge):
- Place the widest powder board first, potentially flat on the floor or at a shallow angle towards the back.
- Place the other two boards binding-to-binding, stacked at a steeper diagonal angle on top or beside the wide board, utilizing the corners for binding height.
- Lay boot bags flat, potentially one on the wide board and the others on top of the stacked boards or beside them.
- Stuff outerwear into gaps, especially around the bulky bindings and the edges of the wide board. Fill corners thoroughly.
- Place helmets (stuffed) on boot bags or secure nooks.
- Goggle cases go inside helmets or deep within clothes.
- Pack the large gear duffel flat on top. Compress soft items down.
- Be mindful of the 110 lb limit – 3 boards + 3 boots/bags + duffel gets heavy fast. Weigh if possible. Use straps to lash the stacked boards together tightly. SecureLock, lock, send it! Prefer something even lower profile? Maybe skinny cargo boxes are worth a look for future trips.
Off-Season & General Use: Beyond the Snow
The beauty of the Thule Pulse? It’s not just for winter! That 16 cubic feet is golden for road trips, camping, moving bulky but light items, or hauling sports gear year-round. How awesome is that?
Transitioning to Summer Mode
- Deep Clean: Give it a thorough wash inside and out to remove salt, grime, and any lingering gear funk from the season. Mild soap and water work wonders. Let it dry completely with the lid open before storing or repacking.
- Packing Soft Luggage: Suitcases, duffel bags, tents, sleeping bags, camp chairs – these are perfect. Pack heavy items low and centered. Use the same void-filling principles with towels or blankets. The passenger-side opening makes loading camping gear a breeze after setting up camp.
- Bulky/Light Items: Think: beach gear (umbrellas, chairs, coolers), kids’ toys, seasonal decorations, even a spare tire. The low profile helps with garages, and the locking keeps it secure. Need ideas? Explore aerodynamic rooftop cargo boxes for efficient summer travel too.
Long-Term Storage: Keep it Fresh
If you’re taking it off for the season:
- Clean & Dry: Absolutely essential (again!).
- Store Open or Ajar: Prevent musty smells by storing it with the lid slightly open or remove it from the clamps and store it open if possible. Bungee the lid loosely if needed.
- Cover It (Optional): A simple tarp or dedicated cover protects it from UV damage and dust. Store it in a cool, dry place out of direct sunlight if possible. Makes getting it ready next winter way easier.
Troubleshooting Common Packing Headaches
Even pros hit snags. Here’s how to tackle common Pulse packing gripes:
- “My Skis/Board is Just Too Long!” Try the absolute deepest diagonal angle. Remove any tip/tail protectors if they add length. If it’s literally touching both ends diagonally, it might still fit if the bindings clear the lid height, but it’s tight. Measure your longest item against the 71.25-inch internal length diagonally (using Pythagoras: sqrt(71.25^2 + 31^2) ≈ 77.5 inches). If your gear is longer than that, you might need a longer box (check biggest cargo boxes for options).
- “Bindings Are Crushing My Stuff Below!” This is why binding management is key! Always stack binding-to-binding or binding-to-base. If you must have bindings down on top of something delicate, place a rigid piece of cardboard or a thin plastic cutting board under the binding as a shield. Better yet, rearrange!
- “I Can’t Get the Lid to Close/Lock!” Is something physically blocking it? Check for a helmet, pole tip, or boot bag pressing up. Is the load too tall/bulky? Compress soft items more or remove something. Is SecureLock not engaging everywhere? Find the gap, push down firmly on that spot while pulling the cord again decisively. Is the box overloaded (>110 lbs)? Remove some weight. Is the box mounted correctly? Ensure the crossbars are within the min/max spread and the clamps are tight – a sagging box won’t close right.
- “Things Are Shifting & Rattling!” You didn’t fill the voids enough. Open it up (carefully!) and shove more soft items (clothes, towels, blankets) into every single gap you can find. Use the straps to secure bundles. Tight packing is silent packing.
- “I Think I Might Be Over the Weight Limit…” Trust that instinct. Better to unpack and weigh key items (bathroom scale works) than risk damage or failure. Boot bags with boots are often 15-20 lbs each! Skis/boards are 10-20 lbs each. It adds up frighteningly fast. When in doubt, leave some non-essentials behind or put them inside the car.
Conclusion: Pack Smart, Ride Easy
Alright friends, we’ve covered a ton of ground! From understanding your Thule 614 Pulse Box’s 76 x 33 x 16.5 inch footprint and 110 lb heartiness, to mastering the diagonal ski stack, conquering bulky bindings, and strategically stuffing every cubic inch of that 16 cubic feet with gear-protecting finesse. You’ve got the hacks for family trips, boarder brigades, and even summer adventures. Remember the golden rules: protect your gear from each other, respect the weight limit fiercely, balance your load, eliminate voids like your gear’s life depends on it (it kinda does!), and always, always ensure that SecureLock clicks and the Comfort Key slips out smoothly.
Putting this knowledge into practice transforms packing from a dreaded chore into a quick, efficient, and even satisfying part of your adventure prep. No more pre-trip stress headaches or post-trip gear damage discoveries. Just the stoke of knowing everything is secure, organized, and ready for the mountain or the open road. So next time you’re facing the gear pile, channel your inner Tetris master, remember these Pulse-specific hacks, and pack with confidence. Now get out there, load up smart, and shred hard! Catch you on the slopes! Got questions about other boxes? Maybe finding a cheap and small cargo box for solo trips or the best roof cargo box under $500? Plenty of resources out there to fuel your gear obsession!
Our team is creating outdoor-gear relevant articles with passion. If our articles can help you to find the correct solutions for your questions, we will be happy about that. In the content creation process, we usually collect accurate and useful information online or offline to compile our content in an organized way. Consequently, we can guarantee that you can discover some expected answers to your questions. We appreciate your time on our site.