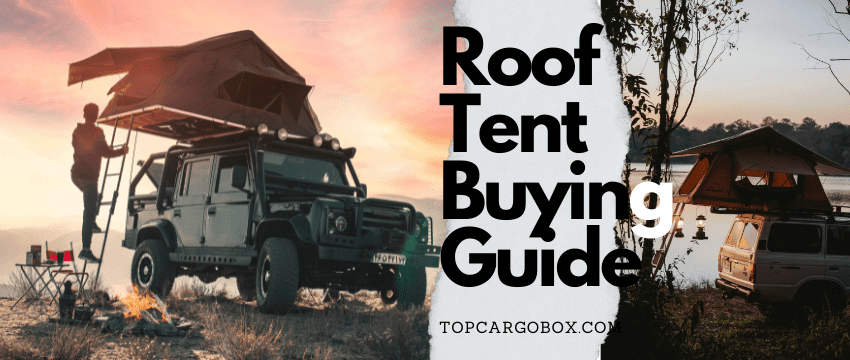
How’s it going, car owners? want a car roof box? Dreaming of epic getaways but dreading the cargo chaos? Imagine this: instead of cramming skis diagonally across the backseat or burying the cooler under duffels, you simply pop open a sleek, lockable vault on your roof. Boom. Instant breathing room inside the cabin, easy access to bulky gear, and everything stays dry and secure. Modern roof boxes are total game-changers – they’re not your dad’s clunky, gas-guzzling monstrosities. The best 2024 designs slice through the wind, minimizing that MPG hit while delivering serious, usable space specifically tailored for your vehicle’s roof. Ready to unlock your vehicle’s true potential and actually enjoy the journey? Let’s dive into the top picks.
Roof Boxes Unpacked: Your Ultimate Guide to Extra Cargo Space!
What’s up? Feeling that familiar pre-trip squeeze? You know the one – trying to jam suitcases, camping gear, kids’ stuff, maybe even the dog bed, into a car trunk that suddenly seems impossibly tiny. It’s frustrating, right? You’re excited for the adventure, but the packing logistics are killing your vibe. Forget stuffing things under seats or hoping everyone travels light. What if there was a smarter way to unlock serious extra space without upgrading your ride? Enter the humble yet mighty roof cargo box! Seriously, these things are game-changers for road trips, outdoor escapades, or just hauling bulky stuff without renting a truck. Let’s dive deep into everything you need to know about freeing up your cabin and conquering your cargo woes.

So, What Exactly is a Roof Box?
Okay, let’s break it down simply. Picture a sleek, hard-shell container designed to sit securely on top of your car’s roof rack. That’s your roof box! It’s essentially weatherproof external storage. Think of it like adding a giant, lockable suitcase to your roof. These boxes come in all sorts of shapes and sizes (we’ll get into that!), but they all serve the same core purpose: storing bulky, less frequently needed items up top. We’re talking luggage, skis, snowboards, camping chairs, tents, strollers – basically anything that doesn’t need constant access during the drive. Instead of playing Tetris inside the car, you pop it on the roof. Boom! Instant breathing room inside. It’s a legit solution that turns packing panic into packing peace. How awesome is that?
Why Bother with a Roof Box? The Killer Benefits
You might be thinking, “Is it really worth the hassle?” Fair enough, let’s talk perks. The absolute biggest win is massively increased storage capacity. We’re talking potentially adding hundreds of liters of space – imagine freeing up your entire trunk and back seat! That means more comfortable passengers, easier access to snacks and essentials inside the car, and no more arguments about whose bag gets squished. Secondly, protection from the elements is a huge deal. Quality boxes are designed to keep your gear dry from rain and snow, and shielded from sun, dust, and road grime. No more arriving with soggy sleeping bags! Thirdly, security. Most boxes lock securely to your roof rack, offering way more peace of mind than just tossing stuff loose up top or leaving valuables visible inside the car. Finally, they’re often more aerodynamic and quieter than alternative carriers like roof baskets or bags, especially at highway speeds. Less wind noise equals a happier drive. That’s a win-win-win-win situation, right?
Navigating the Different Roof Box Styles
Alright, not all roof boxes are created equal. Understanding the main styles helps you pick the perfect fit. First up, Clamshell Design. This is the old-school classic. The lid lifts from the front or rear, hinging like a giant clamshell. The pro? Awesome access to the entire interior at once, great for loading big, bulky items. The con? You need significant overhead clearance to open it fully – watch out for low garage doors! Next, we have the increasingly popular Dual-Side Opening boxes. These open from both sides, like double doors. Super convenient for loading from either side of the car, especially in tight parking spots.
They often have lower profiles too. The trade-off? The central divider inside can sometimes limit what you can fit across the full width. Finally, there are Ski/Sport Specific boxes. These are often longer and narrower, specifically designed for easy loading of long items like skis, snowboards, or fishing rods, sometimes featuring dedicated internal mounting systems. Think about what you haul most often – that’ll guide your style choice.
Sizing It Up: Finding Your Perfect Roof Box Fit
Choosing the right size is crucial. Go too small, and you’re still cramped. Go too big, and you might overwhelm your car or rack limits. Box size is measured in liters (L), indicating internal volume. Think about your typical needs: Weekend trips? 300-400L might suffice. Big family vacations or serious gear haulers? Look towards 400-600L or even larger. But hold up! It’s not just about liters. You must consider your vehicle’s roof dimensions and roof rack weight capacity.
Measure the usable length on your roof bars. A box that’s too long might overhang awkwardly or hit your antenna; too short looks odd and wastes space. Crucially, check your car’s manual and roof rack specs for the maximum dynamic weight capacity (that’s the weight limit while driving). Remember, the box itself has weight, plus whatever you put inside! Don’t blow past this limit – safety first, always. Need help visualizing the Thule Motion 3 L vs XL on a real car? Check out this comparison Thule Motion 3 L vs XL Real-World Fit.
What Are They Made Of? Materials Matter
So, what’s keeping your gear safe up there? Roof box shells are typically made from either ABS Plastic or Fiberglass-Reinforced Composites. ABS plastic is the common, budget-friendly option. It’s tough, durable, and lightweight. Good quality ABS boxes are perfectly capable for most users. Fiberglass composites (like Thule’s “XT” material) are the premium choice. They’re often lighter than ABS and significantly stronger and stiffer. This translates to better aerodynamics, potentially less noise, and enhanced durability against impacts or heavy snow loads. The inner lining also matters – look for textured or ribbed interiors to help keep items from sliding around during corners. The material impacts weight, durability, noise, and price – so weigh your priorities (pun intended!).

Key Features You Won’t Want to Miss
Modern roof boxes come packed with clever features designed to make your life easier. Easy Mounting Systems are essential. Look for quick, tool-free mechanisms that securely clamp onto different roof bar shapes (square, round, aero, etc.). Nobody wants to fiddle with complex tools every time! Integrated Locking is standard and super important – usually, one key locks the box lid and secures the box to the roof bars. Sweet! Dual-Side Opening, as mentioned earlier, is incredibly handy for flexible loading. Low Profile Designs cut through the wind better, improving fuel efficiency and reducing wind noise – a big plus on long drives. Internal Tie-Down Points let you secure loose items inside the box. And Drain Holes are vital to let any accidental moisture escape. Think about which features will give you the most hassle-free experience.
Essential Specifications at a Glance
Let’s break down the core specs you’ll encounter when shopping. This table gives you the key things to look for:
Feature | What It Means For You |
|---|---|
Volume (Liters) | How much stuff fits inside. Ranges from compact (e.g., 320L) to massive (e.g., 600L+). |
Dimensions (LxWxH) | The physical size. Must fit your roof and consider opening clearance (especially clamshells). |
Weight (Empty) | How heavy the box itself is. Affects handling, fuel economy, and your rack’s weight limit. |
Max Load Capacity | The maximum weight of gear you can put INSIDE the box (NOT including the box weight!). |
Opening System | Clamshell (one big lid) or Dual-Side (opens left/right). Convenience vs. overhead clearance. |
Locking | Integrated locks securing lid and box to roof bars. Essential for security. |
Compatibility | Types of roof bars it can clamp onto (square, round, aero, wingbar, etc.). |
Material | ABS Plastic (durable, affordable) or Fiberglass Composite (lighter, stronger, pricier). |
Getting It On There: Installation Essentials
Okay, you bought the box! Now, how do you get this thing on your car without losing your cool? First, read the manual! Seriously, every model is slightly different. Generally, you’ll place the box centered on your roof bars. Then, engage the mounting clamps – these are the mechanisms that grip the bars. Most modern systems involve flipping levers or twisting knobs to tighten the clamps securely onto the bars. Crucially, you must tighten them exactly as instructed. Under-tighten, and the box could shift or fly off (yikes!). Over-tighten, and you might damage the box or the bars. Once clamped, double-check the locks are engaged. Give the box a firm shake – it shouldn’t budge or slide on the bars. Feeling unsure? Avoid common pitfalls by reviewing these Thule Motion 3 Installation Mistakes to Dodge. It’s way easier than it looks once you get the hang of it, promise!
Packing Your Roof Box Like a Pro
Packing the box isn’t rocket science, but a few smart moves make a big difference. Weight Distribution is key: Pack heavier items first, centered over the roof bars and towards the front of the box (closer to the windshield). This helps stability and handling. Avoid putting all the heavy stuff way in the back! Protect Fragile Items by wrapping them in soft gear like clothes or sleeping bags. Use the Tie-Downs: Secure loose items with straps or bungees hooked into the internal anchors. Stuff really shouldn’t be sliding and banging around inside. Fill Gaps: Partially empty boxes can allow items to shift violently. Use soft bags or towels to fill voids and keep things snug. Maximize Space: Pack efficiently! Nest smaller items inside larger ones. Roll clothes tightly. Think Tetris, but less stressful. Remember, the box is best for items you won’t need until you arrive – that emergency snack stash should stay inside the car!
Driving with a Roof Box: What to Expect
Alright, you’re loaded up and ready to roll! Driving with a roof box is generally straightforward, but there are adjustments. Height Awareness: You’ve just added at least a foot to your car’s height. Be hyper-aware of low clearances – drive-thrus, parking garages, low-hanging branches. Seriously, measure your total height and write it on your dash! Fuel Economy: Yeah, it’s a bummer, but aerodynamics take a hit. Expect a dip in MPG, usually between 5-15%, depending on the box size, your car, and your speed. Driving slower helps offset this a bit. Handling & Noise: You might notice slightly more body roll in corners or a feeling of weight up high. Take turns a bit more gently. Wind noise is common, especially with cheaper or poorly designed boxes, but quality aerodynamic boxes are much better. Speed: Most manufacturers recommend a maximum speed limit, often around 80-100 mph. Stick to it for safety – high winds and speeds put huge forces on the box and rack. Chill out, enjoy the drive, and get there safely.
Battling the Elements: Weather & Your Roof Box
A big reason for getting a box is keeping gear dry. But how well do they really hold up? Quality boxes are designed to be water-resistant, meaning they keep out rain and snow under normal driving conditions. Seals around the lid are critical. However, no box is 100% waterproof forever, especially in a torrential downpour or a high-pressure car wash where water might be forced past seals. The key is maintenance (we’ll cover that next!). For snow, boxes are fantastic for carrying skis/boards without filling the car with wet gear. Good boxes shed snow easily. Curious how a popular model handles serious wet weather? See how the Thule Motion 3 fared in a real Thule Motion 3 Waterproof Test and its performance in Thule Motion 3 Snow and Rain Conditions.
Keeping Your Box Happy: Care & Maintenance
Taking care of your roof box ensures it lasts for years and performs well. Cleaning is simple: Use mild soap (like car wash soap) and water with a soft cloth or sponge. Avoid harsh chemicals, abrasive cleaners, or brushes that could scratch the surface or damage seals. Rinse well. Lubricate Seals: A couple of times a year, especially before heavy use seasons, apply a silicone-based lubricant (specifically designed for rubber/plastic) to the lid seals. This keeps them supple and sealing effectively. Wipe off any excess. Check Mounting Hardware: Periodically inspect the clamps and locking mechanisms. Make sure nothing is loose or showing signs of wear. Off-Season Storage: When not in use, store the box indoors (garage, basement, shed) if possible. If you must store it outside, use a protective cover designed for roof boxes to shield it from UV rays and dirt. Keep it slightly open or use spacers to prevent the seals from getting compressed. A little care goes a long way!
Buying New vs. Used: Weighing Your Options
Budget is always a factor. Buying new gives you peace of mind: full warranty, latest features, pristine condition, and you know its full history. It’s the premium, hassle-free route. Buying used can save you significant cash – sometimes half the price or less! However, it requires diligence. Inspect Thoroughly: Check for major cracks, deep scratches, or structural damage. Examine the seals for cracks, dryness, or brittleness – replacing them can be costly. Test the locking mechanisms and mounting clamps to ensure they work smoothly and grip securely. Look inside for mold or water staining, indicating past leaks. Ask about its history – has it been in any accidents? How old is it? Is it missing any parts (keys!)? Finding a well-cared-for used box is totally possible and a great deal. Get smart with this Essential Thule Motion 3 Used Buying Guide before you commit.
Making the Investment: Is a Roof Box Right for YOU?
So, is shelling out for a roof box legit worth it? Honestly, it depends! If you frequently find yourself cramped for space on trips, haul bulky gear seasonally (skis, camping stuff), have a smaller car, or just crave a more organized travel experience, then absolutely yes! The convenience, space, and protection are hard to beat. Consider how often you’d actually use it versus the cost and storage needs when it’s off the car. Think about the types of trips you take most. For infrequent users, rental might be an option, but long-term, owning usually makes more sense. Factor in the potential fuel cost increase, but weigh it against the comfort and practicality gains. For many adventurers and families, a roof box isn’t just a purchase; it’s an investment in smoother, more enjoyable journeys. How wonderful would it be to actually enjoy the packing process?

Hitting the Road with Confidence
You’ve made it! Now you’re totally clued up on the world of roof cargo boxes. You know the different styles, how to pick the perfect size and material, what features rock, and how to install, pack, and care for your box like a boss. You understand the driving adjustments and how to shop smart, new or used. Most importantly, you see how this simple add-on can transform your travels from cramped chaos to spacious serenity. Imagine opening your trunk and actually having room! Picture arriving with dry gear, ready for fun. Think about the stress melting away as you pack. So, what are you waiting for? Assess your needs, do your research, and get ready to unlock a whole new level of cargo freedom. Your next adventure, with all the gear you actually want to bring, is calling. Get out there and conquer the road! Catch you later!
Best SUV Roof Boxes for 2024: Space Savers That Won’t Kill MPG
What’s up, SUV owner? Feeling that familiar road trip crunch? You bought that spacious ride for adventures, but somehow the trunk’s always bursting at the seams. Kids’ gear, sports equipment, luggage for five – it piles up fast. You love your vehicle, but stuffing it to the roof inside just sucks the joy out of getting away. And seriously, who wants to watch their fuel gauge plummet faster just to carry extra stuff? What if you could unlock serious cargo space without turning your SUV into a gas-guzzling brick? That’s where the right roof box shines. Forget the old clunky monsters – modern designs are sleek, smart, and way kinder to your mileage. Let’s find your perfect match for 2024 and get you back to stress-free adventures.
Why Your SUV Needs the Right Roof Box
Look, SUVs are awesome for space inside, but let’s be real: families, gearheads, and road trippers max them out constantly. Trying to cram everything in means sacrificing passenger comfort, blocking rear views with piles of stuff, or just plain leaving things behind. A roof box solves this elegantly. It’s like adding a weatherproof, lockable attic to your ride! Suddenly, bulky items like strollers, tents, duffels, or ski gear have a dedicated spot up top, freeing up your precious interior cabin and trunk space. No more playing Tetris! Plus, a well-chosen aerodynamic box impacts your MPG far less than you’d fear. Imagine actually having legroom and all your gear. How awesome is that? It transforms packing from a dreaded chore into a quick, efficient win.
Picking the Perfect Box: What Really Matters for SUVs
Not all roof boxes are created equal, especially when you’re mounting them on taller vehicles like SUVs. You need to think smarter. Size and Volume are obvious – bigger SUVs can handle larger boxes (15-22 cubic feet or more), but don’t just grab the biggest one! Consider what you actually haul. Is it mostly long items (skis, boards, fishing rods) or bulky bins and bags? Aerodynamics are King for MPG: A sleek, low-profile design slices through the wind way better than a tall, square one, meaning less drag and better fuel economy. Seriously, this can make a ten to twenty percent difference in highway MPG compared to a bulky design! Ease of Loading is crucial when you’re reaching up higher. Dual-side opening boxes are a godsend in tight parking spots. Weight Capacity matters too – check your SUV’s roof rail dynamic weight limit (usually 150-200 lbs total, including box and cargo). Finally, Mounting Security needs to be rock-solid and easy to manage. You want confidence your gear stays put at 70 MPH.
Top Roof Box Contenders for Your SUV in 2024
Alright, let’s get down to brass tacks. Based on performance, features, and real-world SUV love, here are the standouts:
- Thule Motion XT L/XL: Dude, this is the SUV sweet spot for many. Thule’s Motion XT line nails aerodynamics with its sleek shape, keeping wind noise low and MPG impact surprisingly manageable. The “XT” shell is super tough (fiberglass-reinforced), and the dual-side opening makes loading from either side of your tall SUV a breeze. The L (16 cu ft) and XL (18 cu ft) sizes are perfect for most mid-size to large SUVs, offering massive space without feeling overly huge. Wondering if the L or XL fits your specific SUV better? Check out this detailed look at Thule Motion 3 Sizing & Fit. It’s a premium choice, but you feel the quality.
- Yakima SkyBox Carbonite 18: Bro, this box is a legit contender. Known for its incredible value, the Carbonite offers fantastic features without breaking the bank. The 18 cubic foot size is ideal for SUVs, and its low-profile design is seriously slippery in the wind. The dual-side opening is smooth, and it boasts Yakima’s tough-as-nails construction. It’s a bit more “square” than the Thule Motion, but still very aerodynamic. If you want near-premium performance at a friendlier price point, this is it. Awesome bang for your buck.
- SportRack Vista XL: Okay, let’s talk budget without sacrificing serious space. The SportRack Vista XL delivers a massive 18 cubic feet of cargo room without a massive price tag. It’s a great “first box” or for folks who don’t use one constantly but need space when they do. It features dual-side opening and a textured floor to keep things from sliding. While not quite as sleek as the Thule or Yakima, it’s surprisingly decent on gas for its size. Want a deeper dive on how the Vista XL stacks up? See how it Compares to Other Value Options. Solid choice if cash is tight but space is critical.
- Thule Force XT L/XL: Need Thule toughness but watching your wallet? The Force XT is your answer. It shares the awesome dual-side opening and secure mounting with the Motion XT but uses a durable ABS plastic shell instead of the fiberglass blend. This makes it a bit heavier and slightly less aerodynamic than the Motion, but still way better than old-school boxes. The L (16 cu ft) and XL (18 cu ft) sizes again fit SUVs perfectly. It’s the workhorse of the Thule lineup – super reliable and more affordable. Get the lowdown on the Thule Force XT Size Differences to pick your fit.
- Best Under $500 Champ: Yeah, we get it. Sometimes the budget is super tight. The good news? There are decent boxes under five hundred bucks that work for SUVs, often in the 12-16 cubic foot range. Brands like JEGS or Inno offer value lines. You might sacrifice a bit on ultimate aerodynamics or the fanciest latches, but they still get the job done – securely hauling gear and freeing up your SUV’s interior. Focus on finding one with dual-side opening and good reviews for water resistance. Discover the top performers in our Best Roof Box Under $500 Guide. Totally legit if you need basic, reliable extra space.
Key Specs Decoded: Your SUV Box Cheat Sheet
Let’s break down the numbers you’ll see. This table helps you understand what really matters for your SUV:
Feature | Why It Matters for Your SUV |
|---|---|
Volume (Cu Ft/L) | How much stuff fits. SUVs typically need 15-22 cu ft (425-625L). Match size to your usual load & SUV roof length. |
Dimensions | Length, Width, Height. Crucial! Must fit your roof rails without overhang. Height affects garage clearance! |
Weight (Empty) | Lighter is better for MPG and staying under your roof’s weight limit. Fiberglass (Motion XT) often wins here. |
Max Load Weight | The max weight of GEAR you can put inside. Add this to the box weight – MUST be under your SUV’s dynamic roof limit! |
Opening Style | Dual-Side is HUGE for SUVs (easier loading height!). Clamshell needs massive overhead clearance. |
Aero Design | Low profile, tapered shapes = Better MPG & less wind noise. Critical for highway driving comfort. |
Material | ABS Plastic (affordable, durable) vs. Fiberglass Composite (lighter, stiffer, pricier, better MPG). |
Locking | Integrated locks securing lid AND box to rails. Essential for security on the road. |
Size & Fit: Making Sure It Works With YOUR SUV
This part is mega-important. Just because a box says it fits SUVs doesn’t mean it fits yours perfectly. First, Measure Your Roof Rails: Get the distance between the front and rear crossbars (the usable length). Your box length should fit comfortably within this, ideally centered. A box too long is unsafe and looks silly; too short wastes potential space. Second, Know Your Weight Limits: Dig into your SUV owner’s manual! Find the “maximum dynamic roof load capacity.” This is the total weight (box + gear) your roof can handle while driving. Often it’s surprisingly low – like 150 lbs. Don’t blow past this! Third, Consider Height & Garage Clearance: Adding a box adds at least 12-18 inches to your SUV’s height. Measure your garage door opening! Nothing worse than that heart-stopping crunch sound. Seriously, write your new total height on a dashboard sticky note! Curious if a popular model like the Thule Motion 3 fits your specific SUV? Check out this list of Cars & SUVs That Fit the Thule Motion 3.

Installation: Getting It Secure (Without the Sweat)
Installing a roof box sounds harder than it is, I promise. Modern systems are designed for sanity. Read the Manual: Yeah, boring, but every model has quirks. Clean Your Roof Rails: Wipe down the crossbars where the clamps grip – dirt can make things slip. Center the Box: Place it evenly between the front and rear of your SUV’s roof, centered left/right. Clamp It Down: Engage the mounting clamps (usually levers or twist knobs) onto your crossbars. Tighten them exactly as the manual says – firm, but don’t go Hulk mode and strip anything. Lock It & Test: Engage all locks (lid and clamps). Give the box a solid shove in different directions – it shouldn’t budge or slide on the bars. Feel confident? Awesome. If not, double-check those clamps! Pro tip: Do the install with a buddy; it’s easier to lift and position.
Packing Smart: Maximize Space & Keep Things Safe
Throwing stuff in randomly is a recipe for broken gear or worse, instability. Heavy Stuff First & Low: Pack heavier items (toolboxes, coolers) first, positioned low in the box and centered over the crossbars. Avoid putting heavy items way at the back! Protect Fragiles: Wrap breakables in clothes, sleeping bags, or towels. Use Tie-Downs: Secure loose items using the box’s internal anchors and straps or bungees. Stuff sliding around inside is noisy and can throw off balance. Fill the Voids: Partially empty boxes let items shift violently. Stuff gaps with soft bags, blankets, or pool noodles. Think Accessibility: Pack items you’ll need last (like camping gear) first, since they go in deepest. Things you need first (hotel bags) go in last. Weight Distribution is Key: Aim for even weight side-to-side and keep the bulk slightly forward (closer to the windshield) for better handling.
Driving Dynamics & MPG: What to Really Expect
Alright, box is on, packed, locked. Hit the road! Height Awareness is CRITICAL: You are taller now. Way taller. Low garages, drive-thru overhangs, tree branches – be paranoid! Know your new height. MPG Impact: Yes, you will lose some fuel efficiency. How much? Depends heavily on the box (aero design matters!), your SUV, speed, and wind. A sleek box might only cost you 5-10% on the highway; a bulky one could hit 15-20%. Driving slower (think 65 MPH vs 75 MPH) helps a lot. Handling: You’ll feel more weight up high. Take curves and corners a bit slower and smoother. Strong crosswinds will push you more – keep a firm grip. Noise: A good aero box is surprisingly quiet. A less aerodynamic one will whistle or roar more, especially at speed. Speed Limits: Most manufacturers recommend max speeds around 75-80 MPH with a loaded box. Respect this for safety!
The MPG Balancing Act: Space vs. Fuel Costs
Let’s talk honestly about gas mileage. It’s a trade-off. A roof box will increase drag, burning more fuel. But how much? Aerodynamics Rule: That sleek, low-profile Thule Motion or Yakima Skybox is designed to cheat the wind. You might only see a 5-10% dip on the highway. A taller, boxier design? Easily 15% or more. Size Matters (But Less Than Shape): A huge sleek box can sometimes be more efficient than a smaller clunky one. Your Driving Habits Matter Most: Ease off the accelerator! Driving 65 MPH instead of 75 MPH can significantly reduce the MPG penalty, regardless of the box. Is It Worth It? For most SUV owners needing the space on trips, absolutely. The comfort and convenience outweigh the extra $10-$20 in gas for a long trip. For daily use? Probably not – take it off when you don’t need it!
Buying Smart: New, Used, or Even Renting?
Gotta consider the wallet. New: Full warranty, latest features, pristine condition. Peace of mind, but premium price. Used: Can save big bucks! Check meticulously: Look for cracks, deep scratches, brittle seals (run your finger along them), smooth operation of latches and locks, and signs of water inside. Test fit it if possible. Ask about age and history. Missing keys are a dealbreaker! Renting: Great option if you only need a box once or twice a year. Check outdoor gear shops or platforms like Outdoorsy. Ensure it fits your SUV and comes with the right mounting hardware. Weigh how often you’ll use it against the cost.
The Verdict: Unlock Your SUV’s True Potential
So, is a roof box the answer to your space woes? For most SUV adventurers and families, absolutely yes. The freedom to pack everything you need – without sacrificing passenger comfort or playing trunk Jenga – is totally worth it. By choosing a sleek, aerodynamic model like the Thule Motion XT, Yakima SkyBox, or even a value champ like the SportRack Vista XL, you minimize the MPG hit while maximizing utility. Remember the golden rules: measure your SUV, know your weight limits, pack smart, and stay aware of your new height. Installation is simpler than it looks, and the payoff in organized, stress-free travel is huge. Imagine your next road trip: everyone comfortable, gear stowed safely overhead, and you cruising knowing you made a smart choice. Ready to ditch the cargo crunch? Your perfect roof box adventure awaits. Catch you on the open road!
Roof Box Weight Limits: Don’t Get It Wrong
What’s up? Staring at that shiny new roof box, dreaming of all the gear you’ll finally fit? Totally get it. But hold up – before you start heaving suitcases and coolers up there, there’s one massively important thing you gotta understand: weight limits. Seriously, this isn’t just boring fine print. Ignoring it can lead to scary stuff on the road, wreck your car’s roof, or trash your expensive gear. Ever seen those terms “dynamic load” and “static load” and felt your eyes glaze over? You’re not alone. It seems confusing, but it’s legit simple once it clicks. Think of it as knowing exactly how much your roof can handle while blasting down the highway versus when you’re just parked and loading up. Getting this wrong sucks big time. Let’s break it down so you can pack with confidence, not crossed fingers.
Dynamic Load: Your Highway Weight Limit
Alright, picture this: you’re cruising at 70 MPH, wind whipping, maybe hitting a bump. That force pushing down on your roof box and everything inside it? That’s what dynamic load is all about. It’s the absolute maximum total weight your vehicle’s roof system (rails, crossbars, box, and cargo) can safely handle while the car is moving. This number is way lower than you probably expect. Off the top of my head, many standard sedans and smaller SUVs might only handle 100 to 165 pounds total dynamic weight. Yeah, total – meaning the box itself eats up a chunk of that! Why so low? Physics, dude. Forces like wind resistance, cornering, and road vibrations massively increase the stress on everything. Exceeding this is playing with fire – think bent rails, failed mounts, or worst case, the whole setup flying off. Not cool. Your car’s manual is the only place to find your specific dynamic limit – trust that number like gospel.

Static Load: The Parked & Packing Limit
Now, imagine your car is totally stopped. Maybe parked at the trailhead or chilling in your driveway while you load up. That’s where static load comes in. This is the maximum weight your roof system can support when the vehicle is completely stationary. This number is usually much higher than the dynamic limit – sometimes three, four, or even five times higher! Think 330 pounds, 440 pounds, or even more on some heavy-duty trucks or SUVs. It makes sense, right? No wind forces, no bumps, no cornering G-forces trying to rip things apart. Static load matters most when you’re physically loading the box. You can pile more stuff up there safely while parked, but here’s the kicker: you absolutely MUST reduce that weight down to your dynamic limit BEFORE you start driving. That big cooler full of ice and drinks? Awesome for the static load while packing, but if it pushes you over dynamic? You gotta ditch some weight or leave it behind when you hit the road. Bummer, but safety first.
Why the HUGE Difference? Physics Rules
Okay, let’s get real for a sec. Why such a crazy gap between dynamic and static? It’s all about the forces at play when you’re moving. Wind Resistance: Driving fast pushes hard against the box, trying to lift it or rip it backwards. Road Vibrations & Bumps: Every little bump sends shockwaves through the whole setup. A pothole can multiply the effective weight on the roof for a split second. Cornering Forces: Taking a turn pushes everything sideways and down, putting immense stress on the mounting points. Vehicle Movement: Your car naturally flexes and twists as it moves over uneven surfaces. When parked? None of this wild stuff is happening. It’s just simple gravity pulling straight down. Exceeding the dynamic limit means you’re asking your roof and rack to handle forces they simply weren’t designed for. That’s how things break unexpectedly. Not worth the risk, for real?
Finding YOUR Specific Limits: No Guessing!
You can’t just wing this or assume. Finding your numbers is step one. Your Vehicle’s Manual is King: Dig it out (or find it online). Look for sections like “Roof Load,” “Cargo Capacity,” or “Weight Limits.” It will explicitly state the maximum permissible dynamic load for your roof. Write this number down! Roof Rack/Crossbar Limits: If your car came with factory rails but you added aftermarket crossbars, those crossbars have their own dynamic weight limit too! You gotta check the specs for your specific bars. The lower number between your car’s roof limit and your crossbar limit is your hard ceiling. The Roof Box Itself: Yep, the box has limits too! Check its specs for its own empty weight and its maximum load capacity (how much gear it can hold inside). All these numbers play together. Forget it? Big mistake. Need help figuring out strong crossbars for heavy loads? Check this guide on Choosing Crossbars for Heavy-Duty Cargo.
Doing the Math: Crunching Your Weight Numbers
Time for some simple, but crucial, addition. Here’s the formula that matters:
(Weight of Empty Roof Box) + (Weight of ALL Gear Inside) = TOTAL WEIGHT ON ROOF
This TOTAL WEIGHT MUST be LESS THAN or EQUAL TO:
- Your Vehicle’s Dynamic Roof Load Limit
- Your Crossbars’ Dynamic Weight Limit
- The Roof Box’s Max Load Capacity
You gotta satisfy all three! Example: Say your SUV’s dynamic limit is 150 lbs. Your cool roof box weighs 45 lbs empty. Its max load capacity is 110 lbs. Your crossbars are rated for 165 lbs dynamic. Your limiting factor is the vehicle’s 150 lbs. So:
- Box: 45 lbs
- Max Gear Allowed: 150 lbs – 45 lbs = 105 lbs
- Check: 105 lbs is less than the box’s 110 lbs max load? Good! Less than the crossbars’ 165 lbs? Good!
105 lbs is your max gear weight while driving. Pack a bathroom scale to weigh your duffels! That heavy toolbox? Might need to stay inside the car.
Where You Place the Box Matters Too
Believe it or not, where the box sits on your roof affects how the weight stresses the system. Centered Over Crossbars: Always position the box so the bulk of its weight, especially heavy items inside, sits centered over the front and rear crossbars. This spreads the load evenly. Avoid Overhangs: Try not to have the box hanging way off the front or back of the crossbars. Significant overhang creates leverage, increasing stress on the mounting points – effectively making the weight feel heavier dynamically. Closer to Front Often Better: Many manufacturers recommend positioning the box slightly closer to the front of the vehicle (windshield) rather than centered perfectly between the bars. This can improve aerodynamics and stability. Want the lowdown on optimal positioning? See our tips on the Best Position for Your Cargo Box.
SUV & Truck Owners: Special Considerations
Y’all often have higher limits, but don’t get cocky! Higher Dynamic Limits: Trucks and larger SUVs frequently have beefier roofs and higher dynamic capacities – think 150 lbs to 200 lbs or more. Awesome, right? But you still must know your specific number! Weight Distribution is Critical: Because SUVs and trucks are taller, having heavy weight up high dramatically affects handling and rollover risk, even within the weight limit. Pack heavy stuff low and centered. Factory Rails vs. Aftermarket: Know what your factory side rails are rated for. Adding heavy-duty aftermarket crossbars might give you a higher bar limit, but you’re still capped by the roof’s dynamic limit. Don’t assume! Get the specifics for Roof Boxes on SUVs & Trucks.
Sunroofs & Weight Limits: Be Extra Careful
Got a panoramic sunroof? Listen up. Potential Weak Spot: That big glass panel means the roof structure around it might be reinforced differently, but the panel itself isn’t load-bearing. Check Your Manual Twice: Vehicle manufacturers often state lower dynamic weight limits or specific positioning rules if you have a sunroof. Sometimes they say no roof loading at all over the glass! Positioning is Key: Even if allowed, you must ensure the roof box mounts and the weight are positioned only over the solid parts of the roof, not directly over the sunroof glass. The crossbars need to be mounted outside the sunroof opening area. Don’t risk shattering glass! Essential reading: Using a Cargo Box with a Panoramic Sunroof.
Low-Profile Boxes: A Weight Advantage?
You see those sleek, low-slung roof boxes? They’re popular for good reason. Aerodynamic Benefit: They slice through the wind better, reducing drag and improving MPG. Potential Weight Savings: Often, because they use less material or advanced composites (like fiberglass vs. ABS plastic), low-profile boxes can be lighter than taller, boxier models of similar volume. Why Lighter Matters: Every pound saved on the empty box weight is a pound you can add back in gear while staying under your dynamic limit. A box weighing 35 lbs vs. 50 lbs gives you 15 lbs more luggage! Win! Explore some great Skinny & Low-Profile Cargo Box Options.
The Real Risks of Ignoring Weight Limits
“Ah, it’ll probably be fine…” Famous last words. Seriously, overloading isn’t just about maybe getting a ticket. Catastrophic Failure: Exceeding dynamic load risks the entire box and rack tearing off your roof at speed. Imagine that hitting the car behind you. Oh snap! Vehicle Damage: You can permanently bend or crack your roof, damage the mounting points, or wreck your sunroof. Repairs cost thousands. Handling Nightmares: Too much weight up high makes your car feel tippy, increases body roll in corners, and significantly extends braking distances. It’s downright dangerous in emergency maneuvers or windy conditions. Voided Warranties & Insurance Issues: If an overload causes an accident or damage, your insurance might deny the claim, and your vehicle warranty won’t cover related repairs. That sucks. Is saving one extra bag really worth it?
Key Weight Limit Specs Demystified
Let’s put the crucial specs in one spot so it’s crystal clear:
Spec | What It Means For You |
|---|---|
Vehicle Dynamic Load Limit | The MOST Important Number! Max TOTAL weight (rack + box + gear) your car’s roof can handle WHILE DRIVING. Find in your owner’s manual. (e.g., 150 lbs) |
Crossbar Dynamic Limit | Max TOTAL weight (box + gear) your specific crossbars can handle WHILE DRIVING. Must be equal to or higher than your vehicle’s limit. (e.g., 165 lbs) |
Roof Box Empty Weight | How much the empty box itself weighs. This counts against your total dynamic limit! Lighter boxes let you carry more gear. (e.g., 42 lbs) |
Roof Box Max Load Capacity | Max weight of JUST YOUR GEAR that the box itself is designed to hold inside. (e.g., 110 lbs) |
Vehicle Static Load Limit | Max TOTAL weight (rack + box + gear) your roof can handle when PARKED & STATIONARY. Much higher than dynamic. (e.g., 600 lbs) |
Smart Packing: Maximizing Within Your Limits
Knowing your limits is step one; packing smart is step two. Weigh Your Gear: Use a bathroom scale. Know what that big duffel or cooler actually weighs. You’ll be surprised. Prioritize Light, Bulky Items: Roof boxes are perfect for lightweight but space-hogging stuff: sleeping bags, tents, pillows, camp chairs, empty coolers, winter coats. Heavy Items Stay Low (Inside): Batteries, tools, full coolers, toolboxes? These heavyweights belong inside the vehicle, down low, preferably near the center. Distribute Weight in the Box: If you must put moderately heavy items in the box, place them low and centered over the crossbars. Use Every Pound Wisely: That 15 lbs saved by choosing a lighter box? That’s an extra sleeping bag or suitcase!
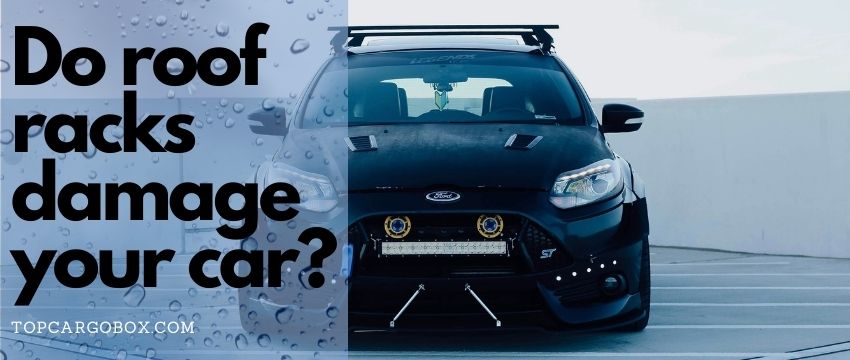
Keeping Your Rack Healthy: Avoiding Damage
Even when staying within limits, proper use keeps your roof happy long-term. Check Mounts Regularly: Periodically inspect the crossbar feet and box clamps for tightness and wear, especially before long trips. Avoid Over-Tightening: Cranking clamps down like a grunt can distort rails or damage components. Follow the manufacturer’s torque specs if given. Know Static Limits When Parked: Don’t climb on the roof or let multiple people lean on a loaded box while stationary. Respect the static limit. Proper Removal/Installation: Don’t drag racks or boxes, scratching the roof. Use proper lifting techniques. Worried about potential damage? Learn how to Prevent Roof Rack Damage to Your Car.
Weight Limits Unlocked: Pack & Drive Safe!
See? Not so scary once you break it down. You’ve got this. Remember: Dynamic Load = Driving Weight Limit (found in your manual!). Static Load = Parked Weight Limit. The dynamic number is the small one you must obey when moving. Do the math: Box Weight + Gear Weight ≤ Vehicle Dynamic Limit (and Crossbar Limit, and Box Load Limit). Position the box smartly, pack heavy stuff low, and prioritize bulky/light gear for the roof. Respecting these limits isn’t about being a buzzkill; it’s about protecting your car, your gear, your wallet, and everyone else on the road. Now you can load up that roof box with total confidence, knowing you’ve got it handled. Go enjoy that adventure, and take it easy out there! Catch you later.
Soft vs. Hard Shell Roof Box: Pick Your Perfect Cargo Buddy!
What’s up, road tripper? Feeling that familiar squeeze packing the car for your next adventure? Yeah, we’ve all been there. You want to bring everything – the skis, the camping gear, the giant inflatable swan for the lake – but your trunk just says “nope.” That’s where a roof box swoops in like a hero! But hold up, the big question hits: Soft Shell or Hard Shell? Totally different vibes, right? Choosing wrong could leave you frustrated or with gear flying down the highway (yikes!). Let’s break it down so you can cruise confidently with your extra cargo. Trust me, figuring this out is worth it.
Understanding the Core Differences: It’s More Than Just Looks
Okay, let’s get real. At first glance, they both sit on your roof and hold stuff. But dude, that’s like saying a backpack and a suitcase are the same thing. They’re built completely differently, and that changes everything about how you use them. Getting this foundation straight is key to avoiding buyer’s remorse later. Seriously, knowing this stuff saves headaches.
- What Exactly is a Hard Shell Roof Box? Think of it like a giant, super-tough suitcase for your car roof. Its outer shell is made from super rigid materials – usually super tough plastics like ABS or super lightweight composites like fiberglass. This shell is permanently fixed to a super strong base. You access your gear by flipping open the whole top half, kinda like a clamshell. It’s a solid, locked-down unit. Ever seen those sleek, colorful boxes gliding down the highway? That’s the hard shell crew. They look legit and feel super substantial.
- What Exactly is a Soft Shell Roof Box (Cargo Bag)? Alright, picture a heavy-duty, weatherproof duffel bag designed specifically to strap onto your roof rack. Instead of rigid walls, it uses layers of seriously tough, coated fabrics (like PVC or polyester blends) that can handle serious weather beatings. There’s no hard frame; the bag gets its shape and support from your roof rack bars underneath and how tightly you pack it. You get into it through zippers, usually a big one on top. It’s way more flexible – literally! When empty, you can often fold it down super small, which is awesome for storage. Pretty clever, huh?
Breaking Down the Heavy Hitter: Hard Shell Roof Boxes
Hard shells are the classic choice for a reason. They bring serious advantages, especially if you travel often or carry precious cargo. Let’s dive into why so many folks swear by them. They feel like a permanent upgrade to your car, honestly.
- Unbeatable Protection & Security: Your Gear’s Fort Knox This is where hard shells absolutely shine. That rigid shell? It’s a total tank against impacts – think flying rocks, low-hanging branches (we’ve all misjudged that driveway, right?), or even minor bumps. Rain, snow, sleet, hail? Forget it, your stuff stays bone dry inside. Plus, most models come with legit locking mechanisms that integrate with your car’s roof rack system. You can literally lock the box closed and lock it to your car. That peace of mind when you stop for lunch or overnight somewhere? Priceless. Knowing your expensive gear is safe lets you actually relax on your trip. For real, who wants to stress about their stuff?
- Aerodynamic Efficiency: Saving Gas & Your Sanity Modern hard shells are designed by aerodynamics wizards. Their sleek, rounded shapes slice through the wind way better than a jumble of loose gear or even many soft bags. Why should you care? Because better aerodynamics means less wind drag, which means significantly better fuel economy on the highway. We’re talking noticeable savings on long trips! Less drag also means way less wind noise – no more constant roaring or whistling driving you nuts for hours. That quiet cabin makes a huge difference. Pretty awesome, right? Check out designs like the Thule Force XT for examples focused on sleek airflow.
- Ease of Loading & Convenience Features That clamshell opening? It’s a game-changer. Flipping open the whole top half gives you massive, unobstructed access to the entire interior. Packing bulky, awkward items becomes so much easier. No more wrestling stuff through a narrow zipper! Many models also have cool internal features like dividers, tie-down points, and even lighting so you’re not fumbling in the dark. Some even have dual-opening hatches for easier access depending on your car’s height. Loading becomes less of a grunt and more like packing a regular trunk. Makes life way simpler.
- Long-Term Durability: Built to Last Adventures Hard shells are seriously tough cookies. That rigid construction can handle years of sun exposure, temperature swings, highway speeds, and general wear and tear without breaking down. They resist punctures, scratches, and UV damage far better than fabric. Think of it as a long-term investment. While the upfront cost is higher, a quality hard shell can easily last ten years or more with basic care. That’s a lot of family vacations covered! It’s not just a box; it’s a travel partner.
The Flexible Contender: Soft Shell Roof Boxes (Cargo Bags)
Soft shells are the agile, budget-friendly underdogs with some seriously appealing perks, especially for specific situations. Don’t underestimate the bag! They solve problems hard shells just can’t.
Affordability & Value: Serious Bang for Your Buck Let’s be honest, price matters. Soft shell cargo bags are almost always significantly cheaper than hard shells. We’re talking potentially hundreds of dollars less for a comparable capacity. If you only need extra space a few times a year (maybe for that big summer camping trip or hauling holiday presents), a soft shell offers incredible value. You get the storage you need without a massive upfront investment. Makes sense, right? Why pay for features you won’t constantly use? It’s a smart way to get started with roof storage.
Lightweight & Compact Storage: Tuck It Away This is a major win for soft shells. When your trip is over and the bag is empty? You can usually fold or roll it down into a surprisingly small package, often fitting into its own storage sack. Stash it in a closet, under a bed, or even in your trunk without it taking over your garage. Compare that to a bulky hard shell, which needs dedicated storage space year-round (like hanging from garage rafters or taking up floor space). If storage real estate is tight at home, the soft shell’s disappearing act is a lifesaver. Super convenient!
Maximum Capacity Flexibility: Pack It Like a Pro Because there’s no rigid structure, soft bags offer unique flexibility. Need to squeeze in that one last oddly-shaped item? You often can, as the fabric can bulge slightly between the roof bars (within safe limits, obviously!). They conform better to irregularly shaped loads. Plus, many soft shells offer truly massive capacities, sometimes exceeding even the largest hard shells. If raw volume for bulky, lightweight gear (like sleeping bags, tents, duvets) is your top priority, a soft shell might be king. Just pack smartly! Thinking about huge capacity? Our guide to the biggest cargo boxes touches on maxing out space.
Low Profile & Potential Weight Savings Soft bags sit much lower on your roof rack than hard boxes. This can be a big deal if you have a low garage clearance – you’re less likely to hear that awful scraping sound! The lower profile can also feel less imposing visually. Additionally, the lack of a rigid frame makes them inherently lighter than hard shells. While the weight difference on the roof might not drastically change your car’s handling, it does make the bag itself much easier for one person to lift onto the roof and maneuver. Less grunt work is always a win in my book. No big deal to handle solo.
Putting Them Head-to-Head: Key Factors to Weigh
Alright, you’ve seen their strengths. Now let’s get practical. How do you actually decide? It boils down to your specific needs, how you travel, and what bugs you the most. Ask yourself these questions honestly.

Frequency of Use: How Often Are You Hitting the Road? Be real with yourself. Are you a weekend warrior escaping the city every other week? Or do you just need extra space once or twice a year for the big family reunion? If you’re using it constantly, the superior durability, security, and convenience of a hard shell justify its cost. It becomes part of your car. If it’s occasional use, a soft shell’s affordability and easy storage make way more sense. Why pay premium for something gathering dust? Makes total sense, right?
What Are You Carrying? Gear Matters! Your stuff dictates the box! Valuables like cameras, electronics, or expensive sports equipment? Hard shell security is non-negotiable. Fragile items? That rigid shell protects way better. Bulky, lightweight, weather-resistant gear (sleeping bags, tents, beach toys)? A soft shell’s huge capacity is perfect. Super dirty or wet gear (muddy boots, wetsuits)? A hard shell is easier to wipe clean inside. Match the box to your typical load. What’s usually filling your space? Check out top cargo carriers for ideas on hauling different gear types.
Security Needs: How Worried Are You? This is crucial. Leaving gear unattended on your roof at a trailhead parking lot or hotel overnight? A lockable hard shell provides serious peace of mind. A soft shell, even with padlocks on zippers, is inherently less secure – someone could slash the fabric relatively easily. If security is a top concern (and for many, it should be!), the hard shell wins hands down. Feeling anxious about leaving stuff up there? Go hard shell. It’s worth the confidence.
Vehicle & Storage Constraints: Space at Home & on the Road Consider your car and your garage. Got a minivan or SUV with crossbars? Both options usually fit fine. Driving a sedan? Measure your roof height – a lower-profile soft shell might be better for garage clearance. Critically, where will you store the box when not in use? If garage space is tight or you live in an apartment, the soft shell’s foldability is a massive advantage. Hard shells need a dedicated spot. Don’t forget about roof boxes for minivans if that’s your ride – compatibility is key! What’s your home storage situation like? Be honest.
Budget: What’s Your Comfort Zone? Let’s not sugarcoat it: hard shells are a bigger investment upfront. You’re paying for that durability, security, and aerodynamics. Soft shells are much kinder to your wallet initially. However, think long-term: a hard shell lasts years longer, potentially making it cheaper per use over a decade. If budget is super tight now, soft shell lets you get the storage you need. If you can invest for the long haul, hard shell pays off. What feels manageable? Fair enough if the price tag makes you pause.
Beyond the Basics: Other Important Considerations
We’ve covered the big stuff, but a few more details can tip the scales. These are the “nice-to-knows” that become “need-to-knows” once you start using it. Don’t overlook these practicalities!
Installation & Mounting: Getting It On There Hard shells typically use a specific mounting system (often brand-specific feet) that clamp securely onto your crossbars. Once set up initially, attaching/detaching the box itself is usually quick (though the box is heavy). Soft shells rely on strong straps (nylon webbing, often with buckles or cam locks) that loop around your crossbars and cinch down tight. Proper strapping is critical for safety with soft shells – follow the instructions meticulously! Neither is super hard, but hard shells feel more permanently attached when mounted. Ever struggled with straps in the wind? It can be a hassle.
Wind Noise & Fuel Economy: The Highway Reality As mentioned earlier, hard shells generally win here. Their aerodynamic design minimizes drag, saving gas and keeping things quieter. Soft shells, due to their fabric nature and less streamlined shape, often create more wind noise and hurt fuel efficiency more noticeably, especially at higher speeds. That constant buffeting sound gets old fast on a long drive. If you do tons of highway miles, the hard shell’s quiet efficiency is a major perk. Who wants to listen to that roar for hours?
Weather Resistance: Keeping the Elements Out Both claim to be waterproof, but reality differs. Hard shells are generally truly waterproof – sealed seams and rigid construction keep driving rain and snow melt completely out. Soft shells are typically water-resistant. Heavy, prolonged rain or submersion (like going through a deep car wash – seriously, don’t!) can eventually overwhelm the seams or zippers. They’re great for typical weather, but not submarine-level protection. If you frequently drive through torrential downpours, hard shell is more reliable. Getting soaked gear sucks!
Weight Capacity: Know Your Limits! Pay super close attention to the manufacturer’s stated weight limit for any roof box, and crucially, your vehicle’s roof rack weight capacity! Hard shells have their own structural limit plus the rack limit. Soft shells rely entirely on your roof bars and how well you strap the load – exceeding capacity risks strap failure or damaging your roof. Distribute weight evenly and never max out the roof capacity. Safety first, always! Your car’s manual is your bible here. Ignoring this is asking for trouble, dude.
Making Your Choice: Which One Sounds Like You?
Okay, time to wrap your head around it! Still feeling stuck? Let’s paint some clear pictures. Think about which scenario feels most like your life. This usually makes the answer pretty obvious.
- The Hard Shell Might Be Your Perfect Match If… You travel frequently (monthly or more), carry valuable or fragile gear, prioritize top-notch security (like leaving gear unattended often), drive long highway distances and want better fuel economy/less noise, have dedicated storage space at home, and are ready to invest in a durable, long-term solution. It’s the hassle-free, premium choice for serious travelers. Sounds good? Then a hard shell is probably calling your name.
- The Soft Shell Could Be Your Best Bet If… You only need extra space occasionally (a few times a year), are on a tighter budget, need maximum storage capacity for bulky/lightweight items, have very limited home storage space, need something ultra-lightweight and easy for one person to handle, or have severe garage height limitations. It’s the flexible, affordable solution for occasional needs or specific constraints. If this resonates, a cargo bag is likely your smart move. Catch you later, trunk space woes!
Essential Specs at a Glance (Not a Comparison!)
Here’s a quick reference table for the main features and specs of each type. Keep your specific needs in mind!
Feature/Spec | Hard Shell Roof Box | Soft Shell Roof Box (Cargo Bag) |
|---|---|---|
Primary Construction | Rigid plastic (ABS) or composite shell | Heavy-duty coated fabric (PVC, Polyester) |
Core Structure | Fixed, rigid frame integrated with base | Flexible, relies on roof bars & packing |
Access Method | Clamshell opening (hinged lid) | Large zippered opening(s) on top/side |
Weather Protection | Waterproof (sealed seams & shell) | Water-resistant (coated fabric, taped seams) |
Security Features | Integrated locks (box closure & to car) | Typically padlock loops on zippers |
Aerodynamics | High (sleek, wind-tunnel designed shapes) | Low-Moderate (fabric creates more drag) |
Weight (Empty) | Heavier (often 50-100+ lbs) | Lighter (often 10-30 lbs) |
Storage When Not in Use | Requires significant space (hanging/floor) | Folds/rolls compactly into storage bag |
Typical Lifespan | Long (10+ years with care) | Moderate (3-7 years with care) |
Ease of Loading | High (full clamshell access) | Moderate (zippered access, can be fiddly) |
Garage Clearance | Higher profile | Lower profile |
Price Point | Higher initial investment | Lower initial cost |
Final Thoughts & Hitting the Road
So, which one’s better? How’s it going? Still pondering? Totally get it – it’s a legit decision! The truth is, there’s no single “best” roof box. The champion is the one that perfectly fits your car, your gear, your budget, and your travel style. Hard shells offer unbeatable protection, security, and ease for frequent flyers. Soft shells bring awesome affordability, flexibility, and compact storage for occasional use or tight spaces. Both solve the core problem: giving you way more space to bring the fun!
Think hard about how you’ll really use it. Be honest about your security concerns and what you’re hauling. Consider your home storage – that’s a biggie people forget! Weigh the upfront cost against long-term value. Do your homework, check your car’s manual for roof limits, and measure twice! Brands like Yakima vs Thule offer great options in both categories if you’re comparing top players. If renting a car is part of your plan, consider cargo boxes for rental cars too.
Whichever path you choose – the rugged hard shell fortress or the flexible soft shell pack-mule – you’re unlocking serious adventure potential. More space means more gear, more fun, and less stress packing. That’s a win however you look at it! Get out there, explore further, and make some epic memories. Take it easy and travel safe!
Your Stress-Free Roof Box Setup: Master Installation Like a Pro
What’s up, road trippers and adventure seekers? Running out of space inside the car for that epic camping trip or family vacation gear? Yeah, we’ve all been there, cramming bags like a game of Tetris gone wrong. A roof box is legit the game-changer you need, unlocking tons of extra storage right on top of your ride. But dude, staring at that big plastic shell and pile of hardware can feel totally overwhelming, right? Forget that stress! This mega-guide breaks down everything step-by-step, turning you from confused beginner to roof box installation master. No big deal, you’ve got this!
Gearing Up: What You Absolutely Need Before Starting
Alright, let’s not jump the gun. Before you even think about lifting that box, get your ducks in a row. Trust me, scrambling for tools halfway through sucks. First things first, read the manual that came with your specific roof box. I know, manuals aren’t exactly thrilling, but this one’s crucial – specs and steps vary! Got it? Awesome. Now, gather your basic toolkit: a tape measure (essential!), a torque wrench (super important for safety, more on that later), maybe a Phillips head screwdriver, some cleaning supplies for your roof rails, and definitely a friend. Seriously, an extra pair of hands isn’t just helpful, it’s almost mandatory. Trying to wrestle a big box solo? That’s a recipe for frustration and potential scratches. Feeling under the weather today? Maybe wait until you’re feeling 100%.
Is Your Roof Rack Ready for Action?
Hold up! Before that shiny new box touches your car, we gotta make sure its foundation is solid. This step is non-negotiable, folks. Are you positive your roof rack or crossbars are actually rated to handle the combined weight of the box and your gear? Check those weight limits – usually found on the rack itself or in your car’s manual. Overloading is a major no-no and super dangerous. Next, physically inspect your crossbars. Are they securely fastened? Give ’em a good wiggle test. Any rust, cracks, or damage? If something looks sketchy, replace it before proceeding. Safety first, always! Finally, give the crossbar surfaces where the box clamps will sit a really good clean. Dirt, grime, or old wax can prevent a secure grip. A simple wipe-down with isopropyl alcohol usually does the trick. How long has it been since you checked your rack? Probably longer than you think!

Unboxing and First Look: Getting Acquainted
Okay, excitement building! Time to carefully unpack your roof box. Find a clean, spacious area like your driveway or garage floor. Open the box and lay out all the parts. Check them against the packing list in the manual. Missing a clamp or bolt? Better to know now than when you’re perched on the roof! Take a good look at the box itself. Familiarize yourself with the front and back (aerodynamics matter!), the latch mechanisms, and especially the mounting points or tracks where the clamping system attaches underneath. Those clamps are your lifeline, dude. Give them a quick once-over to understand how they open, close, and adjust. See any protective films? Leave ’em on for now to avoid scratches during installation. Feeling pumped? You should be!
Strategic Positioning: Finding the Sweet Spot
This part is way more important than most folks realize. Just plopping the box anywhere won’t cut it. You need the optimal position for safety, performance, and even fuel efficiency. Generally, you want the box centered both side-to-side and front-to-back on your crossbars. But here’s the kicker: often, positioning it slightly behind the center point towards the rear is best. Why? It minimizes wind noise buffeting around your front windshield and gives you better rear visibility. Check your car’s manual too – some manufacturers specify max overhang limits, especially at the front. Use your tape measure to ensure equal distance from the front crossbar to the box’s front edge, and from the rear crossbar to the box’s rear edge. Getting it right now saves headaches later. Who knew a few inches could make such a difference?
Clamping Down: Securing the Beast (The Right Way!)
Alright, moment of truth! With your box perfectly positioned, it’s time to lock it down. This is where that torque wrench becomes your best friend. Never just crank the clamps down as hard as you can grunt – you can seriously damage the box or your crossbars! Here’s the drill: Open the clamps according to your manual’s instructions. Carefully hook them onto the crossbars through the box’s mounting tracks. Finger-tighten each clamp just enough so the box doesn’t slide around easily. Now, working diagonally (like tightening lug nuts on a wheel), gradually tighten each clamp a little bit at a time. Your manual will specify the exact torque setting (usually in Newton meters or foot-pounds) – this is critical. Use your torque wrench to achieve this setting precisely on every single clamp point. Double-check that the clamps are securely gripping the metal part of the crossbar, not just any plastic covers. Feeling confident? You should be!
Locking It Up & Final Safety Checks
The box is clamped, but we’re not hitting the road just yet. Engage the box’s locking mechanisms. Most boxes require you to lock each end separately using your key. Make sure you hear and feel the locks fully engage. Give the box a serious shake test. Push it firmly side-to-side and front-to-back. Does it feel absolutely solid? Any movement or rocking means something isn’t tight enough – go back and re-check those clamps and torque settings! Don’t forget to check your clearance. Open your trunk hatch, sunroof, or liftgate fully. Does it hit the box? Oh snap! You’ll need to adjust the box position rearward. Also, ensure the box isn’t blocking any antenna or satellite receiver. Finally, visually inspect all clamp points one last time. See any gaps or misalignment? Better safe than sorry, for real.
Hitting the Road: Your Initial Test Drive
Take it easy, champ! Don’t load it up and blast onto the highway immediately. Your first drive should be cautious. Head out on some quieter local roads. Keep your speed low initially – maybe stick under 40 mph. Listen intently. Do you hear any unusual whistling, howling, or rattling noises? That could indicate a slight misalignment or something not fully secured. Feel any vibration through the steering wheel? Pay attention to how the car handles; a roof box changes your car’s center of gravity slightly. After a few miles, pull over in a safe spot. Get out and physically check every clamp point again. Are they still tight? Is the box sitting squarely? Everything cool? Awesome, you can gradually increase your speed. Feeling good? That’s the sign of a job well done!
Loading Like a Pro: Weight Distribution & Access
Now for the fun part – packing! But even this has its tricks. The golden rule? Put the heaviest items first, positioned directly over the front crossbar. This is the strongest point and helps maintain good vehicle balance. Then, distribute medium-weight items towards the rear crossbar. Keep lighter, bulkier stuff (sleeping bags, pillows) in the middle or top. Avoid packing everything way at the back; it creates a lever effect stressing the rear mounts. Pack items snugly so they don’t shift and bang around during turns. Need something mid-trip? Think about access – pack items you might need (like rain jackets or snacks) near the opening end or in a separate bag you can pull out easily. Don’t forget that weight limit! Exceeding it is asking for trouble. Check out our guide on choosing the right roof box if you need a refresher on capacities.
Keeping It Awesome: Maintenance & Care
Your roof box is an investment, so take care of it! After trips, give it a good wash inside and out with mild soap and water, especially if you drove through road salt or grime. Gunk can build up in the tracks and seals. Periodically check the clamp mechanisms – ensure they open, close, and lock smoothly. A tiny drop of silicone spray on moving parts can work wonders. Inspect the seals around the lid. Are they intact and pliable? Cracked or brittle seals mean water gets in, and nobody wants soggy gear. When not in use, store it properly. Find a cool, dry place away from direct sunlight if possible. Hanging it on wall brackets or storing it on its side (if designed for it) saves floor space. We’ve got great tips on storing your roof box long-term to keep it in top shape. Thinking about renting instead? Compare the pros and cons of renting vs buying a cargo box for your needs.
Troubleshooting Common Hiccups
Even with perfect installation, minor things pop up. No worries, we’ve got fixes. Annoying wind noise? That’s super common. First, double-check your box positioning – is it too far forward? Try moving it slightly rearward. Ensure the lid is fully closed and locked. Sometimes, adding a wind deflector (if compatible) in front of the box helps massively. Notice a slight decrease in fuel economy? Totally normal due to increased drag; driving smoothly and avoiding high speeds helps. Lid hard to close? Don’t force it! Check for obstructions in the seal track and ensure the box isn’t overstuffed. If locks get sticky, a graphite-based lubricant (not oil!) is your friend. If you encounter major issues like persistent movement or damage, stop using it and consult the manufacturer or a pro. Need more general info? Get the lowdown on everything you need to know about cargo boxes.
Key Roof Box Features & Specs at a Glance
Feature/Spec | What It Means For You |
|---|---|
Capacity (Volume) | Measured in liters or cubic feet. Tells you how much stuff it can hold. Crucial for trip planning! |
Weight Limit | The maximum weight (gear + box itself) it can safely carry. Never exceed this! Check your car’s roof load limit too. |
Dimensions (LxWxH) | How long, wide, and tall the box is. Affects what fits on your roof, trunk access, and garage clearance. |
Opening Mechanism | Which side(s) the lid opens from (e.g., dual-side, rear). Impacts loading convenience and your car type (hatchback vs sedan). |
Aerodynamic Design | Sleeker shapes = less wind noise and better fuel mileage. Look for tapered fronts. |
Mounting System | How it clamps to your bars (e.g., U-bolt, T-track). Must be compatible with your crossbars. |
Locking | Integrated locks (usually 1 or 2 keys) secure your gear. Essential for peace of mind! |
Material | Usually ABS plastic or fiberglass. ABS is common, durable, and affordable. Fiberglass is lighter but pricier. |
Weight (Empty) | How heavy the box itself is. Impacts your vehicle’s payload capacity and ease of handling. |
Security Features | Things like reinforced bases or anti-theft clamps offer extra protection for your stuff. |
Wrapping Up: Adventure Awaits!
See? Installing a roof box isn’t rocket science. By taking your time, following these steps carefully (especially that torque wrench step!), and doing those safety checks, you’ll have it secured like a pro. No more stressing about space, just pure excitement for the open road ahead. Imagine all that extra gear you can bring – bikes, skis, camping stuff, whatever fuels your adventure. Go load it up, hit your favorite scenic route, and enjoy the freedom that comes with all that extra cargo room. Drive safe, travel smart, and make some awesome memories out there! Catch you later! Got questions on how long fitting usually takes? We’ve got answers.
Your Roof Box Lock Truth: Will Thieves Win?
What’s up, road warriors? Ever packed your roof box full of pricey gear – skis, camping stuff, maybe even luggage – and felt that nagging worry creep in? You know the one: “What if someone just… takes it?” You lock it up, drive off, but that little voice whispers, “Are these locks actually any good?” Totally get it. Leaving hundreds or thousands of dollars worth of gear strapped to your roof feels risky. So, let’s cut the marketing fluff and get brutally honest. Can thieves easily break into your roof box? We’re diving deep into real-world lock tests, vulnerabilities, and how you actually make yours a tougher target. No sugar-coating, just the security lowdown you need.
The Lock Reality Check: It’s Not Fort Knox (But It Doesn’t Have To Be)
Okay, let’s be real upfront. Most standard roof box locks aren’t designed to stop a determined thief with heavy-duty tools and plenty of time. If someone really wants what’s inside your specific box and has no witnesses around, they can probably get in. That’s just the harsh truth. BUT, and this is a huge “but,” that doesn’t mean your locks are useless! Their real job is to be a massive deterrent. Think about it like your home door lock. A pro burglar can get through it, but most thieves are looking for the easy score – the unlocked door, the open window. Your roof box lock aims to make stealing your gear way more trouble than it’s likely worth, pushing thieves to look elsewhere. So, how do they stack up? Let’s break down the common types.
Standard Key Locks: The Everyday Defense (And Its Weak Spots)
This is what you’ll find on the vast majority of roof boxes. It’s the lock you engage with your key after closing the lid. Pretty straightforward, right? Off the top of my head, these usually work with a simple pin tumbler mechanism, similar to many older house locks. How tough are they? Well, they generally hold up decently against casual “jiggling” or opportunistic tugs. However, security experts often rate them as relatively low-security. Why? A few reasons:
- Pickability: With basic lock-picking skills and cheap tools readily available online, an experienced thief can often pop these open in under a minute. Scary, right? There are tons of videos showing just how quickly it can be done. Not exactly reassuring when your camping gear is stashed up there!
- Bypassing: Sometimes, the way the lock bar connects to the latch can be manipulated with a thin shim (like a strip of metal or even a sturdy plastic card) inserted just right, tricking the mechanism into thinking it’s unlocked. It’s a common trick for cheap locks.
- Brute Force: While harder, repeatedly yanking hard on the lid near the lock point can sometimes stress or break cheaper plastic latch components inside. It’s noisy and obvious, but in a deserted parking lot? It happens. You definitely don’t want to discover that after a long hike.
“Double Lock” Systems: Stepping Up Your Game
Feeling nervous about those standard locks? Fair enough. That’s where “double lock” systems come in. You’ll see this feature advertised, and it does offer a meaningful upgrade. What’s the deal? Instead of just one locking point per side, these boxes have two independent locking mechanisms (often at the front and rear of each side latch). You usually engage them both with the same key turn. Here’s why it’s better:
- More Resistance: A thief now has to defeat two locks per side instead of one. Doubling the work significantly increases the time and effort needed, which is a huge deterrent. Time is a thief’s enemy.
- Harder to Shim/Bypass: Manipulating two separate latches simultaneously with shims becomes much more complex and finicky. It’s not impossible, but it’s far less likely to succeed quickly.
- Structural Rigidity: Having two points locked often makes the entire lid feel more solidly attached, reducing flex that might aid brute force attacks. That extra rigidity adds peace of mind when you’re miles away from your car at a trailhead. Worth the upgrade if security is a top concern.
Locking Clamps: Securing the Whole Shebang
Hold on! Locking the box lid is crucial, but what about the whole darn box? What’s stopping a thief from just unclamping the entire carrier and walking off with your stuff inside it? Oh snap, that’s a nightmare scenario! This is where locking clamps become absolutely essential. Most decent roof boxes have clamps that can be physically locked after you’ve tightened them onto your crossbars. This prevents someone from simply loosening the knobs or levers and lifting the box off your car. Seriously, never buy a box without this feature! Check out why a roof box is essential – security is a big part of it.
The Thief’s Toolbox: How They Might Attack
Alright, let’s get into the gritty stuff. How do bad guys actually try to get into these things? Understanding their methods helps you defend against them. Here’s what they might pull:
- The Opportunistic Tug: Simplest method. They just walk by, see a box, give the lid a quick, hard yank. If it wasn’t fully latched or locked (hey, it happens!), or if the latch is super flimsy, it might pop open. Always double-check that click!
- Lock Picking: As mentioned, standard pin tumbler locks are vulnerable. A skilled picker with quiet tools can be in and out quickly if no one’s watching. It’s stealthy.
- Shimming/Bypassing: Using thin, rigid strips to manipulate the latch mechanism past the lock bar. Often targets single-lock systems more easily.
- Prying/Crowbars: The brute force approach. Jam a pry bar or large screwdriver into the seam between lid and base and lever it open. This is incredibly damaging – it’ll wreck the box, likely bending metal parts and shattering plastic. But it can work fast on weaker boxes, especially if they can get enough leverage. Seeing a crowbar test on video is legit terrifying.
- Drilling: Drilling out the lock cylinder itself. Destructive, noisy, but effective if they don’t care about trashing the box. Higher-security locks resist this better.
- Stealing the Whole Box: If clamps aren’t locked, or if they can cut the crossbars (a much bigger job), they might just take the entire unit. Locking clamps are your first line of defense here.
What Lock Tests Actually Reveal (Hint: It Depends!)
You see videos online – “WE TESTED ROOF BOX LOCKS WITH A CROWBAR!” They can be dramatic. But take them with a grain of salt. Results vary wildly based on:
- Box Brand & Model: A cheap, thin-shelled box will fold like cardboard under a crowbar. A premium box with a reinforced opening edge and metal-reinforced latches will resist much longer. You absolutely get what you pay for in security.
- Lock Quality: A flimsy $5 lock vs. a more robust $20 lock makes a massive difference in resisting picking, drilling, and prying forces.
- Where They Pry: Prying near the lock point is harder than prying midway down a long side where the plastic might flex more. Thieves know this.
- The Attacker’s Strength/Tools: A grunt with a giant crowbar vs. a dude with a small screwdriver? Yeah, different outcomes. Most thieves aren’t bodybuilders, but they use leverage.
Real Talk: Can You Actually Make Your Box Secure?
Absolutely, you can make it way harder for them! Forget about making it impossible – focus on making it not worth their time and risk. Think layers of security, like an onion (or an ogre…). Here’s your practical defense plan:
- Invest in a Quality Box: Seriously, this is number one. Boxes from reputable brands (Thule, Yakima, etc.) generally use better locks, stronger latch mechanisms, and more durable plastics that resist flexing and prying. Check out options for your specific ride, like Audi Q7 boxes or Toyota Sienna. That initial cost buys real security.
- Demand Double Locks: If security is a major concern (and it should be!), make “double lock system” a non-negotiable feature when shopping. It’s a significant step up.
- ALWAYS Lock the Clamps: This seems obvious, but it’s often overlooked. Lock those clamps every single time you leave the car. No exceptions! It prevents the whole-box heist.
- Park Smart: This is HUGE and costs nothing. Park in well-lit, high-traffic areas whenever possible. Thieves hate audiences. If there’s security camera coverage (like near store entrances), even better. Avoid dark, isolated corners of parking lots like the plague. Consider dedicated gear like locking cables through the box handles and around the crossbars for an extra visual deterrent on long stops, though this isn’t foolproof.
- Don’t Advertise: Try not to leave super tempting, high-value items (like obvious camera bags or expensive electronics boxes) visible inside the box. If you must, cover them with blankets or clothes. Out of sight, out of mind. Pack strategically – heavy stuff over the front bar makes the box harder to lift even if clamps are compromised. Find the best cargo carriers for camping gear to help organize and conceal.
- Check Your Gear Insurance: For real? Talk to your auto or homeowners/renters insurance provider. Understand what’s covered if gear is stolen from your roof box and what proof you might need (police reports, photos, receipts). Don’t assume it’s covered! Know your policy.
Roof Box Security Features Explained (What Matters!)
Feature | Why It Matters For Security |
|---|---|
Double Lock System | Two locks per side significantly increases time/effort needed to bypass, a major deterrent vs. single locks. |
Reinforced Lid Edge | Metal or thick plastic reinforcement where prying happens makes it much harder to jam a tool in and break it. |
Metal Locking Bars/Latches | Metal components inside the latch mechanism resist bending and breaking far better than plastic under force. |
Locking Clamps | Essential! Prevents thieves from simply loosening and stealing the entire box with your gear inside. |
High-Quality Lock Cylinder | Better resistance to picking and drilling. Look for brands mentioning “security cylinders” or similar. |
Sturdy Shell Material | Thicker, reinforced ABS plastic or composite materials flex less under prying, making brute force harder. |
Integrated Latch Covers | Small plastic flaps covering the latch points make it slightly harder to access for shimming/picking. |
Specific Vehicle Considerations (Fit Matters!)
Your car model actually plays a role too! How the box sits on your specific roof rack/crossbars can affect vulnerability. For instance:
- Low-Profile Cars (Sedans): The box might be easier for a thief to reach and manipulate the latches or pry points without needing a step stool. Parking smart is extra crucial.
- Tall Vehicles (SUVs, Trucks): The height makes it harder to reach the center of the box lid to pry effectively, acting as a natural deterrent. However, ensure your crossbars are robust! Weak bars are a weak link. See options for Dodge Journey or Acura MDX.
- Sunroof/Liftgate Interference: If the box sits too far back, it might block your liftgate. But positioning it too far forward can make the front latch more accessible from the ground near the windshield. Find that sweet spot!
Peace of Mind on the Road: It’s Achievable!
Look, no security measure is perfect. But by choosing a well-made box with good locks (double is best!), always locking the clamps, and parking like a pro, you dramatically reduce your risk. Most thefts are crimes of opportunity. Make your roof box a hassle they don’t want to deal with. Focus on enjoying your adventure, knowing you’ve done your part to keep your gear safe. Drive safe, explore freely, and catch you on the road! No worries, you’ve got this security thing handled now.
Beyond the Box: Roof Cargo Alternatives Compared
What’s up, space seekers? Feeling that familiar panic trying to cram one more bag into your already overflowing car? Been there, done that, got the grumpy kids to prove it. Roof boxes are awesome, but dude, maybe they aren’t the perfect fit for you. Maybe the upfront cost makes you sweat, or storing that giant plastic shell feels impossible in your tiny garage. Totally get it! What if I told you there are legit other ways to haul your gear? Let’s ditch the one-size-fits-all thinking and explore the world of cargo bags, baskets, and hitch carriers. Each has its own vibe, strengths, and quirks. Finding your match could save you cash, hassle, and maybe even your sanity on the next big trip. Ready to see what else is out there?
Soft Roof Bags: The Budget-Friendly Space Saver
Alright, let’s kick things off with the most wallet-friendly option: soft-sided roof bags. Picture a giant, rugged duffle bag designed to strap directly onto your car’s roof rails or crossbars. How’s it going for affordability? Seriously, they often cost a fraction of a hard shell box. Storage is a breeze too – when not in use, they roll or fold down into a surprisingly compact bundle you can toss in a closet. That’s awesome for apartment dwellers or anyone tight on space. But hold up, it’s not all sunshine and rainbows. Weather protection is key here. You need a high-quality bag with a seriously waterproof rating (think 10,000mm+ hydrostatic head) and taped seams. Cheap ones? They’ll leak like a sieve in a downpour, leaving your sleeping bags soggy. Security is also minimal – sharp objects can potentially slice through the material, and they usually rely on basic straps, not locks. They’re perfect for bulky, lightweight, weather-resistant gear like tents, sleeping pads, or camp chairs. Need inspiration? Check out these potential road trip saviors.
- Water Worries & Wind Whispers: That waterproof claim is everything. Don’t just take the marketing at face value – look for legit reviews mentioning real rain tests. Wind noise can also be a thing, as soft bags don’t have that sleek aerodynamic shape. Expect some whistling, especially at highway speeds. Packing strategically helps; make the bag as smooth and tight as possible. Always, always use the provided straps plus extra tie-downs through the bag’s loops for peace of mind. A bag flying off is no joke!
- Installation & Packing Smarts: Getting it secure feels a bit more hands-on than clipping a box. You lay the bag flat on the bars, load it up (distributing weight evenly!), then cinch it down tight with the integrated straps, crisscrossing them for stability. Double-check every buckle and strap before you roll out. Pack heavier items low and centered. Avoid overstuffing – it stresses the seams and makes it harder to secure properly. Think of it like packing a backpack for your roof. Fair enough?
Roof Baskets: The Open-Air Adventure Hub
How’s it going for those who love versatility and that rugged, off-road look? Enter the roof basket. Imagine a metal (usually steel or aluminum) platform sitting on your crossbars, ready to hold anything you can strap down. Need to haul firewood, a spare tire, oversized coolers, or even a kayak? A basket handles it. The open design means no height restrictions – stack it high (within weight limits, obviously!). That feeling of freedom is pretty good. But, oh snap, the big downside is zero weather protection. Everything’s exposed to sun, rain, dust, and highway grime. You’ll need heavy-duty tarps, cargo nets, and a serious collection of straps and bungees to secure your load safely. Wind noise and drag can also be significant, hitting your fuel economy harder than a sleek box. It’s the ultimate utility player for dry gear and bulky items. Explore the best cargo basket options to see what fits your style.
- Strapping Down Like a Pro: Security here is all about your lashing skills. Invest in high-quality ratchet straps or cam buckle straps – no flimsy old-school bungees for anything important! Cargo nets are great for keeping smaller items contained, but they don’t provide real security against theft. Cross your straps and anchor them securely to the basket’s sides. Give everything a firm tug test before driving off and after the first few miles. Things shift! Feeling unsure? Guides like the Suorto basket setup can help visualize it.
- Basket Upgrades & Accessories: The basic basket is just the start. Many offer cool add-ons like extension kits for more length, wind fairings to cut down on noise (a bit!), or even hard covers that snap on for partial weather protection (check out the Yzona hard-top or Meefar upgrades). Side rails keep things from sliding off easily. Consider how you’ll use it before buying accessories. Are you serious about maximizing it?
Hitch Carriers: Taking the Weight Off Your Roof
What’s up if lifting heavy stuff onto your roof sounds like zero fun? Or maybe your vehicle can’t handle a roof load? Hitch carriers mount directly into your trailer hitch receiver, carrying gear down low and centered behind your car. Dude, loading is a breeze – just lift things waist-high instead of overhead. They can handle serious weight, often 500 lbs or more, making them ideal for coolers full of drinks, generators, grills, or multiple heavy suitcases. Many even come with handy ramps for rolling ATVs, motorcycles, or heavy cargo bins on and off. Talk about convenient! However, they do block access to your trunk or tailgate unless you get a fancy swing-away model. Ground clearance can be reduced, especially on bumpy roads or steep driveways. Backup visibility often takes a hit too. They’re fantastic for heavy, bulky items you need frequent access to. Discover the best hitch cargo boxes and carriers with ramps.
- Hitch Class & Weight Wisdom: This is CRUCIAL. Your carrier is only as strong as your hitch. Know your hitch receiver class (I, II, III, IV, V) and its tongue weight capacity. The carrier’s weight plus your gear must not exceed this limit. Seriously, overloading is dangerous and can damage your vehicle. Distributing weight evenly on the platform is key. Heavier items should go forward, closer to the vehicle. Factor in the carrier’s own weight when calculating your total load! Need help understanding hitches? Our guide on weight distribution is essential reading.
- Security & Stability on the Road: Hitch carriers feel solid, but your load still needs secure strapping. Use multiple heavy-duty straps. Locking hitch pins (like the Rhino USA adjustable) prevent someone from just unbolting the whole carrier. Some carriers offer integrated lock points for cables. Watch for load shifting during turns and braking. Give it a visual check at every stop. Better safe than sorry, for real.
The Big Choice: Which Alternative Fits YOUR Life?
So, how do you pick? It boils down to your specific needs, budget, and what kind of junk… err, valuable gear… you need to haul. Let’s break it down simply:
- Choose a Soft Roof Bag If: Your budget is tight, storage space is minimal, you mostly need weather-resistant bulk (camping gear, clothes in waterproof bags), and you prioritize easy stowing over ultimate security or aerodynamics. It’s a solid space saver.
- Choose a Roof Basket If: You crave maximum versatility for oddly shaped or bulky items (kayaks, lumber, tires), don’t mind wrestling with tarps and straps, love the rugged aesthetic, and mostly carry stuff that doesn’t mind getting dusty or wet (or you’ll cover it well). Utility is king.
- Choose a Hitch Carrier If: You regularly haul heavy items (coolers, generators, fuel cans), hate lifting things onto the roof, have a good hitch receiver, need frequent access during travel, and can handle slightly reduced rear visibility and ground clearance. Power loading wins.
Key Specs Snapshot: Know Before You Go
Feature | What You Need to Consider |
|---|---|
Cost | Budget? Bags win. Mid-range? Baskets & basic carriers. Higher-end? Premium baskets & swing-away carriers. |
Storage Footprint | Bags fold small. Baskets are bulky but open. Carriers need floor/garage space or hitch storage. |
Weather Protection | Bags need high waterproofing. Baskets = None (add tarps). Carriers = Partial (some have covers). |
Security Level | Bags = Low. Baskets = Low-Medium (straps only). Carriers = Medium (locks possible). |
Ease of Loading | Roof = Harder (height). Hitch = Easier (waist height, ramps available). |
Weight Capacity | Varies hugely! Check both the carrier/bag/basket limit AND your vehicle’s roof/hitch limit. Never exceed! |
Aerodynamics/Noise | Boxes best, then bags, then baskets. Hitch carriers vary. Expect some impact on MPG & noise with all except boxes. |
Vehicle Access | Roof options block sunroof sometimes. Hitch carriers block trunk/tailgate (swing-away fixes this). |
Ideal Cargo | Bags: Light, bulky, weather-resistant. Baskets: Bulky, awkward, dry. Carriers: Heavy, bulky, frequent access. |
Installation & Setup: Getting Rolling
No big deal, but each option has its own setup quirks. Soft bags need meticulous strapping – crisscross those straps tightly and double-check all buckles. Roof baskets require solid mounting to your crossbars; follow the instructions precisely and ensure it’s centered. Hitch carriers need the right size hitch pin and often a locking mechanism; make sure it’s seated fully in the receiver and use the safety chains/cables if provided. Always, always, always check your load security after the first few miles and at every major stop. Things settle and shift! Feeling confident?
Making the Most of Your Choice: Pro Tips
Alright, you picked your weapon! Here’s how to rock it:
- Soft Bags: Use internal dry bags for critical gear even if the main bag is waterproof. Pack tightly to avoid shifting. Cover sharp corners inside the bag. Use extra tie-downs through the bag’s loops for redundancy.
- Roof Baskets: Invest in a heavy-duty waterproof tarp and secure it under the cargo net. Use multiple ratchet straps, not just bungees. Center the load. Consider a wind fairing if noise drives you nuts.
- Hitch Carriers: Know your tongue weight limit cold. Distribute weight forward. Use multiple high-quality ratchet straps. Check the carrier mount and hitch pin tightness frequently. Consider a lighting kit if the carrier blocks taillights (legally required in some places!). Swing-away models are worth it for trunk access.
The Verdict: More Space, Your Way
See? You’ve got options, friend. Roof boxes are great, but they aren’t the only game in town. Whether you grab a soft bag for spontaneous trips, a basket for your next big haul, or a hitch carrier for heavy lifting, you’re unlocking serious space without the commitment of a hard shell. It’s about matching the solution to your adventures, your budget, and your ride. Forget the stress of cramming – get the right gear hauler and actually enjoy the journey. Load up, hit the road, and make some memories. Catch you later! No worries, you’ve got this space thing figured out. Drive safe!
The Ultimate Roof Box & Cargo Carrier Truth Bomb
Alright, let’s tie this all together! Whether you’re a road-trip rookie or a seasoned adventurer, one thing’s clear: expanding your car’s cargo space isn’t just about buying gear—it’s about making smart, personalized choices. From mastering roof box installation like a pro to understanding whether thieves can crack your locks, and finally exploring alternatives like bags, baskets, or hitch carriers, you’ve now got the full picture.
Installation taught you that precision matters—torque wrenches aren’t optional, positioning affects noise and safety, and lazy setups risk disasters. Security revealed that while no box is theft-proof, deterrence is everything: double locks, clamp security, and smart parking turn your rooftop into a fortress. And alternatives? They’re not just plan B’s—they’re game-changers for budget, accessibility, or specialty hauls (think hitch carriers for ATVs or soft bags for spontaneous camping).
The big takeaway? Your perfect solution hinges on three things:
- Your Lifestyle (Weekend camper? City commuter? Overlander?).
- Your Budget (Splurge on a fortress-like box? Or go minimalist with a bag?).
- Your Tolerance for Hassle (Got storage space? Willing to strap gear weekly?).
Roof boxes shine for weather protection, aerodynamics, and security—but they’re not the only heroes. Hitch carriers save your back, baskets handle dirty gear, and bags vanish when not needed. And no matter what you pick:
- Weight limits are sacred.
- Parking smart is your #1 theft deterrent.
- Regular maintenance (lubing locks, checking straps) keeps adventures stress-free.
So—what’s next? If you’re eyeing a box, nail the installation. If security worries you, double-lock it. If a box feels like overkill, explore baskets or hitch carriers. At the end of the day, it’s about freedom: more space = more memories, less stress. Now go load up, hit the road, and own your journey—you’ve totally got this.
Our team is creating outdoor-gear relevant articles with passion. If our articles can help you to find the correct solutions for your questions, we will be happy about that. In the content creation process, we usually collect accurate and useful information online or offline to compile our content in an organized way. Consequently, we can guarantee that you can discover some expected answers to your questions. We appreciate your time on our site.