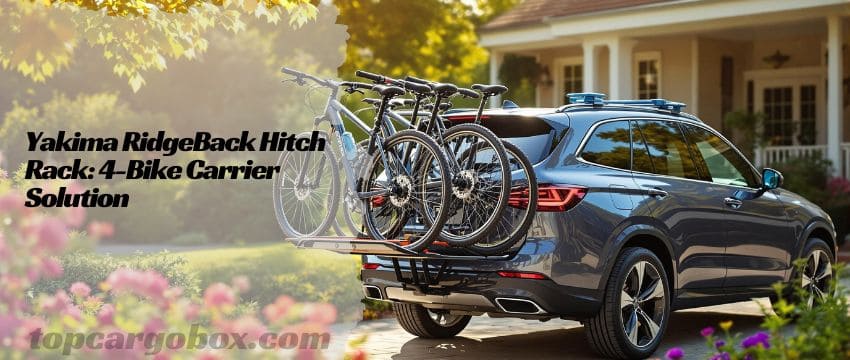
Alright, let’s talk bike adventures! You know the drill: you’re totally stoked for that weekend ride with your crew, the trails are calling, the sun is shining… but then reality hits. Wrestling bikes into the trunk? Forget it. Trying to squeeze them all inside the SUV? Say goodbye to passenger space and hello to scratched interiors. And that old trunk rack? Yeah, it wobbles like crazy and makes you nervous the whole drive. Sound familiar? What if there was a smarter, safer, way less stressful way to haul your bikes? Dude, there totally is. Meet the Yakima RidgeBack Tilt-Away Hitch Bike Rack – your new best friend for getting you and your bikes (up to four of them!) where you need to go, hassle-free.
Why Choosing the Right Hitch Rack Matters (More Than You Think!)
Okay, let’s cut to the chase: picking any old bike rack? Big mistake. You wouldn’t trust a flimsy lock with your favorite ride, so why gamble on something holding all your bikes on the highway? For real? Picture this: you’re cruising at 65 mph, heart pounding every time you glance back because those bikes are dancing like crazy in the wind. How’s that for stress? Or worse – you finally unload after hours on the road, psyched to ride, only to find fresh gouges on your frame from it banging against your buddy’s bike the whole trip.
Total bummer. And let’s not even talk about the horror show if that cheap rack just… gives up. No way! That’s why grabbing a legit hitch rack like the RidgeBack isn’t just about making life easier (though it totally does); it’s about ditching that constant low-level panic. You wanna daydream about singletrack or post-ride burgers, not white-knuckle the steering wheel worrying if your gear’s gonna end up on the interstate. I get it. And honestly, wrestling with some complicated, bolt-heavy setup when you’re already late meeting your crew? That just sucks.

Think about what you actually need out there. Freedom, right? Like when you roll up after an epic ride, sweaty and starving, and just need that cooler in the trunk. With most racks, you’re looking at unloading bikes first or doing some weird yoga pose to reach around them. Nice try, but no thanks. The RidgeBack flips that script. One simple pull on their UpperHand lever, and the whole rack tilts smoothly down, bikes still safely strapped in, giving you full access to your trunk or hatch like magic. Groceries, camping gear, your giant dog’s water bowl – grab it and go. Isn’t that the kind of hassle-free experience you’re after? It’s not just a rack; it’s your ticket to actually enjoying the whole adventure, start to finish, without the grunt work. No more sacrificing space or time just because you brought the bikes along. Totally changes the game.
Bottom line? Settling for a wobbly, awkward, or just plain sketchy rack turns what should be pure stoke into a stress-fest. Who needs that? You deserve gear that works as hard as you play. Something solid that keeps your bikes safe, secure, and scratch-free mile after mile. Something stupid-easy to put on and take off so you’re not wasting precious ride time. And something smart enough to get out of your way when you need your car space back. That’s the dream, dude. The RidgeBack tackles those exact headaches head-on, letting you focus on the fun stuff – like where your next two-wheeled adventure takes you. Fair enough? Why sweat the small stuff when the solution’s right here?
RidgeBack’s Killer Feature: Effortless Tilting & Access
Okay, picture this: You roll up to the trailhead, sweaty and awesome after an epic ride. You just wanna grab your water bottle and snacks from the trunk. But your bike rack is blocking the hatch. Ugh! Traditionally, this meant awkwardly reaching under bikes, maybe even partially unloading them. Forget it! The RidgeBack’s genius move is its patented UpperHand lever. This isn’t some tiny, flimsy switch. It’s a big, chunky lever right where you need it.
One simple pull, and the entire rack assembly smoothly tilts down towards the ground, bikes and all! Your trunk or hatch swings open freely, like magic. Need to grab the picnic blanket? Cooler full of post-ride drinks? No big deal. When you’re done, just lift the rack section back up until it clicks securely into place. That’s awesome! It’s pure, uncomplicated functionality designed for real life. How many times have you wished for this exact feature? Exactly.
SpeedKnob: Tool-Free Installation? Yes, Please!
Now, let’s talk about getting this beast onto your car. The dread of digging through the garage for that one specific wrench, lying on your back trying to thread a bolt into a hitch receiver that’s slightly misaligned… Give me a break! Yakima gets it. That’s why the RidgeBack features the SpeedKnob. This oversized knob replaces traditional bolts and wrenches. Here’s how it works: You slide the rack’s hitch shank into your vehicle’s receiver (whether it’s 1.25″ or 2″ – more on that versatility soon!).
Then, you simply hand-tighten the big SpeedKnob. It uses a clever cam mechanism that pulls the rack shank tight against the walls of your hitch receiver, eliminating wobble and play. No tools required. Seriously, it takes less than a minute. Tightening it down feels satisfyingly solid, and loosening it to remove the rack is just as easy. Heading home after the ride, tired and maybe a little muddy? You’ll really appreciate not needing to find tools. Totally worth it.
Fold Flat? Storage Solved (Even in Small Spaces!)
So, you’ve had an amazing day biking. The rack did its job perfectly. Now you’re home. Where do you put this thing? Not everyone has a massive garage. I get it. While the RidgeBack isn’t “foldable” in the sense of collapsing into a tiny square (that “Is Foldable: No” spec refers to the rack arms folding up like some designs), it does have a super practical storage trick. After tilting the rack down with the UpperHand lever, you can continue folding the main bike tray section flat against the vertical post. This significantly reduces its profile. Instead of sticking out like a giant metal spider, it becomes a much slimmer unit.
You can easily slide it into a garage corner, stand it upright against a wall, or even stash it in a reasonably sized closet. Compared to many bulky hitch racks, this flat-folding feature is a major space-saver. Fair enough? It means you don’t have to leave it permanently mounted on your car, tempting thieves or getting covered in road grime. Check out our guide on cleaning and maintaining bike racks to keep yours looking fresh after storage!

Rock-Solid Security: Keeping Your Bikes Safe & Sound
Let’s not sugarcoat it – seeing your expensive bikes strapped to the back of your car can feel like waving a giant “Steal Me!” sign. For real? That pit-in-your-stomach worry every time you park at a trailhead or grab coffee sucks the fun right out of your adventure. The RidgeBack gets it and packs serious smarts to fight both bounce-off and walk-off thieves. Forget those wimpy Velcro straps you’re used to failing; the ZipStrips are legit beasts.
Picture super-tough nylon straps with ratcheting buckles that lock down with a solid click. You loop them around your frame and the cradle, crank ’em tight, and boom – your bike isn’t going anywhere. They hold with a death-grip, even on bumpy backroads. But hey, even locked-down bikes can sometimes sway and kiss each other during turns, leading to nasty scratches or worse. Nice try, chaos! That’s where the anti-sway cradles step in. Each bike gets its own padded, contoured nest. The ZipStrip yanks your frame down into this cozy pocket, locking it in place and creating space between bikes. No more cringing at that awful metal-on-metal clatter! Seriously, those paint chips hurt.
Okay, but what about some jerk trying to just lift your bike off the rack, or worse, unbolt the whole thing and drive off with your gear? That’s the real nightmare scenario, right? How’s it going feeling vulnerable like that? Here’s where the optional HandCuff locking cable becomes your best friend (yeah, it’s extra, but cheaper than replacing a stolen bike!). This isn’t some dinky wire; it’s a thick, vinyl-coated steel cable designed to thread perfectly through built-in guides on the RidgeBack’s frame.
You snake it through all your bike frames and wheels, loop it securely around the rack itself, and click the lock shut. Instant theft deterrent. Plus, that clever SpeedKnob design hides the main hitch connection point inside the mechanism. No exposed bolt for a thief to quickly unscrew – they’d need serious time and tools. It adds a massive layer of “not worth the hassle” for would-be thieves. Feeling that weight lift off your shoulders yet? Knowing your precious rides are locked down tight means you can actually relax and enjoy that post-ride brew. For more on bike rack security, see our FAQ on is it safe to use a car bike rack?
Built Yakima Tough: Weatherproof & Rugged Construction
You’re not just driving to the smooth, paved bike path down the street, right? You’re heading to the mountains, the beach, maybe a dusty desert trail. Or maybe you just live somewhere where the weather loves to throw curveballs – rain, snow, road salt. How’s it going? The RidgeBack is built to handle it. Yakima uses sturdy, lightweight aluminum for the main frame structure. Why aluminum? It’s strong enough to handle the 35-pound weight capacity per bike spot (crucial for heavier e-bikes or mountain rigs!), but it doesn’t rust like steel.
Then, they coat the entire rack in a super durable powder coat finish. This isn’t just paint; it’s a baked-on layer that provides excellent resistance against scratches, UV rays (so it won’t fade quickly in the sun), and corrosive elements like road salt or ocean spray. Think about those long highway drives in the rain, or the gravel kicking up on forest service roads. The RidgeBack shrugs it off. This all-weather toughness means the rack isn’t just a fair-weather friend. It’s designed for years of reliable service, trip after trip, season after season. That’s legit peace of mind. Need tips for cleaning off that inevitable road grime? We’ve got you covered: How to Clean and Maintain Bike Racks.
One Rack, Many Rides: Universal Vehicle Compatibility
Here’s a huge win: the RidgeBack fits both 1.25-inch AND 2-inch hitch receivers. For real? Yup! This is a game-changer. It means whether you drive a compact car like a Toyota Prius (check out bike racks for Toyota Prius), a popular SUV like a Subaru Outback (see options for Subaru Outback) or Toyota Highlander (Highlander racks here), a rugged pickup truck, or even a minivan, chances are this rack will fit. The hitch shank has an integrated adapter system. You simply slide the shank into your vehicle’s receiver. If it’s a 2-inch, it fits snugly. If it’s a 1.25-inch, you flip out the built-in adapter sleeves, and it locks securely into the smaller size. No extra parts to buy or lose! This universal fitment saves you the hassle and expense of needing different racks for different vehicles. Thinking about upgrading your car next year? No worries, the RidgeBack likely comes with you. Wondering about other vehicle fits? Explore our guide on are car bike racks universal? for more insights.
Handling Different Bike Styles (Tubes, Step-Thrus, Kids Bikes)
Most bikes? The RidgeBack handles them like a champ using the standard cradles and ZipStrips. We’re talking standard diamond frame mountain bikes, road bikes, hybrids – you name it. But what about those trickier frames? You know the ones: step-through bikes (popular for commuting and comfort), BMX bikes with their smaller top tubes, kids’ bikes with tiny frames, or certain full-suspension mountain bikes where the frame design makes securing the top tube awkward?
No big deal! Yakima has a solution: the TubeTop adapter (sold separately, but super handy). This clever accessory provides an extra bar that sits horizontally above the rack’s cradle. You secure your bike’s top tube (or down tube, or seat tube – wherever it fits best) to this TubeTop bar using the included strap. It essentially creates a solid anchoring point for bikes that don’t have a traditional horizontal top tube within easy reach of the main cradle. Problem solved! It ensures even your unique rides travel safely and securely. It’s this kind of thoughtful design that makes the RidgeBack truly versatile.
Yakima Heritage: Trust Built Since 1979
Buying a bike rack isn’t just about the metal and plastic. You’re buying into a brand’s reputation and expertise. Who knew Yakima has been in the gear-hauling game since 1979? That’s over 40 years of figuring out what works (and what doesn’t!) for people who love getting outside. Their whole vibe? “Take It Easy.” But that doesn’t mean lazy design. It means designing products that make travel and transport easier, safer, and more sensible for you.
They put serious thought into the little things – the placement of the UpperHand lever, the grip on the SpeedKnob, the durability of the ZipStrips, the padding on the cradles, and even that fun little bottle opener integrated into the frame (because post-ride beverages are essential!). How wonderful is that? It’s the culmination of decades of listening to customers, refining designs, and understanding the real-world frustrations of transporting gear. You’re not just getting a rack; you’re getting decades of engineering and passion focused on making your adventures smoother. That’s awesome.
Main Features and Specs at a Glance
Feature | Specification |
|---|---|
Brand | Yakima |
Model | RidgeBack Tilt-Away Hitch Bike Rack |
Hitch Compatibility | Fits both 1.25″ and 2″ receivers (Integrated adapter) |
Bike Capacity | Holds up to 4 bikes |
Weight Capacity (Per Bike) | 35 pounds |
Tilt-Away Access | Yes (UpperHand lever tilts rack down for trunk/hatch access) |
Storage Fold | Folds flat against the post (Not foldable arms) |
Installation | Tool-free (SpeedKnob) |
Bike Security | ZipStrips, Anti-Sway Cradles, Optional HandCuff cable lock |
Frame Material | Sturdy Aluminum |
Finish | Durable Powder Coat |
Vehicle Compatibility | Universal Fit (Cars, SUVs, Trucks, Minivans – Any vehicle with 1.25″ or 2″ hitch) |
Special Features | Integrated Bottle Opener, TubeTop adapter compatible (sold separately) |
Item Weight | 32 pounds |
Dimensions (LxWxH) | 44 x 12 x 16 inches (Approx., varies slightly with bikes loaded/folded) |
OEM Part Number | 8002458 |
Getting Rolling: Installation and Daily Use Made Simple
Alright, you’ve got this sweet rack. Time to put it on the car! How hard could it be? Thanks to the SpeedKnob, installing the RidgeBack is genuinely straightforward. Slide the rack’s hitch shank into your vehicle’s receiver tube. Make sure it’s seated all the way in. If you have a 1.25″ hitch, flip out the adapter sleeves until they lock out. For a 2″ hitch, they stay retracted. Now, grab the big SpeedKnob and hand-tighten it clockwise.
You’ll feel it engage and start pulling the rack tightly against the hitch walls. Keep turning until it’s firmly snug – no need for superhuman strength, just solidly tight. Give the rack a shake; there should be minimal to no wobble. Done! Loading bikes is intuitive: Lift a bike onto an empty tray, positioning its frame into the padded cradle. Pull the ZipStrip strap over the frame, thread it through the buckle, and pull tight until secure. Repeat for each bike, using the anti-sway cradles to keep them separated. Need to get in the trunk? Pull the UpperHand lever, tilt the rack down, access your stuff, lift it back up until it clicks. Removing the rack is just loosening the SpeedKnob and sliding it out. It is what it is – simple! Need a visual? Our guide on how to install car bike racks covers general principles.
1. Hitch Sizes & Classes
You’ll need to know your hitch size first—either 1.25″ (Class I/II) or 2″ (Class III/IV). No ruler? Yakima’s diagrams show actual sizes. If your hitch lacks a class sticker, use size as a guide: 1.25″ hitches are Class I/II (200–350 lb tongue weight), while 2″ hitches are Class III/IV. Always verify your vehicle’s tongue weight limit!
2. Rack Styles Explained
Yakima offers tilt racks (e.g., RidgeBack, FullTilt) that lower when empty for trunk access. Tray racks (HoldUp, Dr.Tray) support bikes by wheels/frames and tilt with bikes loaded. Swing racks (FullSwing) or add-ons like BackSwing swing bikes sideways for full rear access—ideal for tight spaces.
3. RV-Specific Racks
For RVs or trailers, only use Yakima’s RV-approved racks (RoadTrip, LongHaul). These undergo extra testing for harsh road vibrations. Never use standard racks or hitch extenders on RVs—they can fail catastrophically.
4. Compatibility Checks
Most Yakima racks fit 1.25″ and 2″ hitches, but Class I hitches (with internal “stops”) may reject some models. Check the compatibility chart: RidgeBack works with 1.25″ (no stop) and 2″ hitches, while FullSwing requires 2″. When in doubt, visit yakima.com/fit.
5. Critical Fit Measurements
Depth (Measurement A): Insert a ruler into your hitch receiver. If the depth is less than your rack’s min (e.g., RidgeBack needs 1.5″), it won’t fit. Bumper clearance (B): Must be ≤ your rack’s max (e.g., RidgeBack: 7.5″). Spare tire clearance (C): If your spare tire blocks the rack, consider a BackSwing adapter.
6. RidgeBack Setup
For RidgeBack, measure your hitch’s pin hole depth (Measurement X). 1.5–2.375″? Use hole B. >2.375″? Use hole A. <1.5″? No fit. Attach using the red SpeedKnob—no tools needed. Never exceed 40 lbs per bike or 150 lbs total!
7. Loading & Security
Load heaviest bikes first, closest to the vehicle. Secure frames with ZipStrips™ (replace if worn!). Use the safety strap always. For step-through/kids’ bikes, add a TubeTop adapter. Lock bikes to the rack with Yakima’s HandCuff cable (sold separately).
8. Tilting & Unloading
Need trunk access? Pull the UpperHand lever to tilt the rack down (even with bikes!). Unloading: Remove safety strap → bikes → fold arms → loosen SpeedKnob → remove hitch pin. Fold the rack flat for storage.
9. Safety & Warnings
- Never use in automatic car washes, off-road, or with tandems/recumbents.
- Keep bike tires away from hot exhaust pipes.
- Inspect ZipStrips, bolts, and cradles before each trip.
- Drive <10 mph over speed bumps to avoid grounding bikes.
10. Critical Restrictions
- Don’t install if spare tire interferes.
- Remove panniers, child seats, or bike covers before transport.
- Class II+ hitches only—some Class I hitches won’t work.
- RV/trailer use? RoadTrip/LongHaul racks only.
- When unsure, hire a pro! Misinstallation risks accidents or fatalities.
Conclusion: Unleash Your Adventures with Confidence
So, there you have it. The Yakima RidgeBack Tilt-Away Hitch Rack isn’t just another piece of gear; it’s your ticket to easier, safer, and way more enjoyable bike adventures. No more wrestling bikes into the car. No more stressing about trunk access or bikes swaying dangerously on the highway. No more wondering if your rack will survive the elements. With its killer tilting feature (that UpperHand lever is genius), tool-free SpeedKnob installation, rock-solid security with ZipStrips and anti-sway cradles, rugged all-weather build, and universal fit for almost any vehicle with a hitch, the RidgeBack tackles the real frustrations head-on. It embodies Yakima’s decades of experience in making transport simple. Ready to stop the struggle and start riding? Ditch the hassle and invest in getting yourself and your bikes to the starting line effortlessly. The RidgeBack lets you focus on the fun part: the ride itself. Let’s bounce! Explore more options and insights in our list of the 12 best bike racks for your car.
Your RidgeBack Questions Answered!
Is it weather resistant?
Absolutely! This is a big strength. The main frame is built from tough aluminum, which naturally resists rust, unlike cheaper steel racks. On top of that, the entire rack gets a super durable powder coat finish. This baked-on coating is seriously tough, shielding the metal from scratches, the fading effects of constant sun (UV rays), rain, snow, road salt, and general grime you pick up on trips. You can confidently use it year-round in pretty much any climate without worrying about it deteriorating quickly. It’s built for the long haul, just like your adventures. No worries about leaving it on in bad weather between trips either.
Does it require tools for installation?
Nope, not at all! That’s the beauty of the SpeedKnob. Installing the RidgeBack onto your car’s hitch receiver is completely tool-free. You literally just slide the rack’s shank into the hitch tube, make sure the built-in adapters are set correctly for your hitch size (1.25″ or 2″), and then hand-tighten the large SpeedKnob clockwise. The cam mechanism inside does the hard work of pulling everything tight and eliminating wobble. Tightening and loosening it is all done by hand – no wrenches, no allen keys, no hassle. Taking the rack off is just as simple: loosen the SpeedKnob and slide it out. Easy peasy.
What do customers say?
Most folks are seriously stoked! The number one thing people rave about is how incredibly easy the UpperHand lever makes accessing the trunk or hatch – it’s constantly mentioned as a total game-changer. The tool-free SpeedKnob installation gets huge praise for its simplicity and how solid it feels when tightened down. Customers also consistently mention how stable their bikes feel during transport, thanks to the ZipStrips and anti-sway cradles preventing any clattering or damage. The build quality and durable feel of the aluminum/powder coat impress many. A few might mention the initial price point, but the overwhelming sentiment is that the quality, features, and peace of mind are totally worth the investment for frequent riders. Legit satisfaction.
Does it fit on RVs?
Alright, RV adventurers – the RidgeBack can physically plug into your rig’s 1.25-inch or 2-inch hitch receiver, no sweat. But hold up before you start loading bikes! There are two huge things you absolutely gotta check first, and ignoring ’em is asking for trouble. First up: weight. Your RV’s hitch tongue rating? It’s usually way lower than your truck or SUV back home.
For real? The rack alone tips the scales at 32 pounds. Load it up with four bikes (each maxing out at 35 pounds), and suddenly you’re hanging over 170 pounds off the back. You MUST dig out your RV’s manual or find that sticker near the hitch to know its exact tongue weight limit. Go over that number? You’re risking serious damage to your hitch or worse – think bent frames or even detachment while driving. How’s that for stressful? Don’t just guess; know your rig’s limits cold.
Second major headache? Clearance and length. Your RV’s already a beast, right? Slapping a rack on the back adds extra feet sticking out. Picture this: You’re rolling into a steep driveway or a bumpy campsite road. That extra length means your rear end sits lower, and that rack could easily scrape concrete or dig into dirt. Total buzzkill, not to mention expensive damage. You’ll also need to eyeball whether the rack blocks your tail lights, brake lights, or that rear ladder. Blocking lights is a safety hazard and a ticket magnet, and covering the ladder defeats its purpose. Nice try just eyeballing it – actually measure the angles and clearances before you commit. It’s a long shot assuming it’ll work without doing this homework first. Totally doable? Sure. But only if you verify your specific RV can handle the serious grunt and extra bulk.
Is this rack easy to clean?
Dude, that tough powder coat finish is your best friend when it’s cleanup time. Road spray, dried mud, bug splatter, or winter salt? No big deal. Most days, just blasting it with the garden hose gets rid of the light stuff – quick and painless. Hit a seriously muddy trail or drove through salty slush? Fair enough, that needs a bit more effort. Grab a bucket of warm water mixed with some mild car wash soap (the gentle kind!), a soft brush (an old paintbrush works great for nooks), and gently scrub. Give me a break with the harsh chemicals or abrasive pads though – they’ll wreck that beautiful finish faster than you can say “scratch.” Think of it like washing your car; treat it nice and it’ll keep looking sharp for years. How’s that for easy maintenance?
Pay a little extra attention around the spots that move, like where it tilts and the hinge points. A quick rinse and a wipe down with a damp cloth here helps stop gritty dirt from building up and making things feel stiff or grindy later on. Totally worth the extra minute. For the ZipStrips? Just wipe ’em down with a damp rag – they don’t need a deep clean, just getting the surface grime off. The absolute golden rule? Let the whole rack air dry completely before you fold it flat and stash it away. Trapping moisture inside is just asking for trouble you don’t want, like hidden rust or funky smells. Nice try, moisture! Letting it breathe ensures it’s ready for your next adventure without any hidden surprises. Chill and let it dry! No big deal at all. For a deep dive, see our full guide: How to Clean and Maintain Bike Racks.
Can it be locked to prevent theft?
Yes, definitely, but you need the extra cable. The RidgeBack itself has fantastic features for securing the bikes to the rack (ZipStrips) and preventing sway (cradles), but to physically lock the bikes to the rack and lock the rack to your car, you need the optional Yakima HandCuff locking cable. This thick, vinyl-coated steel cable threads through integrated routing points on the rack’s frame. You loop it through your bike frames and wheels, then secure it with the included lock right onto the rack. This deters thieves from quickly grabbing a bike. The SpeedKnob design also hides and protects the hitch pin connection point, making it harder for thieves to simply unbolt the rack. While determined thieves can defeat almost anything, the HandCuff adds a very strong layer of security for peace of mind at trailheads or rest stops. Totally recommended to get the cable. Learn more about security in our article: Is it safe to use a car bike rack?.
Our team is creating outdoor-gear relevant articles with passion. If our articles can help you to find the correct solutions for your questions, we will be happy about that. In the content creation process, we usually collect accurate and useful information online or offline to compile our content in an organized way. Consequently, we can guarantee that you can discover some expected answers to your questions. We appreciate your time on our site.