Roof Cargo Box weight distribution? That killer pre-trip buzz is totally there, right? But man, that nagging thought about how you’re gonna cram everything into your ride? Yeah, you’re not alone—we’ve all stared down that mountain of gear feeling totally overwhelmed. Throwing a roof cargo box up top seems like the ultimate fix—just chuck everything overhead and boom, problem solved! Nice try, but hold that thought. How you actually pack that thing? It’s way bigger than just stuffing it full. Get it sloppy, and suddenly you’re wrestling a wobbly drive, watching your fuel tank drain faster, or sweating bullets in heavy traffic. No joke. Sound familiar? For real, it sucks. But here’s the kicker: nailing that weight balance isn’t some impossible mystery. Legit, I’ll walk you through it piece by piece, no fancy jargon, just straight talk so your trip starts chill and stays safe. Ditch the stress and let’s get you loading like you’ve done this for years.
Seriously, why sweat the small stuff like where you drop that heavy cooler or toolbox inside the box? It’s not about being neat—it’s physics messing with your drive. Picture your car cruising down the highway, happy with weight low and centered. Now slam a big bin way up high on the roof—that alone raises its center of gravity. Ever felt your car sway weirdly? Now imagine if the heavy junk inside is piled way off to one side or shoved all the way back. You’re basically inviting your ride to handle like a shopping cart with a busted wheel. Steering gets vague, corners feel sketchy, stopping takes longer, and a gust of wind might just scare the heck out of you. How’s that for ruining your vibe? Plus, uneven weight beats up your roof rack—could even break it. Nobody wants their gear exploding onto the freeway behind them. Getting this right means smoother control, safer miles, less strain on your car, and honestly? Way more peace of mind. Totally worth ten extra minutes, don’t you think? How do you feel about trading chaos for confidence?
Let’s not jump ahead though—before you even lift that first bag skyward, there’s groundwork. First rule: know your numbers. This is non-negotiable, my friend. Grab your car’s manual—yep, that book in the glovebox—and find the max roof load capacity. Seriously, skip this and you’re playing with fire. It’s not just the rack rating—it’s what your actual car roof can handle. Off the top of my head, it’s usually way less than folks expect—often between 65kg (143 lbs) and 100kg (220 lbs), box and rack included! Then, check your roof box manual for its max weight and any loading tips. Overloading? Massive risk—bend your roof, wreck the rack, crack the box, create a highway hazard. Not cool. What’s your biggest fear about getting this wrong?
Why Perfect Weight Distribution Isn’t Just Nitpicking
Seriously, why should you care where you put that heavy duffel bag or the big cooler inside your roof box? It’s not just about being tidy. Think about your car driving down the road. It’s engineered for stability with weight low and centered. Now, picture adding a big container way up high on the roof. That alone raises your car’s center of gravity – physics 101, right? Now, if all the heavy stuff inside that box is shoved way over to one side, or piled up high at the front or back? You’re basically asking for trouble. Your steering can feel weirdly light or heavy, cornering becomes less predictable, braking distances might increase, and strong crosswinds or sudden maneuvers can feel downright scary. For real? Absolutely. Uneven weight strains your roof rack system too, potentially leading to damage or even failure. Nobody wants their gear raining down on the interstate. Getting distribution right means better control, safer driving, less stress on your car and rack, and honestly, a much more relaxed journey. Totally worth the extra few minutes planning, don’t you think?
Getting Ready: Before You Even Open the Box Lid
Alright, let’s not jump the gun. Before you start heaving luggage skyward, there’s some groundwork. First things first: know your limits. This is crucial, my friend. Grab your car’s owner’s manual and look up the maximum roof load capacity. Seriously, don’t skip this. It’s not just about what the roof rack can hold, but what your actual car roof structure is designed for. Usually, it’s way less than you think – often between 65 kg (143 lbs) and 100 kg (220 lbs), including the weight of the box and rack itself! No way! Yep. Then, check your roof box manual for its specific weight capacity and any loading recommendations. Overloading is a massive no-go. Exceeding limits risks damaging your car, the rack, the box, and creates a major safety hazard. Not cool.
Next up, whatcha packing? Time for the pre-trip weigh-in. Grab a bathroom scale and weigh your heaviest items – suitcases, toolboxes, coolers full of drinks. Group lighter stuff like sleeping bags and pillows. Knowing roughly what each item weighs helps immensely when deciding where it goes inside the box. Pro tip: Pack bulky, lightweight items (like those sleeping bags or camp chairs) inside the car first. Save the roof box for the dense, heavy-but-compact stuff you can’t fit below. Also, double-check your roof rack is installed correctly and torqued to spec – a wobbly rack is a disaster waiting to happen. Need a refresher on securing that carrier? Our guide on how to secure a cargo carrier has you covered. Don’t wing it!
The Golden Rules of Roof Box Weight Distribution
Okay, here’s the meat and potatoes of how to actually arrange things inside that box for optimal stability. Forget just throwing stuff in. Follow these core principles:
- Heavy Stuff Centered & Low: This is rule number one, the big kahuna. Always place your heaviest items (think toolkits, heavy duffels, coolers with contents, generators) directly over the center of your vehicle’s roof, positioned low inside the cargo box. Why? This keeps the weight as close as possible to your car’s natural center of gravity, minimizing the “pendulum effect” high weight creates. Imagine balancing a broomstick vertically on your palm – much easier if the heavy part is near your hand, right? Same principle.
- Balance Left & Right: Equally important is side-to-side balance. You absolutely do not want all the weight stacked on the driver’s side or passenger’s side. Distribute weight evenly across the width of the box. Think of your roof box like a see-saw centered over your car – you want it perfectly level. An imbalance here makes your car pull slightly to one side, straining the suspension and making steering feel off, especially noticeable on highways. That sucks and is tiring to drive with.
- Front-to-Back Considerations: Generally, aim for a slight bias towards the front half of the box. Why front? Placing a bit more weight (think 55-60%) towards the front helps counter aerodynamic lift. As you drive, air flows over the box, trying to lift the rear. Too much weight at the back can exacerbate this lift, potentially affecting rear axle traction and stability. However, don’t go crazy and pile everything at the very front! Keep the heavy items centered front-to-back as much as possible, with the overall slight forward bias achieved by lighter items. Confused? Think heavy stuff centered low, medium-weight stuff just ahead of center, lightest stuff towards the rear. Need help choosing a box that fits your car well? Check out our 2025 roof box buying guide. Fair enough?
Putting it All Together: Your Loading Strategy
Alright, let’s get practical. How do you actually apply those rules when you’re standing there with a pile of gear? Here’s a battle plan:
- Step 1: Heavy Hitters Go First & Low: Open the box. Place your absolute heaviest items (one or two pieces) dead center in the box, right down on the floor. Literally measure or eyeball the center point between the sides and along the length. Push them as far forward as possible within that center zone, but still centered side-to-side. This is your foundation.
- Step 2: Build Around the Core: Now, take your next heaviest items. Place them around your central heavy core, maintaining that side-to-side balance. You can start placing these items slightly behind the center point to help achieve that slight front bias, but keep them low and keep them balanced left/right. Avoid stacking heavy on heavy if possible – spread them out laterally.
- Step 3: Alright, now let’s tackle those awkward empty spaces around your heavy core items—this is where your medium-weight gear shines. Grab stuff like stuffed duffels, loaded toolkits, or plastic storage bins (you know, the not-crazy-heavy-but-not-feather-light either). Totally use these to stuff those gaps snugly around your anchors. Here’s the pro move: While you’re filling, nudge a bit more of these medium items toward the front half of the box than the back. Why front? It subtly counters that pesky rear lift from wind without dumping all the weight up front. But—and this is big—don’t get lazy on balance! Keep everything stacked low and spread evenly left-to-right. No leaning towers of luggage toward the driver’s side, okay? Ever tossed a bin in haphazardly and felt the car pull later? Yeah, sucks. This step’s your chance to fine-tune stability before adding the fluffy stuff. Fair enough? And hey—while you’re securing it all, remember shifting gear can scratch up your box interior. Peek our tips on keeping things mint: avoiding roof box scratches. No big deal now, saves grunt work later.
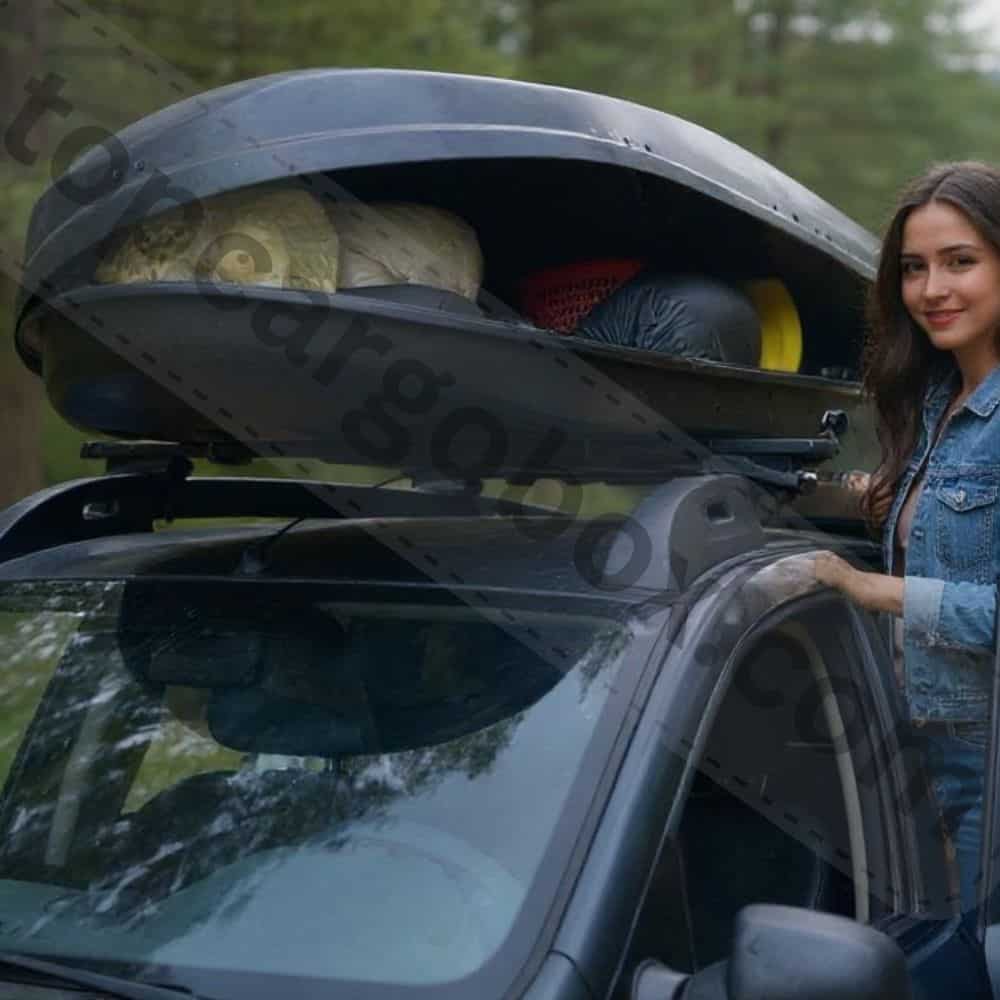
- Step 4: Time for the fluff! Grab all those giant-but-super-light items—think sleeping bags, squishy pillows, rolled-up inflatable mattresses, empty coolers (key word: empty!), collapsed camp chairs, or even lightweight duffels stuffed with blankets. Totally cram these into whatever gaps are left, focusing on the upper area and back third of your box. Why? These space-hoggers add serious volume without wrecking your careful weight balance. By parking them up high and toward the rear, you naturally create that slight 55-60% front weight bias we talked about—without slamming heavy junk in the back where wind lift gets sketchy. Ever felt that floaty feeling on the highway? This trick fights it while keeping dense stuff safely centered low. See how that works? And since these items barely weigh anything, stacking ’em higher won’t tip your center of gravity like a heavy bin would. No big deal if they shift a little, but pack ’em tight anyway to avoid annoying slides. Pro tip: Wrapping fragile items in that comforter? Genius. Just don’t let bulky gear scratch up your box interior—peek our quick fix guide here if you’re worried. Grunt work avoided!
- Step 5: Avoid Peaks & Gaps: Try to pack items so the load is relatively level across the top. Avoid creating a big peak of stuff in one spot. Fill gaps as best you can with soft items (clothes in bags work great) to prevent shifting. Shifting weight is a nightmare while driving – it throws off your carefully planned balance! Worried about fitting it all? See our general roof cargo box packing tips.
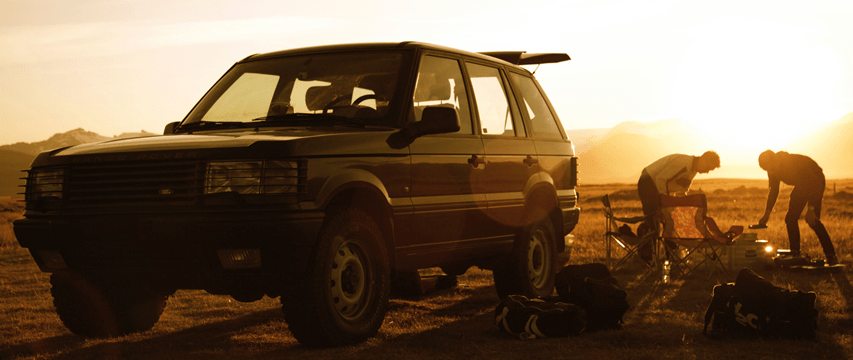
Real-Life Example: Packing for a Camping Trip
Let’s make this concrete. Imagine you’re packing for a week-long family camping trip. Here’s how you might apply the strategy:

- Heavy Core: Your large, heavy cooler (full of food and drinks) and your toolbox with camp tools go first, centered front-to-back and side-to-side, low on the box floor. Solid foundation.
- Build Around: Your two heaviest duffel bags (maybe one with cooking gear, one with heavy clothing) go next. Place one on each side of the cooler/toolbox, keeping them centered front-to-back or slightly forward. Balanced left/right.
- Fill Gaps/Medium Weight: Medium-weight duffels (lighter clothes, kids’ stuff) go around the sides and front of the heavy core. Maybe place one more duffel just behind the heavy core but keep it low. Tents (in their bags) can go here too if not too bulky. Focus on filling lower space towards the front.
- Top Off Light/Bulky: Sleeping bags, pillows, camp chairs, rolled-up tarps, that big bag of marshmallows – all this super light stuff goes on top, filling the rear half and upper space. Achieves the front bias without heavy rear weight.
- Avoid Shifting: Use soft items like sleeping bags to stuff any gaps between harder items. Ensure nothing is precariously perched. Secure the load internally with straps if your box has them, or use soft bags that conform.
Securing the Load Inside the Box
You’ve packed it smart, but will it stay put? Dude, hitting a bump or taking a sharp turn can send unsecured gear tumbling inside the box, ruining your perfect balance. Most modern roof boxes have tie-down points or internal straps. Use them! Cinch down straps over your load, especially securing the heavier items in the center. If your box lacks straps, get creative. Pack items tightly, filling voids with soft gear. You can also use bungee cords hooked to the tie-down points (but ensure they are tight and won’t snap). The goal is zero movement. Hearing stuff slide around while driving is the worst and means your distribution is compromised. Think of it like packing a moving truck – you wouldn’t just toss furniture in and hope, right? Same deal up top. Check out our tips on preventing internal scratches from shifting gear while you’re at it: roof cargo box ditch scratches. No big deal to add this step, but huge for peace of mind.
Closing Up and Final Checks
Almost there! Before you slam that lid shut, do a quick visual check. Does the load look reasonably balanced side-to-side? Is the heaviest stuff visibly centered and low? Are lighter, bulkier items filling the top/rear? Good. Now, gently close the lid. Don’t force it! If it doesn’t close easily, you’re overloaded or packed too high. Open it back up and reassess. Maybe swap a bulky item for something flatter, or see if you can fit something else inside the car. Forcing the lid risks damaging the box or the latch, and guarantees an unsafe, overloaded situation. Not worth it.
Once closed, lock the box securely. Then, walk around the car. Does the roof box look level? Or is it sagging slightly to one side? A slight sag indicates a side imbalance – you might need to open it up and adjust. Better to catch it now than on the freeway! Finally, give the entire roof box assembly (box and rack) a firm shake. It should feel solidly attached to the car with minimal movement. If there’s significant wobble, revisit your rack mounting and tightening. Our guide on fitting times might help if you’re unsure about the rack setup: how long to fit a car roof box.
Driving with a Loaded Roof Box: What to Expect
Okay, you’re loaded and locked. Time to hit the road! But hang tight, driving with a roof box feels different, even with perfect packing. Be prepared for:
- Increased Wind Noise & Reduced MPG: Yep, that giant box is basically a sail. Expect noticeable wind noise and a fuel economy hit. How much MPG do you lose? It varies, but typically between 10% and 25%, depending on the box size, your car, and your speed. Ouch. Driving slower (especially on highways) helps mitigate this. Totally a trade-off for the extra space.
- Higher Center of Gravity: Even perfectly packed, your car will feel a bit taller. Take corners more slowly and deliberately. Avoid sudden lane changes or sharp maneuvers. Smooth is fast and safe.
- Mind Your Height: Seriously, don’t forget it’s up there! Drive-throughs, low parking garages, tree branches – they are all hazards now. Know your total vehicle height (car + rack + box) and be hyper-aware. That low garage entrance? It’s lower than you think. Brush up on roof box height rules worldwide if traveling far.
- Increased Braking Distance: More weight (especially up high) means it takes longer to stop. Leave more following room than usual. No tailgating!
- Sensitivity to Wind: Crosswinds and passing large trucks will push your car around more than usual. Keep a firm grip on the wheel and anticipate gusts. Don’t panic, just be ready.
Unloading: The Safe Way Down
Trip’s over? Awesome! Time to unpack. Reverse your packing order. Open the box and carefully remove the light, bulky items from the top first. Then work your way down to the heavy core items. Don’t try to yank a heavy cooler out from under a pile of stuff. This prevents lighter items from tumbling out unexpectedly and makes handling the heavy stuff safer and easier once you have clear access. Common sense, but easy to rush. Once empty, give the box a quick clean out if needed before closing it up (or removing it if you don’t need it on there – storing it properly helps it last longer, see how long do cargo boxes last).
Choosing the Right Roof Box Matters
Hey, while we’re talking… The type of roof box you have can influence how easy it is to achieve good weight distribution. Not all boxes are created equal! Consider these factors when choosing or using yours:
- Shape & Size: A longer, lower-profile box generally handles better than a short, tall one because it allows for better front-to-back weight spread and has a lower center of gravity itself. Match the box size to what you actually need. Oversized boxes create more drag and are harder to pack optimally. Think about your most common loads. Our list of the best roof cargo boxes in 2025 can help you find the right fit.
- Opening Mechanism: Side-opening boxes (hinged on one long side) are generally easier to load heavy items into centrally than front-opening or rear-opening clamshells, where heavy items tend to get shoved towards the hinge end. If you have a clamshell, be extra vigilant about getting heavy items centered.
- Internal Tie-Downs: As mentioned, these are gold for securing your load. Prioritize boxes with good internal attachment points or included straps. Makes life so much easier.
- Weight: The box itself has weight! Remember, its weight counts towards your car’s max roof load. Lighter boxes leave more capacity for your gear. Every pound counts.
- Roof Rails or No Rails? If you don’t have factory rails, you need specific solutions. No problem! We’ve got a guide for that: no rail roof box guide.
Essential Roof Box Weight Specs at a Glance
Here’s a quick reference table for the key weight numbers you absolutely need to know:
Feature/Specification | Details | Why It Matters |
|---|---|---|
Vehicle Roof Load Limit | Typically 65 kg (143 lbs) to 100 kg (220 lbs) – ALWAYS CHECK YOUR OWNER’S MANUAL! | The absolute maximum weight your car’s roof structure can safely handle. Includes box + rack + contents. |
Roof Box Weight | Varies by size/material: Approx. 15 kg (33 lbs) to 25 kg (55 lbs) for most standard boxes. | This weight eats into your available capacity for gear. Subtract this from your vehicle limit first. |
Roof Box Capacity | Varies: Often 50 kg (110 lbs) to 75 kg (165 lbs) – CHECK YOUR BOX MANUAL! | The max weight the box itself is designed to hold. Must be less than your remaining vehicle capacity. |
Roof Rack Weight | Varies: Approx. 5 kg (11 lbs) to 15 kg (33 lbs) for crossbars + feet. | Also subtracts from your vehicle roof load limit. Don’t forget it! |
Your Usable Capacity | Vehicle Limit MINUS (Box Weight + Rack Weight) = Max Gear Weight | This is the actual weight of belongings you can safely put in the box. NEVER exceed this. |
Optimal Load Position | Heaviest Items: Centered (Left/Right & Front/Back), LOWEST point in the box. | Critical for stability, handling, and safety. Prevents sway, improves control, reduces strain. |
Conclusion: Pack Smart, Travel Safe, Adventure On!
Alright, let’s wrap this up. Getting your roof box packed right isn’t brain surgery, but for real, it does lean on some basic physics – think weight placement, balance, and keeping things stable up there. Investing that extra 15 to 20 minutes upfront? Totally a game-changer. Seriously, just grabbing a scale for your heaviest bags, mapping out where stuff goes, anchoring weight low and dead-center, balancing side-to-side like a pro, nudging a bit more toward the front, and strapping it all down tight inside? That’s the secret sauce. You swap a tiny bit of pre-trip grunt work for massive wins: way safer driving, your car handling predictably instead of feeling like a wobbly top, less strain chewing up your suspension and rack, and way less white-knuckle stress gripping the wheel wondering if your gear’s about to take flight. How’s that for a serious payoff? Ditch the nightmare of a noisy, swaying ride that gulps gas like crazy.

Embrace that sweet confidence boost knowing your stuff is locked down solid and your ride is planted firmly on the road. No more frantic mirror checks every five minutes, right? You’ve got this. Now, go load that box like you own it, hit the gas, and go make some killer memories out there! Chill travels, friend. Need a quick refresh on the full packing method? Our roof cargo box packing tips have your back. Fair enough? Go get ‘em!
Your Burning Roof Box Weight Questions Answered
How to properly load a roof box?
Okay, let’s recap the essentials. Always put your absolute heaviest items dead center in the box, right down on the floor. Keep everything balanced perfectly from left to right – no leaning stacks! Aim to have slightly more weight towards the front half of the box than the back, roughly 55-60% forward. Pack your lightest, bulkiest stuff like sleeping bags or pillows up high and towards the rear. Crucially, secure everything inside using the box’s straps or tie-downs so nothing shifts while driving. Finally, never, ever exceed the weight limits for your car’s roof or the box itself – that’s asking for big trouble. Get it?
How do you distribute weight on a roof rack?
Think low and centered, always. The weight inside the roof box (which sits on the rack) needs careful distribution, as we covered. But the rack itself also matters. Ensure the crossbars are spaced correctly according to the box and vehicle manuals for even support. The rack system (feet and bars) must be rated for the total load you’re carrying (box + contents). Distribute the load on the rack by placing the box centrally between the crossbars. An unevenly loaded box or a box placed too far forward or back on the bars puts uneven stress on the rack mounts. Balance is key top to bottom!
How much weight can I put in a roof box?
This is the million-dollar question, and the answer is specific to YOU. You absolutely must check two things: your car’s owner’s manual for its maximum dynamic roof load capacity (usually 65-100 kg / 143-220 lbs), and your roof box manual for its maximum weight capacity. Subtract the weight of the empty roof box itself and the weight of your roof rack system (crossbars and feet) from your car’s roof limit. The result is the maximum weight of your gear you can safely put inside the box. Seriously, don’t guess – look it up! Overloading risks catastrophic failure. Not cool.
How much MPG do you lose with a roof box?
Okay, let’s talk gas mileage – yeah, it’s gonna sting a bit. Slapping that roof box up top basically turns your ride into a rolling parachute, fighting wind way harder than usual. Off the top of my head, get ready for your fuel economy to dip somewhere between a noticeable 10% and a seriously painful 25%. Ouch, right? How bad it actually hits you? That depends on a few things. Got a giant, square-shaped box? That’s basically an aerobrick – way worse than a sleek, low-profile one. Driving a boxy SUV or truck already? You might dodge the worst of it compared to someone in a slippery sedan. But here’s the real kicker: Your right foot is the boss. Cruise at 65 mph (105 km/h) or higher, and watch that MPG plummet like crazy. Ever feel like you’re wrestling the wheel in a headwind? That just multiplies the drag, sucking down even more fuel. Total bummer. Your best moves to fight back? Chill on the speed – seriously, ease off the gas – and drive smooth, no jackrabbit starts or sudden braking. It’s legit the price of admission for all that sweet extra cargo room. Knowing the rules helps too – brush up on roof box height regulations if you’re pushing limits. Fair enough trade for space, or does that fuel hit make you grunt?
Our team is creating outdoor-gear relevant articles with passion. If our articles can help you to find the correct solutions for your questions, we will be happy about that. In the content creation process, we usually collect accurate and useful information online or offline to compile our content in an organized way. Consequently, we can guarantee that you can discover some expected answers to your questions. We appreciate your time on our site.